|
|
|
|
| |
Latest photos at the top of this page. |
|
|
| |
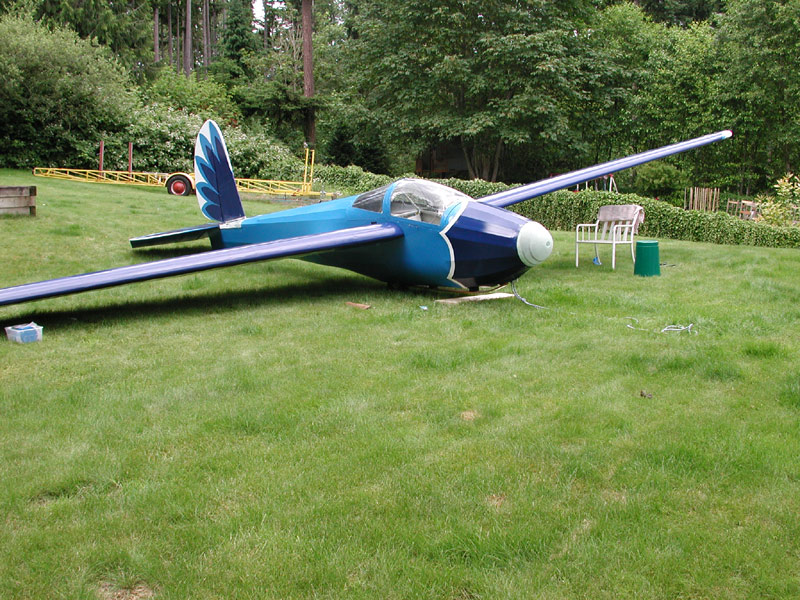
Below - New owner of 038 Charles Shaw views the assembled 038 prior to flying for the first time. These are all Jo Shaw photos. |
|
|
| |
|
|
|
| |
Below James Cogburn supervises while Charles tunes the new VHF com antenna installation. |
|
|
| |
|
|
|
| |
Below - 038 arrives at the Hobbs hangar from the house on 196's trailer (038 wings were already at the hangar and 038's fuselage was at the house having panel mods and radio and antenna installed) |
|
|
| |
|
|
|
| |
Below - a photo of some serious cu-nim action northeast of Tatum, NM on the way to Hobbs in the red truck with 038 on the trailer. |
|
|
| |
|
|
|
| |
Below - I perform the first flight in 038 since it was rebuilt. |
|
|
| |
 |
|
|
| |
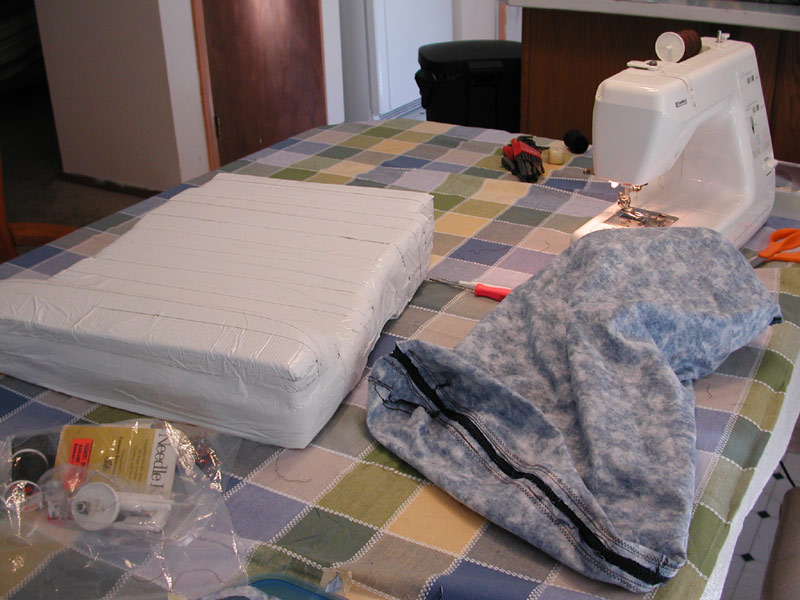
Below - August 14, 2005 - Before I can sew a cover for the seat cushion I made for 038, I have to disassemble and repair the sewing machine. For some reason the bobbin would not thread and hours spent troubleshooting were fruitless until I compared it to a similar machine Renee inherited from her mother. Seems the bobbin drive was not timed to the needle correctly and after disassembly, I was able to re-time the bobbin carriage by re-indexing the gears. With the sewing machine re-assembled and all the small bits wrenched away from the Tabby Cat's paws, I was able to start cutting and sewing. |
|
|
| |
 |
|
|
| |
Below - the cushion is a duct-taped concoction of styrofoam and soft foam cut to shape as described in Charles Shaw's seat cushion construction instructions on the 1-26 Association web page, located here: http://www.126association.org/cushion.htm |
|
|
| |
 |
|
|
| |
Below - I do a trial fit and get ready to pin the zipper in place and the Pippin jumps up on the table to see what's going on. |
|
|
| |
 |
|
|
| |
Below - zipper installed and the cover is ready for installation. |
|
|
| |
 |
|
|
| |
The shape of the seat cushion is not exactly like that shown in Charles' instructions, but it works and that's all the foam I had to work with. Crude but effective! |
|
|
| |
 |
|
|
| |
|
|
|
| |
 |
|
|
| |
Above - 31 July, 2005 and 038 is on the line at 1130 for an early morning smooth air flight at Ephrata. Craig Funston, Mike Newgard and Linda Chism all helped to rig, ready the towplane and Craig took photos. Thanks to everyone for all the help in getting this glider off the ground! |
|
|
| |
 |
|
|
| |
Above - Craig took a photo of me getting settled in, it's very different from sitting in the Nimbus. |
|
|
| |
 |
|
|
| |
Waiting for the towplane. |
|
|
| |
 |
|
|
| |
Above and below - the dark blue shows the fingerprints well, I still have a lot of touch-up paint and polishing to do, then a wax job and it's all set. |
|
|
| |
 |
|
|
| |
Below - Mike Newgard gets ready to hook me up to 75B the Seattle Glider Council towplane. This is a great place to fly. I ended up with a smooth thirty minute flight and I can report that 038 handles just great. It seems much quieter than my E models and the only thing I forgot was a yaw string, but I really didn't miss it, as light as this glider is, it's very apparent when you're not coordinated. What a fin ship to fly! |
|
|
| |
 |
|
|
| |
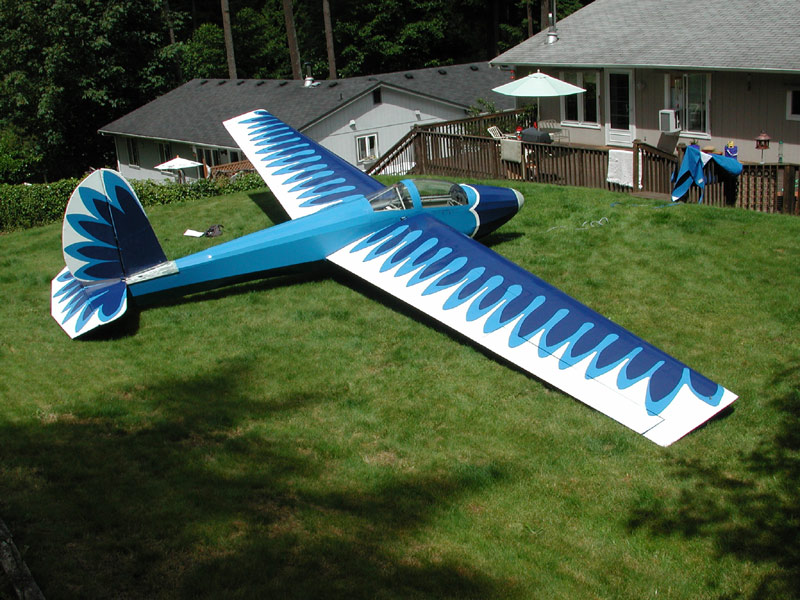
July 24, 2005 - I install the decals Dave Piotrowski had made, they're very high quality and went on very easily. |
|
|
| |
 |
|
|
| |
|
|
|
| |
 |
|
|
| |
Below - I fabricate a new carry-thru for the trailer mount - it attached to the alignment pin holes. |
|
|
| |
 |
|
|
| |
|
|
|
| |
 |
|
|
| |
Above and below - during the annual inspection, Jay and Raylene Todd and I did the final adjustment to the control surface throws and I finished it off by installing the proper number of washers under the heads of the control stick stop bolts. |
|
|
| |
 |
|
|
| |
|
|
|
| |
 |
|
|
| |
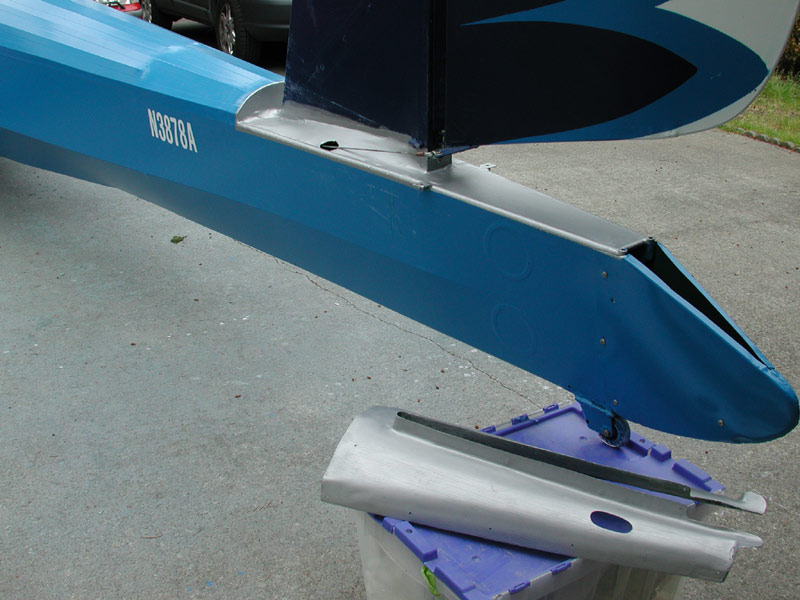
Above - July 11, 2005 - 038 gets a new steel skid plate. |
|
|
| |
 |
|
|
| |
Because the Tabby Cat is not allowed in the garage, he takes great delight in providing close supervision on all inside tasks, like cutting a new stick boot. I used the plans Kurt Strong sent over the 1-26 Association e-mail list, sized them for the 1-26 stick opening and it worked very well. The TC is about to leap onto my shoulder in hopes of getting a ride to the garden out back so he can chew on some grass. At least he is no longer standing on the fabric while I am trying to cut it out. |
|
|
| |
 |
|
|
| |
Above and below - N numbers, fairing, tailcone - lots of little steps being made. Annual is set up with Jay Todd (currently Jay and Raylene Todd are managing the Region 8 and Open Nationals over at Ephrata) Jay is an IA, so it will be good to have a second set of eyes give 038 the once-over. If I did not miss anything, I'll be very surprised. |
|
|
| |
 |
|
|
| |
|
|
|
| |
 |
|
|
| |
Above and below - July 1, 2005 - Charles Shaw suggest I seal the fuselage opening under the vertical and horizontal to cut down the air noise, so I checked everything for final safety and glued on some fabric, coated with clear Polybrush and Polyspray, ready for Bahama Blue. |
|
|
| |
 |
|
|
| |
|
|
|
| |
 |
|
|
| |
Above - TE probe from Paul Remde's Cumulus Soaring arrived. He's great to deal with - no hassle and fast service. |
|
|
| |
 |
|
|
| |
|
|
|
| |
 |
|
|
| |
Above and below - bear with me while I lament the long hours it takes to finish all the the little, mundane things that must be done prior to flying. There are so many things that need to be installed before something else can be installed and I'm finally able to close the cockpit seat pan and floorboards for what may hopefully be the last time. There are just under a million screws holding the floor panels in. The certificate holder is in, the stick boot that the Tabby Cat was SO helpful with is in, seat belts permanently mounted now that the AN-320 shear nuts arrived from Wicks. Lots and lots and lots of very minor things that just seem to take forever. Bitch session complete, back to work. |
|
|
| |
 |
|
|
| |
|
|
|
| |
 |
|
|
| |
Above and below - Monday June 27, I took a day off from 038 and drove to Ephrata to drop off my chute, iPaq, batteries and Volkslogger so Garret Willat can use them to fly H4 in the Open Nats. I wasn't going to take time to fly it and they needed another guy to make 8, so they asked Garret to come fly and I loaned him H4. He's done well - finishing first on the first day. While I was there, I took the photos above and below of Dick Butler's modified ASW-22. Very impressive machine indeed. |
|
|
| |
 |
|
|
| |
Below - June25, 2005 - I installed nutplates in the forward bulkhead for the nose cone mounting screws. |
|
|
| |
 |
|
|
| |
|
|
|
| |
 |
|
|
| |
Above - June 19, 2005 - I cut another tip wheel bracket for the right wing from some steel angle. Below, I finish sand it prior to priming with zinc chromate and painting dark blue. |
|
|
| |
 |
|
|
| |
Below - I moved the right wing over the deck to install the rivnuts and trial fit the bracket. |
|
|
| |
 |
|
|
| |
|
|
|
| |
 |
|
|
| |
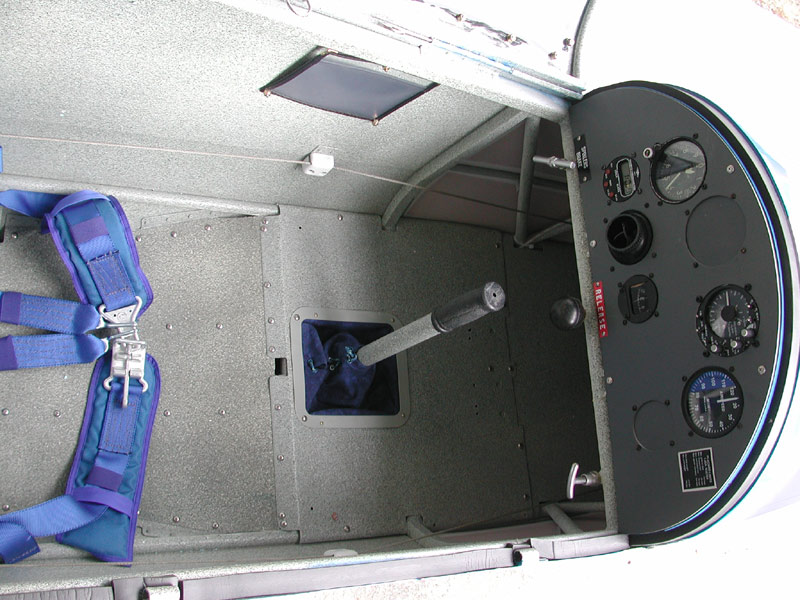
Above - I try on the shoulder harness and seat belts. I don't like where the shoulder harness mounts and shall have to think of a better arrangement. The seat belts mount in the seat belt attach holes and fit perfectly. |
|
|
| |
 |
|
|
| |
Above - Sam takes a break from chasing the ball on this hot 70° day. |
|
|
| |
 |
|
|
| |
Above - Monday June 20, 2005 and I finish installing the nose pitot, vent tube, and static ports. I still have to wet sand and re-spray the nose cone - after I mount the nutplates and drill the holes. |
|
|
| |
 |
|
|
| |
Pitot and static ports and tubing installed and below the vent tube is installed, ready for installation onto the nose. |
|
|
| |
 |
|
|
| |
|
|
|
| |
 |
|
|
| |
038 gets a new old stock nose cone that Dave Piotrowski bought on eBay for $51. That's an amazing bit of serendipity for this 1955 model year glider! With a bit of trimming, it fits very well. I still have to fit the vent tube, install the pitot tube and static ports and final sand and paint the nose cone. Still doing lots of little things, next I will paint the tailcone and vertical fairings after some final sanding, fairing and fitting on those parts. Lots of safetying to do after completing the final flight control rigging. |
|
|
| |
 |
|
|
| |
|
|
|
| |
 |
|
|
| |
|
|
|
| |
 |
|
|
| |
Below - new tip wheels. |
|
|
| |
 |
|
|
| |
|
|
|
| |
 |
|
|
| |
Below - the new nose cone trimmed and fitting nicely, Sam guards his ball. Above - I spray some blue on the nose cone to see how it will look. Note that the glossy wet paint dries to the typical dull Polytone finish. |
|
|
| |
 |
|
|
| |
|
|
|
| |
 |
|
|
| |
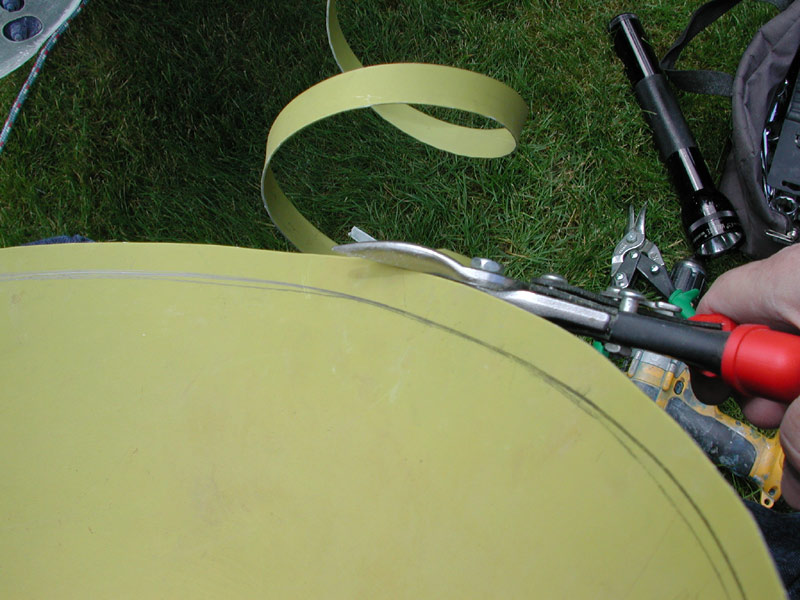
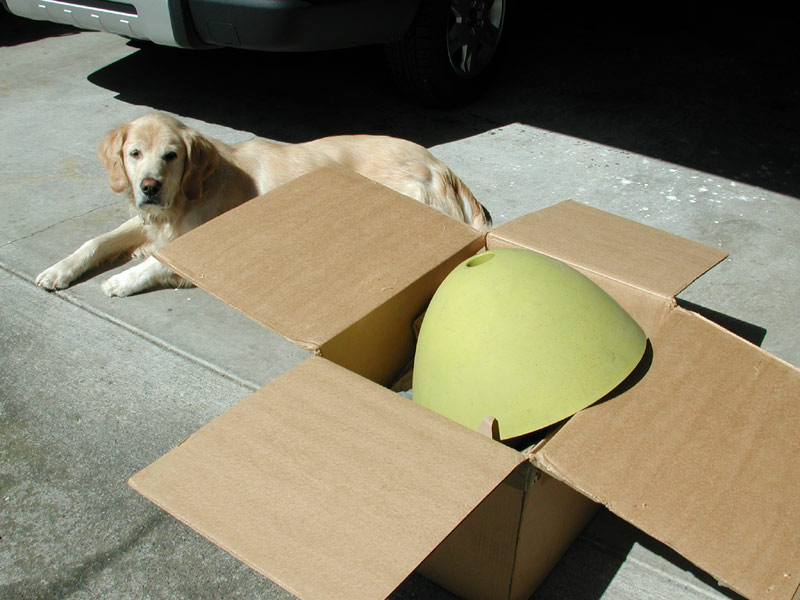
Below - UPS delivered the brand new nose cone that Dave Piotrowski won on eBay and shipped to me. Above - I trim the new, un-drilled and un-trimmed A model nose cone to fit 038. It has a Schweizer part number stamped on it. |
|
|
| |
 |
|
|
| |
Below - June 13, 2005 - I made a new placard on the printer and laminated it onto some .020 2024-T3 aluminum. |
|
|
| |
 |
|
|
| |
Below - June 11 and 12, 2005 - I assembled 038 in order to complete the spoiler and aileron rigging and check the elevator rigging that I did prior to covering the fuselage. |
|
|
| |
 |
|
|
| |
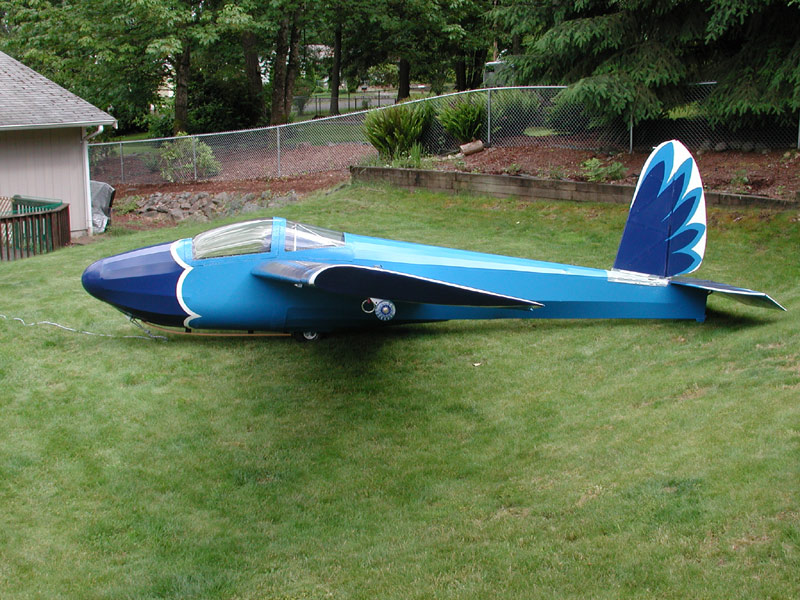
Below - I took a number of photos from different angles. The glider is assembled, but much more needs to be done. |
|
|
| |
 |
|
|
| |
Below, the board is used to weigh 038 sits in front of the skid. It weighs 356 empty giving a max pilot weight of 219. |
|
|
| |
 |
|
|
| |
Below -the messy blue splatter is from wet-sanding the fuselage, it will clean up easily. |
|
|
| |
 |
|
|
| |
Above - rigging the spoilers and ailerons, below - Sam rolls his ball under the wing where I'm working in case I forget that he's ready to retrieve it whenever I throw it. |
|
|
| |
 |
|
|
| |
|
|
|
| |
 |
|
|
| |
This series of photos show the fabrication of the seat back and battery box. |
|
|
| |
 |
|
|
| |
|
|
|
| |
 |
|
|
| |
|
|
|
| |
 |
|
|
| |
|
|
|
| |
 |
|
|
| |
Above, last of the tent structure loaded up and ready for hauling to the back yard. Below, Sam guards his ball in front of the corrected skid installation. I sat in 038 today for the first time and boy is it different from the Nimbus!! |
|
|
| |
 |
|
|
| |
|
|
|
| |
 |
|
|
| |
June 5, 2005 - I spent the day doing lots of little, very time consuming items like finishing the panel, running power wires, checking the Ilec vario, replacing the nutplates for the horizontal stab mounting bolts, replacing the rudder attach hardware, fitting and sanding the tail fairing, stripping the tail cone in preparation for painting and changing the location of one rubber skid bumper because I had it in the wrong location when I first installed it. I knew it was wrong as soon as I stood back and looked at it, but waited until today to set it right. . |
|
|
| |
 |
|
|
| |
|
|
|
| |
 |
|
|
| |
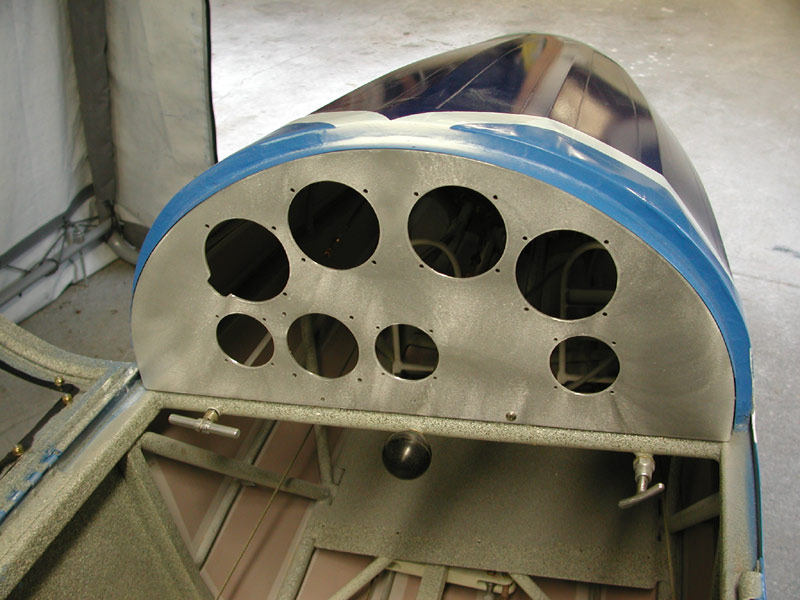
June 3, 2005 - After cutting holes in the fiberglass panel, I decided I did not like the look of it, so I made a new panel from some .080" thick 2024-T3 I had lying around. I like the aluminum panel much better. |
|
|
| |
 |
|
|
| |
|
|
|
| |
 |
|
|
| |
Above and below - with the wings mostly done, I turn to finishing the fuselage installations, panel, fairings, nose cone, final part and finish painting, electrical system - lots of little things. |
|
|
| |
 |
|
|
| |
|
|
|
| |
 |
|
|
| |
Above - I lay out the panel, below, the vent hose adapter is finished. |
|
|
| |
 |
|
|
| |
|
|
|
| |
 |
|
|
| |
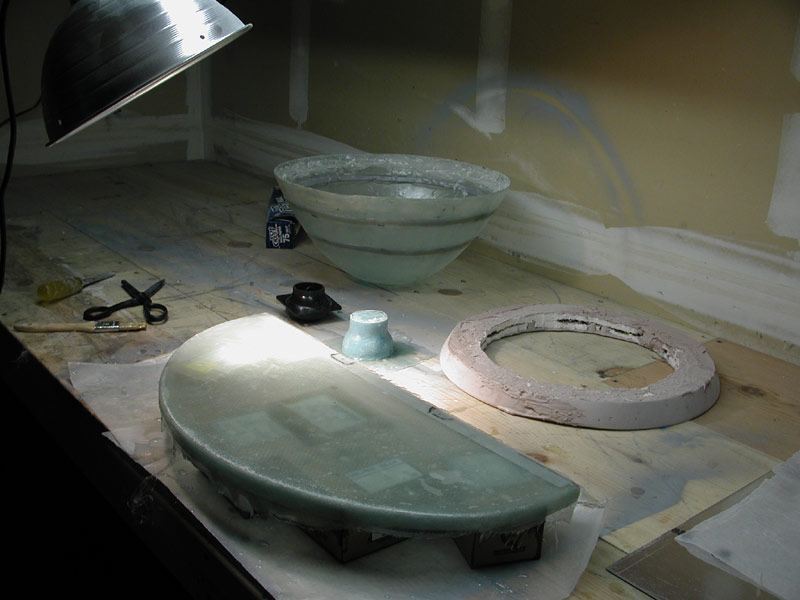
Above - May 21, 2005, I mold some fiberglass parts - the vent to hose adapter went missing after the crash, so i made a new one from a foam mold. A bulkhead mold for the new nose cone takes shape from foam and Bondo. The instrument panel gets a final layer of 2 oz. fiberglass to provide a smooth surface. |
|
|
| |
|
|
|
| |
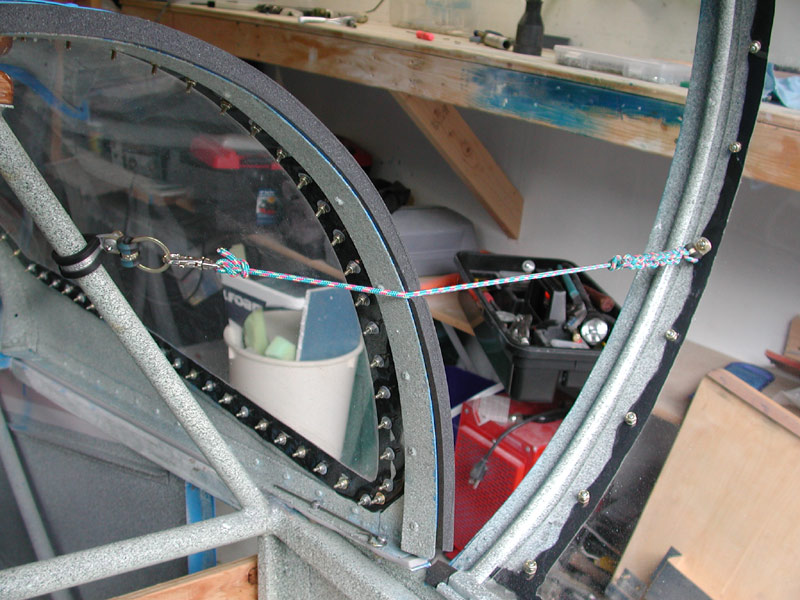
Below - Canopy and turtledeck Plexiglas installation |
|
|
|
 |
|
|
| |
Above - The forward and aft ends are screwed into place - next I'll install screws in the sides. Below - it's easy to clean the extruded sealant using a plastic scraper. This 3M goop makes an excellent, waterproof, seal. |
|
|
| |
 |
|
|
| |
|
|
|
| |
 |
|
|
| |
|
|
|
| |
 |
|
|
| |
Above - I install the 6-32 screws and nuts with large area washers starting in the center working out towards the sides. This compresses the sealant and allows it to flow. The screws and nuts are just run down until it starts to squeeze the sealant - then I stop. |
|
|
| |
 |
|
|
| |
Above - first step is to lay in place two beads of 3M canopy sealant available from Aircraft Spruce or Wicks. The Lexan is installed with Clecos starting from the aft center holes working out towards the sides of the frame. |
|
|
| |
 |
|
|
| |
Above - after painting the frame - including a coat of epoxy over the speckle paint - I lay on the canopy sealant. |
|
|
| |
 |
|
|
| |
Above - I test fit the turtledeck after drilling the Lexan, next step is to paint the canopy and turtledeck frames. |
|
|
| |
|
|
|
| |
 |
|
|
| |
|
|
|
| |
 |
|
|
| |
|
|
|
| |
 |
|
|
| |
Below - all drilled up, de-burred and cleaned. Ready for assembly. |
|
|
| |
 |
|
|
| |
|
|
|
| |
 |
|
|
| |
|
|
|
| |
 |
|
|
| |
Above and below - using the special #10 drill to open up the holes. High speed and light pressure - it's important to make tiny shaving - not big long twisted shavings - if you press too hard or drill too fast, the acrylic will crack and then you'll need another $350. |
|
|
| |
 |
|
|
| |
Below - all holes drilled to #30, ready for opening up to #10 - final size. Skippy heads for the closet to see if anything's moved in there since his last inspection 2 hours earlier. |
|
|
| |
 |
|
|
| |
|
|
|
| |
 |
|
|
| |
Below - half of the holes are drilled and the canopy is well-secured. It's important to take your time, so I take a break with a Starbucks strawberry smoothie with whipped cream that Renee brought home for me. I'm totally busted on making a big mess and my punishment is to scratch the Skippy behind the ears when I get done. |
|
|
| |
 |
|
|
| |
Above - the drilling step requires #30 clecos, a #30 Plexiglas drill and a #10 Plexiglas drill. One must only use drill ground specifically for drilling Lexan and Plexiglas - available from Wicks or Aircraft Spruce. I pilot drill with the #30 and finish drill the holes with a #10. The screw size is 8-32, so the #10 hole will be larger and allow for expansion and contraction and help prevent stress-cracking. I'll have to vacuum the carpet when I'm done. The important thing to remember is to finish the trimming, drilling and vacuuming before Renee gets home. |
|
|
| |
 |
|
|
| |
Above and below - when cutting Lexan with a cutoff wheel, I plunge the wheel all the way down in the cut until the rotating shaft rests against the Lexan to prevent jumping and chattering. Gives a nice smooth cut, next I round the cut edges with a DA sander and 100 grit sandpaper. |
|
|
| |
 |
|
|
| |
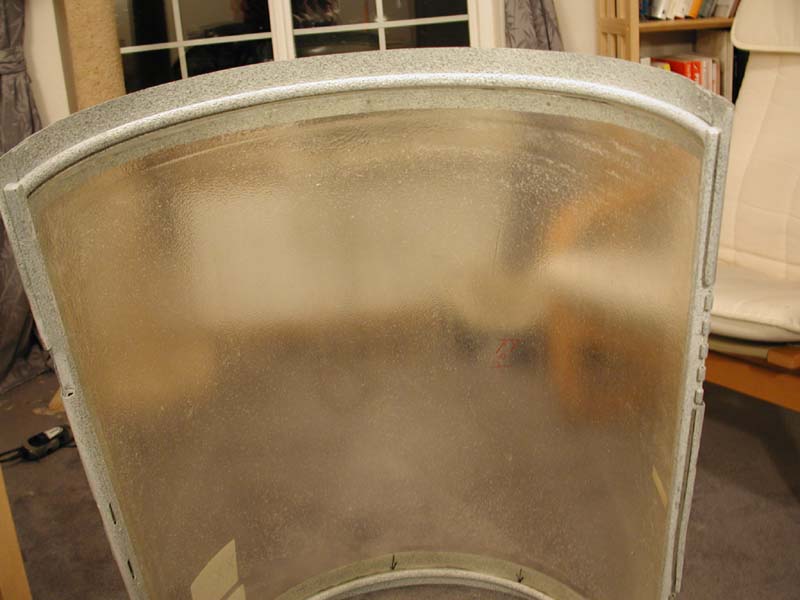
Below - I fit the canopy on the fuselage to make sure the frame fits well with the trimmed canopy. Above - a final trim before drilling. |
|
|
| |
 |
|
|
| |
Above and below - canopy fits pretty well - the Pippity-Skip completes his QC inspection and okays the job for drilling. This cat is totally blind and relies on his hearing for moving around (Sonar) - needless to say the screaming Dremel tool has raised his interest and he's trying to figure out what the heck is going on back here. |
|
|
| |
 |
|
|
| |
|
|
|
| |
 |
|
|
| |
Above and below - I use a Dremel cutoff wheel to trim the excess Lexan. Works very well. I'm doing this inside the house with the inside air temperature set to 70° to prevent cracking. |
|
|
| |
 |
|
|
| |
|
|
|
| |
 |
|
|
| |
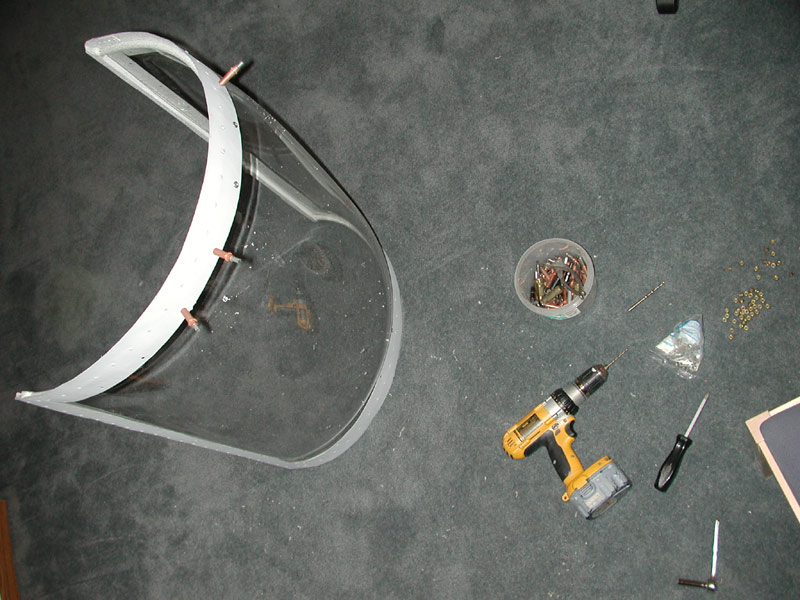
Cutting the canopy to fit inside the frame. |
|
|
| |
 |
|
|
| |
|
|
|
| |
 |
|
|
| |
December 1 - Preparing the canopy frame for installation of the new canopy. |
|
|
| |
|
|
|
| |
|
|
|
| |
|
|
|
| |
|
|
|
| |
|
|
|
| |
|
|
|
| |
|
|
|
| |
|
|
|
| |
|
|
|


