|
After cleaning the fuselage, I start to re-assemble 038. The sequence of pictures begins at the bottom, the latest photos are at the top of the page. |
|
 |
|
New fabric garage assembled on Christmas Eve and finished on Christmas day. Now I can start taping and spraying the Poly-Brush and Poly-Spray. I could not spray in the garage because the furnace for the house is in the garage and the polybrush will blow the house up - it also smells very bad and the smell lingers for weeks, so with this external paint facility set up I can tape and brush and spray and not worry about an explosion or stinking up the house. The fuselage will be silver very soon. Visual progress at last!!! |
|
 |
|
Above - modeling my new OLC sweatshirt Dave and Rebecca Piotrowski gave me for Christmas, I'm only allowed to wear it inside the house because I always get my sweathsirts dirty with paint and polybrush, etc. |
|
 |
|
 |
|
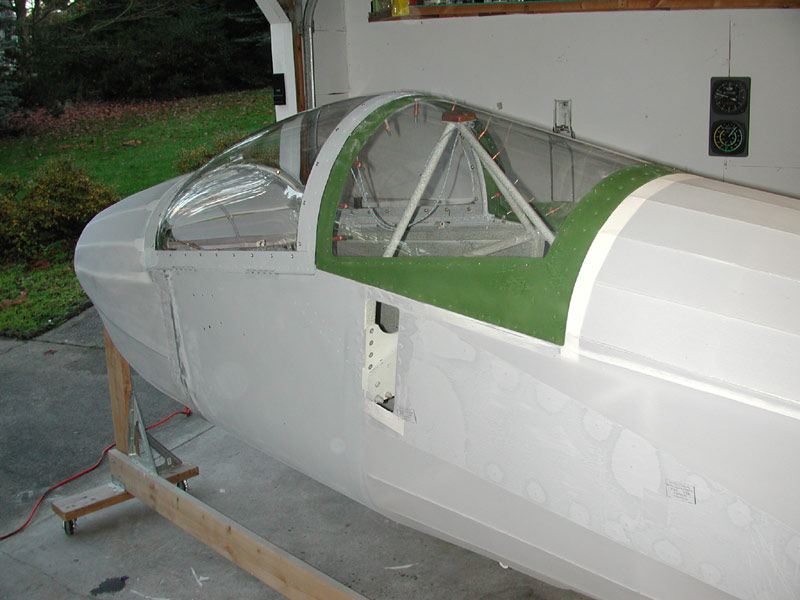
December 20, 2004 - I've re-covered the nose again after completely rebuilding the forward stringers and nose bulkhead. I did not like how the stringers came together at the bulkhead and I also did not like how the bulkhead was aligned vertically, the photos below show the process of removing the fabric, removing the bulkhead and getting everything re-aligned so that the nose contour looks right. Regardless of what the drawings say, the eye knows a fair line when it sees one and my eyes were just not seeing the lines looking properly - so now it looks a heck of a lot better! |
|
 |
|
I re-cut the turtle deck window opening to a straight line aft, looks better than the curved line and it fairs well with the canopy line as well. Drilled up and waiting on some screws from Wicks to arrive. |
|
 |
|
| Above - Rear three-quarter view, better nose contour. | |
 |
|
| Above - stringers re-aligned, nose bulkhead re-installed - looks much better now. | |
 |
|
| Above and below - nose bulkhead removed to adjust the contours of the stringers that form the nose. | |
 |
|
 |
|
| Above - December 3 - looks good. | |
 |
|
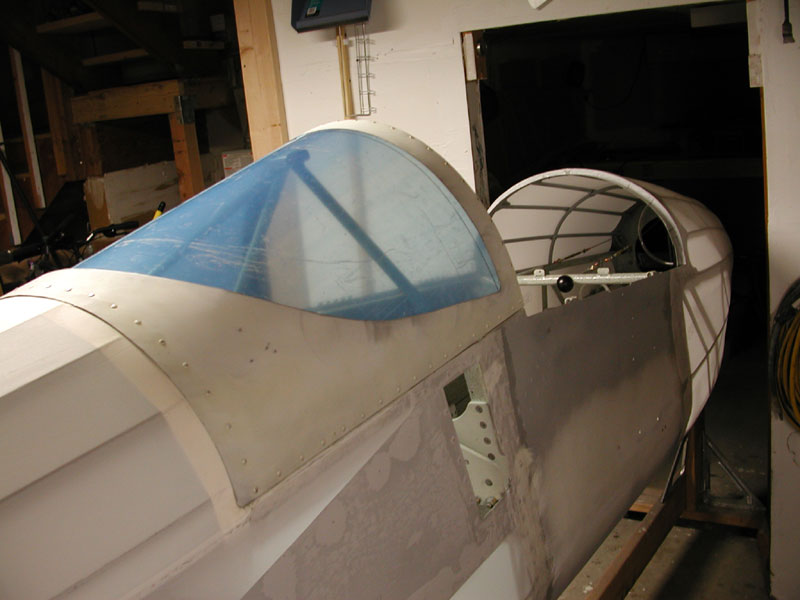
Above - I still have to drill the window mounting holes in the turtledeck. The Lexan is not blue tinted - that's the plastic film covering - it's clear under the plastic film. |
|
 |
|
| Above - test fit of the new fiberglass instrument panel and turtledeck window. | |
 |
|
Above - October 30, 2004. After adding a third layer of 9 oz. glass to the inside of the panel, sandwiching the aluminum angle that provides stiffness for the lower edge, grounding bus and a secure mounting area, I weigh the panel prior to finishing. The fiberglass panel weighs 11.7 ounces. The old aluminum panel, with the instrument holes cut out, weighs 15.3 ounces. |
|
 |
|
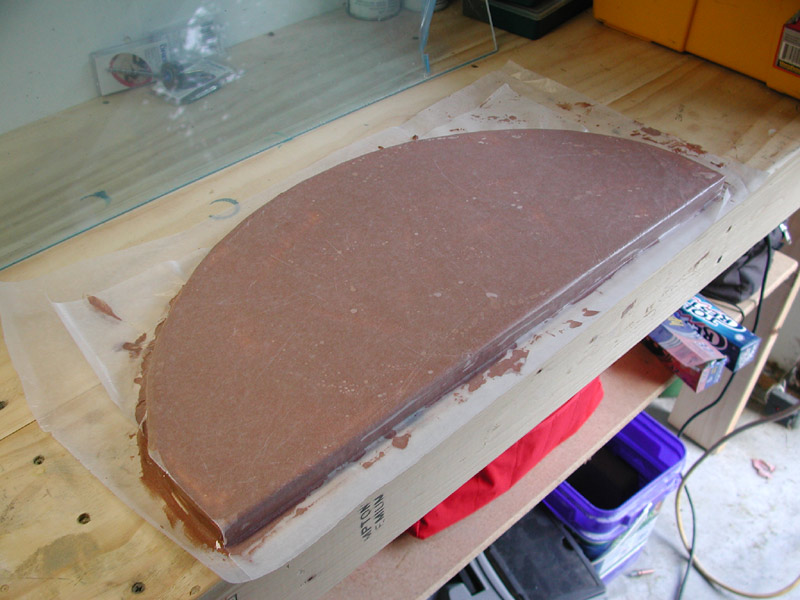
| Above - I pop the panel out of the mold - I started with two layers of 9 oz. cloth and MGS epoxy resin. | |
 |
|
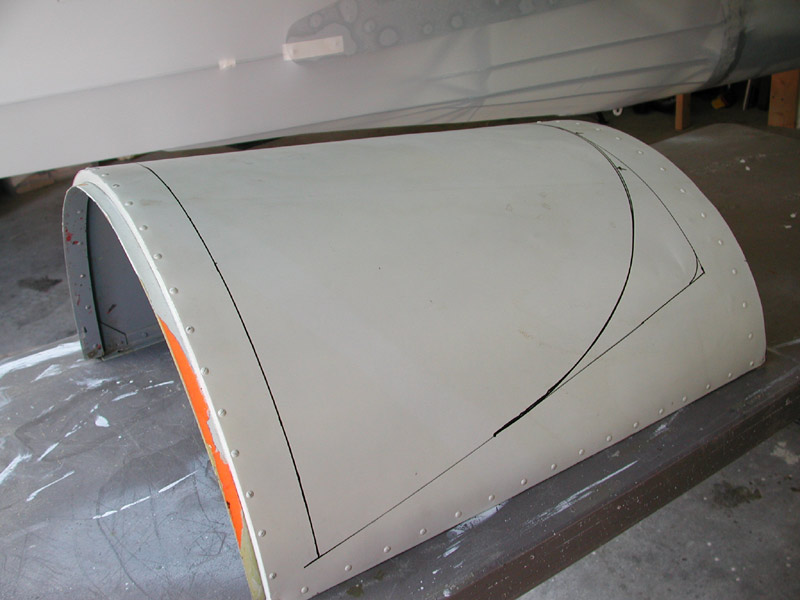
Below - I mark the cut line for the new Lexan window I'm going to install in the turtledeck. Above - window cutout made with left and right hand tin snips. Ready for the Lexan layout and window mounting holes. |
|
 |
|
| Below - I make a plug mold for the new fiberglass instrument panel. | |
 |
|
| Time for some before and after photos. | |
| After - and almost ready for fabric. | |
 |
|
| Before - April 2003 | |
 |
|
| The new nose - September 2004 | |
 |
|
| The old nose with Inspector Tabby Cat. | |
 |
|
| After. | |
 |
|
| Before - TC assists with fabric removal. | |
 |
|
| The elevator bellcrank after 15 months. | |
 |
|
| Before. | |
 |
|
| Tabby Cat surveys the damage in April 2003. | |
 |
|
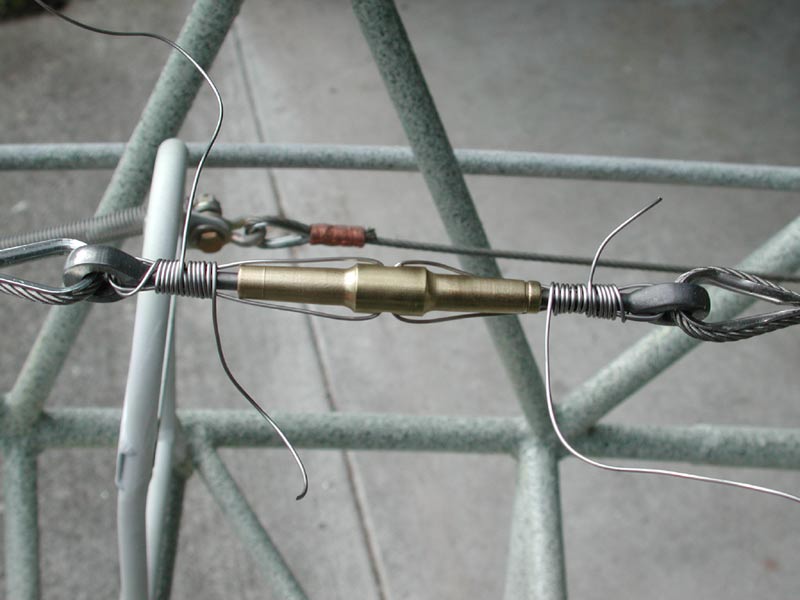
| New rigging and double wrapped turnbuckles on the elevator cables. | |
 |
|
| The newly overhauled spoiler bellcrank and rigging. | |
 |
|
| The old scene prior to fabric removal. | |
 |
|
 |
|
| The old release assembly undergoing a detailed visual inspection. The Tabby Cat likes to get into his work. | |
 |
|
| The newly restored release area. | |
 |
|
| September 25, 2004 - Newly fabricated floor panels, other new stuff. | |
 |
|
| And the Jeep fits nicely on the left side. | |
 |
|
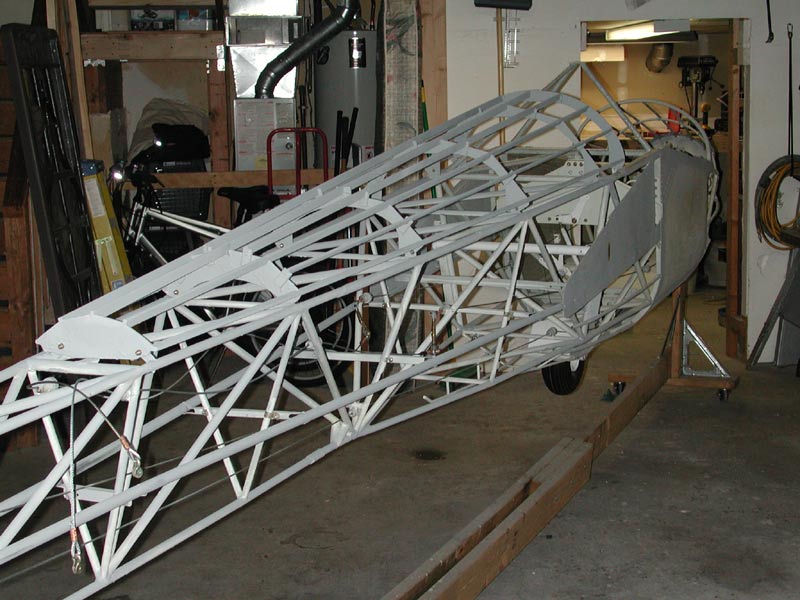
| 9/20/2004 - I can lay it down in the rotisserie to fit the vertical and rudder in the garage for night storage. | |
 |
|
| Getting to be too big for the garage. | |
 |
|
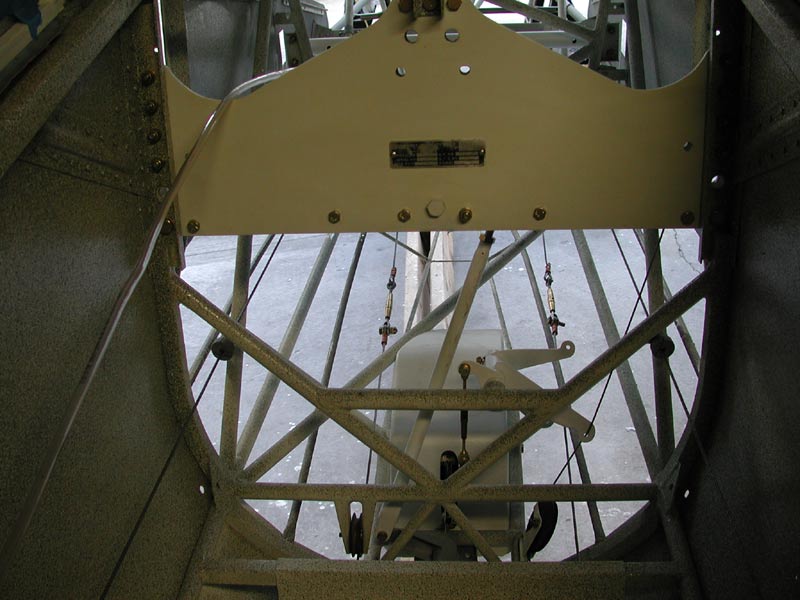
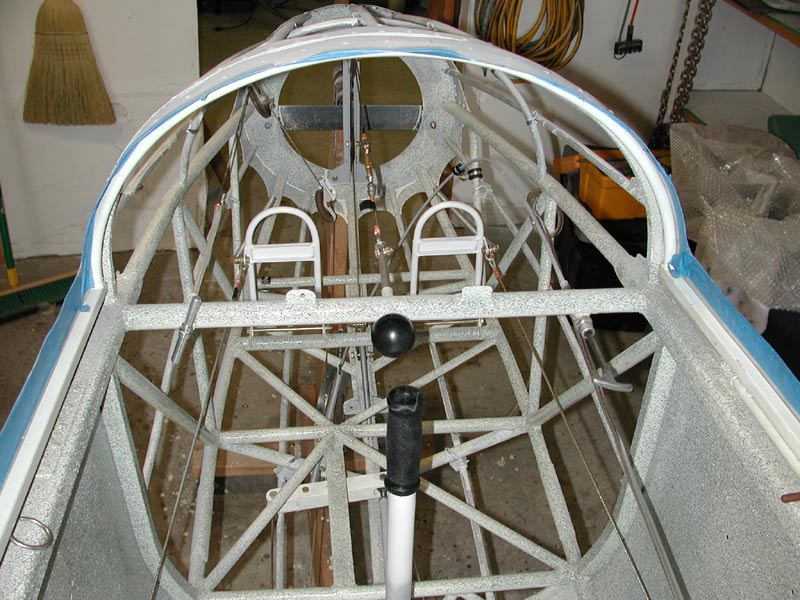
| The view aft from the cockpit. | |
 |
|
| New stick tube - 4130 steel, inserted into the stick base and bolted. | |
 |
|
 |
|
25° up and 25° down - just as the Type Certificate Data Sheet says it should be. |
|
 |
|
 |
|
9/19/2004 - I installed one elevator, the vertical and rudder so I could adjust the rigging and finalize the surface movements. A bit of adjustment and everything fell into place. Time now to safety all the turnbuckles and cotter key all the nuts on that various flight control connections. |
|
|
|
| Wrapped - just needs trimming and dressing. | |
 |
|
Double-wrap method of safetying a turnbuckle. I could have used turnbuckle clips, but this is an original turnbuckle from 1955 and it doesn't have the slots. The remainder of the turnbuckles are new and I'll clip them, maybe. I like safetying turnbuckles - it gives them a classic look. I think turnbuckle clips are for 737's. |
|
 |
|
Finished brackets awaiting a trial fit. After the trial fit, I modified the bracket to move the lower pulley up higher to provide clearance for the cable routing to the release arm. |
|
 |
|
| Fabricating the pulley bracket. | |
 |
|
 |
|
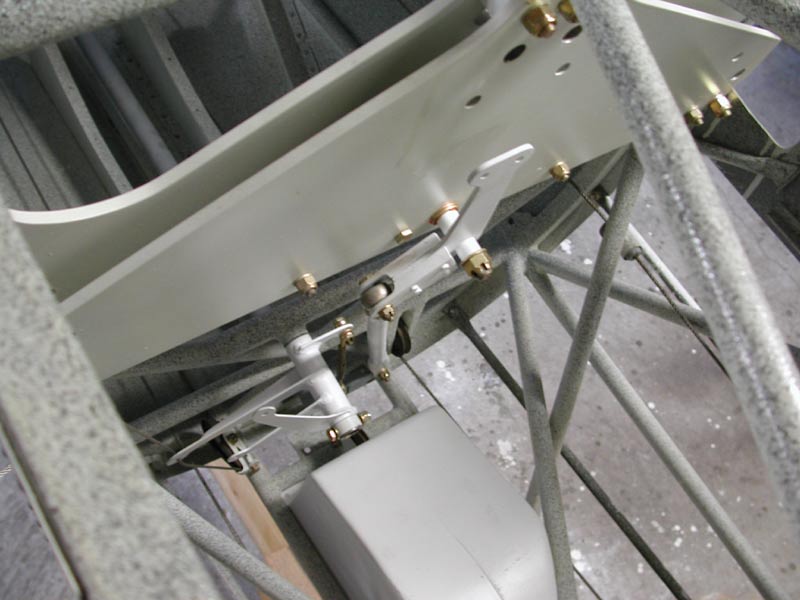
| Close-up of the new pulley bracket for the release cable. | |
 |
|
Detail of the new release cable pulley arrangement - I replaced the old release cable routing (through a copper tube) with this setup that makes me feel much better about the security of the release system. Strong, lightweight and foolproof. |
|
 |
|
The front of the cockpit is getting busier - but there is much more to go. |
|
 |
|
Photo of the aileron bellcrank and spoiler rigging. |
|
 |
|
New cables being routed and attached to the spoiler and brake control arm. |
|
 |
|
New tire installed over the stainless brake shoe. Between the two pieces of stainless that make the brake shoes, someone has written in marking pen on the stainless "this should last forever Carl". That message was apparently sent to Carl Ekdahl, previous owner of 038. |
|
 |
|
Old turnbuckle and cable for the release mechanism about to be replaced. |
|
 |
|
9/18/2004 - time to start assembling the controls and rigging. Here's a photo of the pile of hardware needed to re-assemble this 1-26. There's more, such as pulleys, bolts, seals, nutplates, etc. that are not shown here. It's all new - every bolt, pulley, nut and washer, all the old stuff was rusted or otherwise damaged. |
|
 |
|
|
The stringers are attached to the formers with epoxy. I coated the entire surface of the stringers and formers with epoxy to weatherproof them and after the epoxy sets up, I'll paint the structure with white epoxy primer.
|
|
 |
|
|
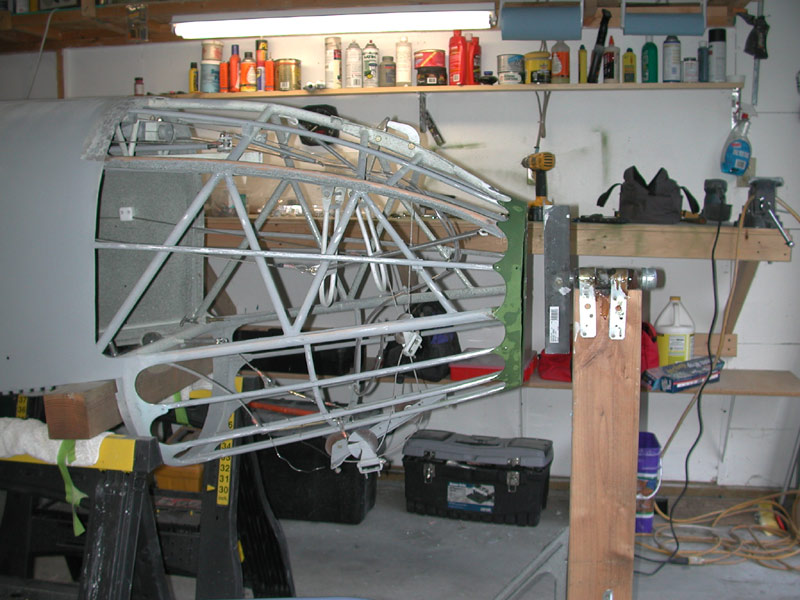
Details of the aft section of the turtledeck structure.
|
|
 |
|
| Top view of the turtledeck structure - the formers are cut away between the stringers so the fabric does not rest on them - that will provide a clean stringer line under the fabric all the way back. | |
 |
|
|
Stringers installed and the formers are cut to their final shape.
|
|
 |
|
|
The aft end showing the stringers overhanging the last former.
|
|
 |
|
|
Using a string line to line up the stringer locations.
|
|
 |
|
|
Formers screwed into place in preparation for fitting the stringers.
|
|
 |
|
|
All formers lined up for a fit check - some trimming is required to fit under the aft cockpit cowl. Note the Zolatone cockpit paint. I sprayed a coat of clear polyurethane over the Zolatone to provide durability.
|
|
 |
|
| I decided to dispense with the aluminum turtledeck to save weight - but more importantly to attain the classic look of fabric over stringers. I use the scroll saw to cut out the birch plywood formers. | |
| I built this jig to hold the fuselage during the cleaning, painting and covering process. I am able to rotate the fuselage through a full 360° and can move it in and out of the garage as necessary. | |
 |
|
|
The parts removal and clean-up continues.
|
|
 |
|
|
Details of cleaning the rust from the fuselage frame.
|
|
 |
|
| All of the rusty spots had to be cleaned with a wire wheel and epoxy primer re-applied. The original cables that I had hoped to use were thoroughly corroded and are all removed and shall be replaced. I probably should have replaced them in the first place - but I must have been trying to get by on the cheap - now I'm back on the quality track and have dispensed with any artificial deadlines I've created for myself. | |
| The bottom of the cockpit pan accumulated snow and dirt - it all needed a very thorough cleaning and touch up of primer before a final interior paint application. | |
 |
|
| The salt and wet weather found all of the exposed steel and immediately caused any nick or paint chip to rust. This turned out to be a good exercise because it revealed any and all flaws in the protective coating of epoxy primer. | |
 |
|
| After being towed from Connecticut to Oklahoma City through a Pennsylvania snowstorm, 038's fuselage and wings accumulated a thick coating of road salt. The glider sat on its trailer in Oklahoma for another 3 months while I attended FAA training and was finally towed to its new home in Seattle suburb of Bonney Lake in early April. Note the corroded cable end. | |
 |
|