|
Winter 2001 - Installation of Wedekind Sleeves
|
|
| In the center of the towel are the pieces of the Wedekind sleeve. The spoiler link is first to be modified. I cleaned the Hotelier connection thoroughly with alcohol and a brass brush. Using a strong light and a magnifying glass, I carefully inspected each piece of the arm, rod ends and connection mechanism to detect any cracks, corrosion or other damage. They appear to be in excellent condition |
 |
| I measure the length of each control rod prior to disassembly and record the length to insure that the rod is re-assembled correctly after the modification. |
 |
| Using a 2mm drill and some cutting fluid, I drill the roll-pin hole through one side of the control rod. |
 |
| I tap the roll-pin into the bronze bushing and the hole I just drilled. This will hold the bushing in proper position while I mark and drill the hole in the opposite side of the control rod |
 |
| you can see the roll-pin sticking out of the bronze bushing on the bottom of the control rod while I drill the opposite hole. This will insure perfect alignment. Use lots of cutting fluid as this is hard steel. |
 |
| Holes drilled, bronze bushing, spring and safety sleeve assembled, ready for the roll-pin and the Hotelier connection. |
 |
| With roll-pin partially tapped in to hold the safety sleeve in place, I put some medium Loc-Tite onto the Hotelier threads to help secure the rod-end. It's not required, but I'm a big fan of Loc-Tite - this Hotelier will not inadvertently back off! |
 |
| With the Hotelier rod-end lined up with the original marks I made and the lock-nut tightened and roll-pin driven all the way in; I measure the overall length one last time to insure correct assembly and it's all done. |
 |
| Here's how it works: with the spring holding the safety sleeve forward against the bronze washer, the Hotelier wedge is captured by the safety sleeve and cannot open enough to release the rod-end ball (when it is connected). |
 |
| With the safety sleeve pulled back against the spring, you can push the Hotelier wedge into the open position. The roll pin holds the bronze bushing in place - that provides a backstop for the spring, and the pin also sticks up out of the bronze bushing about 2mm to ride in the safety sleeve slots - that keeps the safety sleeve from rotating away from the wedge-capture position. |
 |
| Two down, four to go. Tom Knauff has the Wedekind sleeves for sale - about $27 each. He had four in stock and fellow Nutmegger and CFIG Esteban Dragonovich traded me one for some gel-coat he needed for his Standard Cirrus (which is in excellent condition). So, now I just need one more to complete the task. |
 |
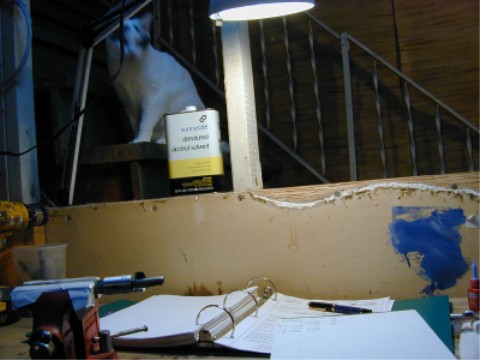
| Close supervision by William the White Cat insures regulatory compliance and correct assembly in accordance with the Schempp-Hirth Technical Bulletin. If you need a cat, The Little Shelter in Huntington, NY provides a wide-range of FAA certified and qualified glider inspectors - the smaller the parts, the more interesting the task! One roll pin has gone walkies - I'll probably find it under the bed with the dust bunnies and other treasures. |
 |
| 23 December 2001 is another beautiful sunny day in Connecticut, so I install the control arms back into the Nimbus - only the flap arms remain to be completed when the last sleeve arrives from Knauff and Grove. The spoiler control rod attach bolt at the top of the photo is in upside-down from what you might consider normal - important to re-install all hardware exactly as it came out because those bolt heads must be properly oriented to clear everything it may swing next to. The complex geometry of the Nimbus control system means that full and complete functional checks must be completed after this is all done, one never knows what one may have done inadvertently that may limit or interfere with control travel. |
 |
|  |