Monk Galley replacement
Home
|
|
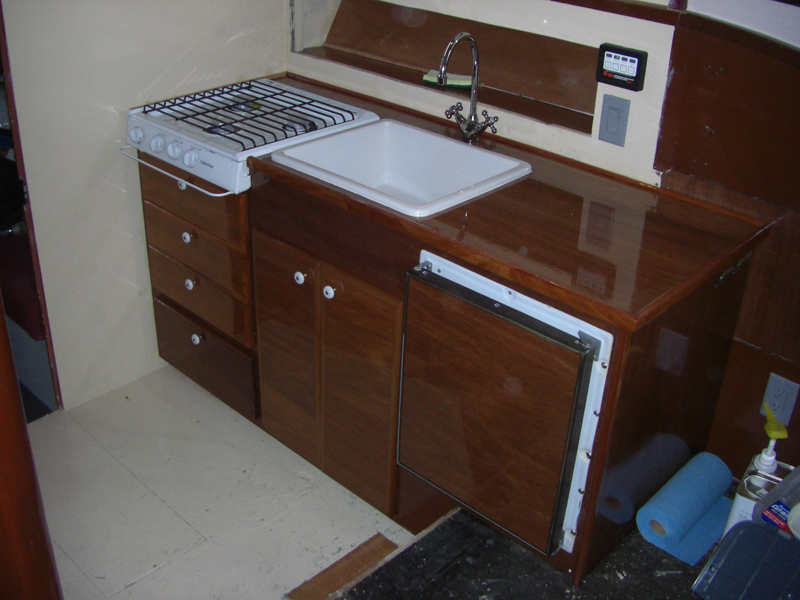
| Below - the finished galley. |
 |
| |
| |
| |
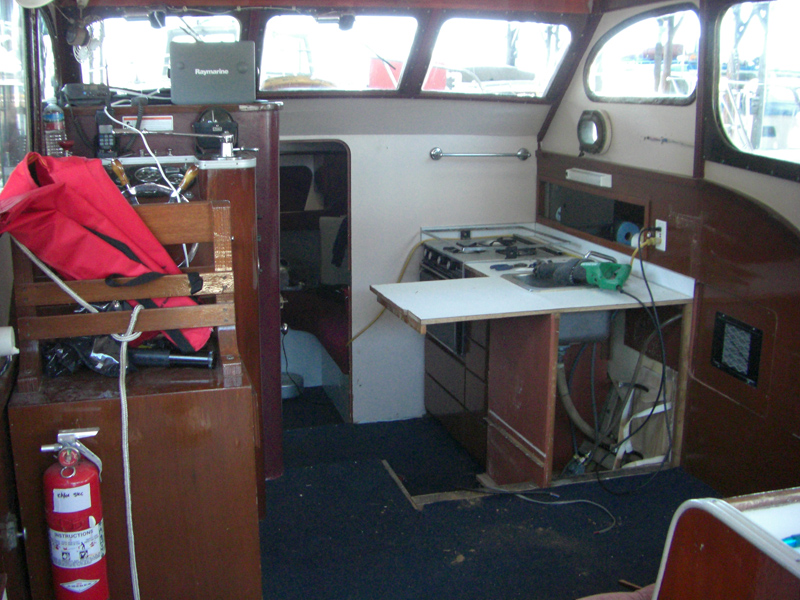
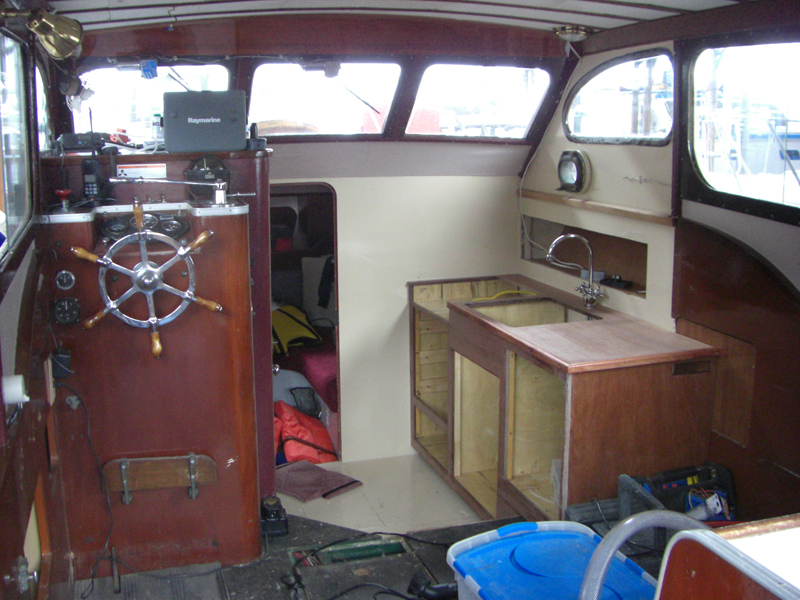
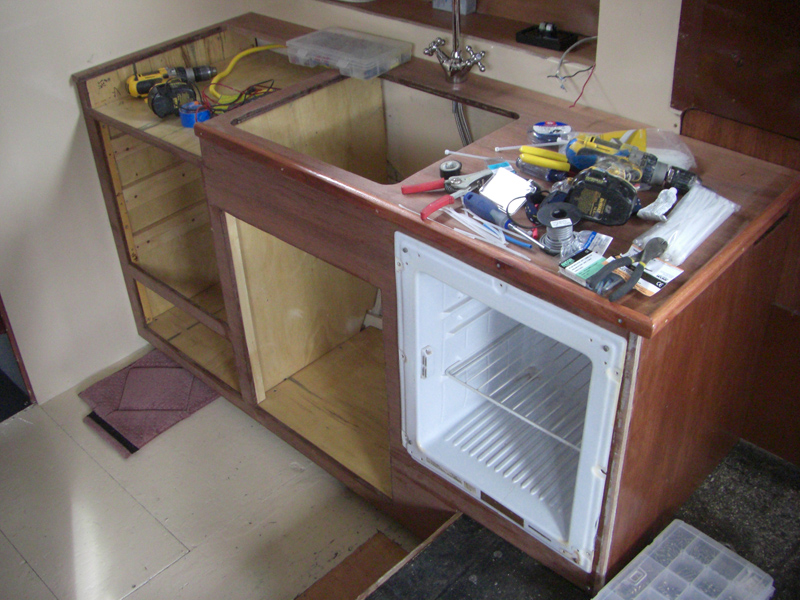
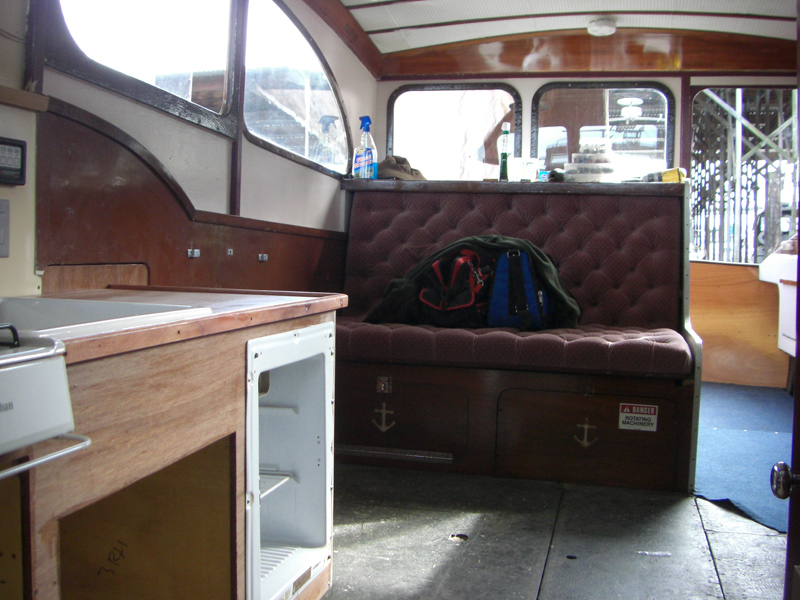
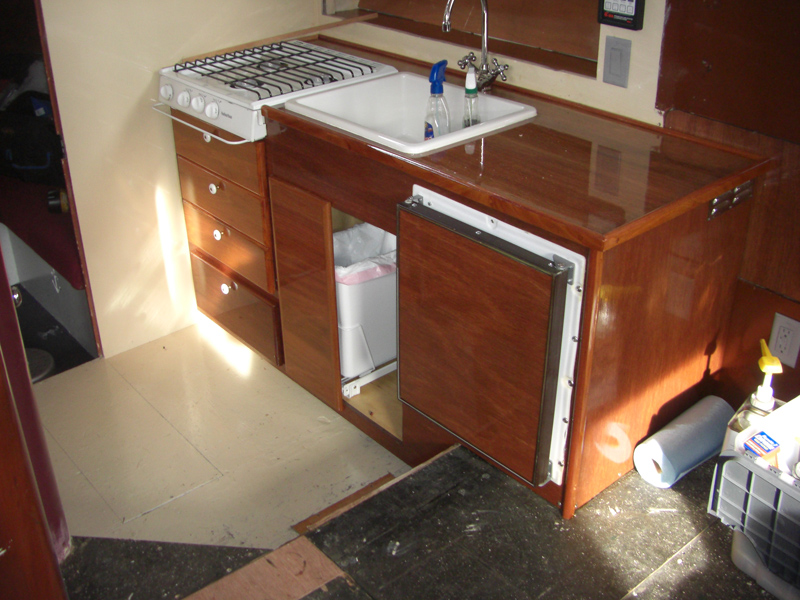
September 9, 2007 - This is the galley as it looked before last weekend. |
 |
| Below - Renee and I went to the Port Townsend Wooden Boat Festival and saw a few Monks. We liked the galley layout in an Owens 30 that we say and decided to rip ours out, rebuild it to better suit the cabin and update the appliances. |
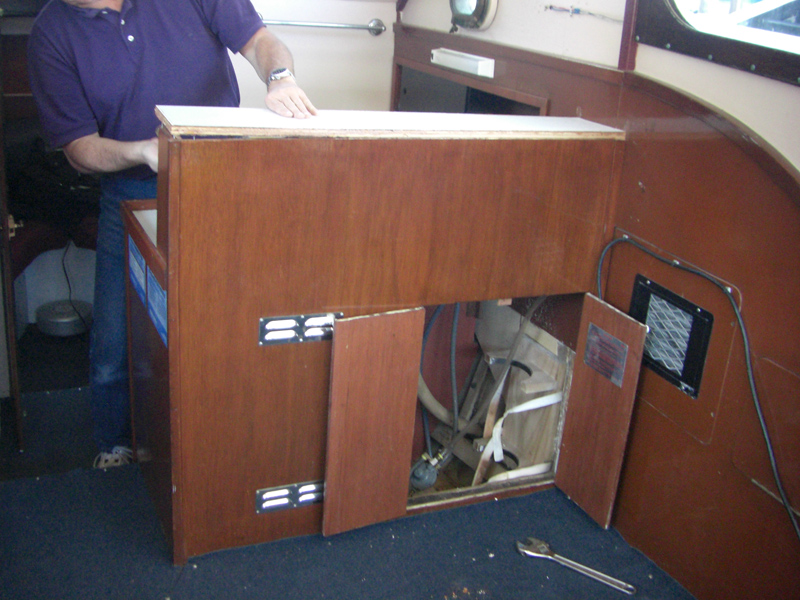 |
| Above - the upper counter comes out, this will not go back in, providing more access to the galley and a more open feel to the cabin. The wood bracket inside the cabinet held the old CNG bottle, I'll be going back in with a propane cooktop, no need for an oven - we don't plan to bake any pies at sea. |
 |
| Above - the Norcold refrigerator is removed. I planned to replace it, but it is working perfectly and a replacement will cost upwards of $600, so it will go back in after some cleanup and cosmetics. |
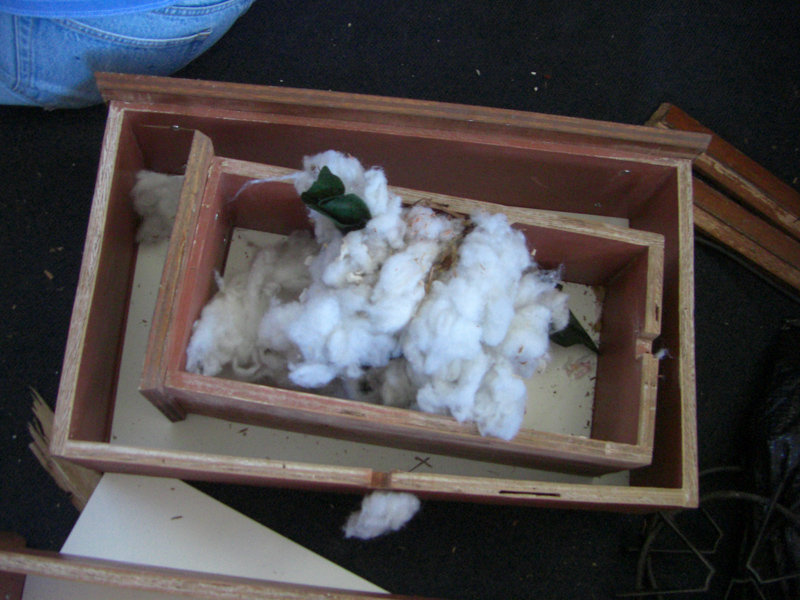 |
Above - a rat nest was discovered behind one of the drawers. Cotton from the bunks and fake plant leaves from the previous owner's fake plants make for a nice rat's nest. |
 |
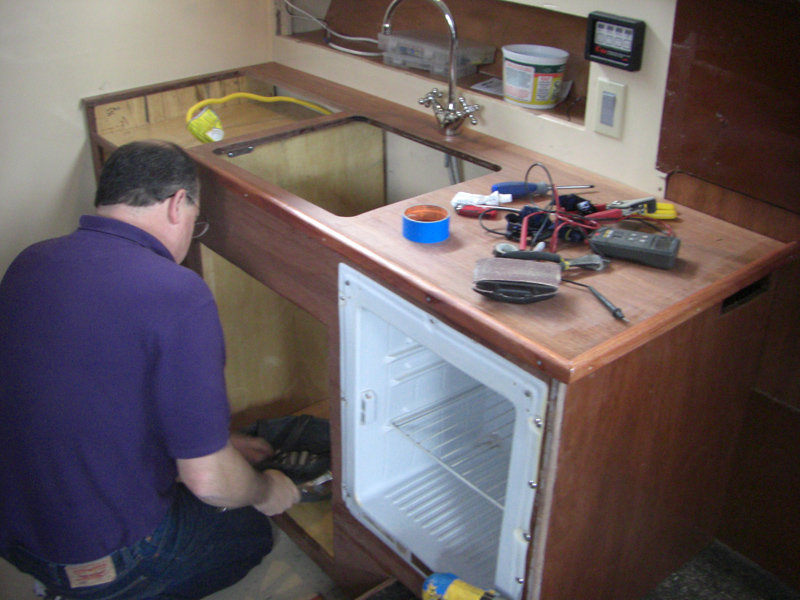
Renee works on removing the sink, I've got the stove loose - it will not go back in. |
 |
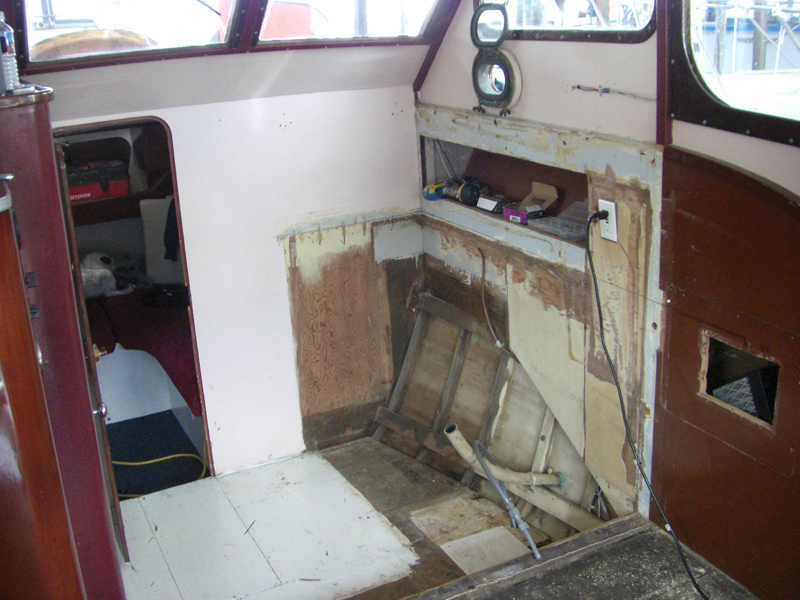
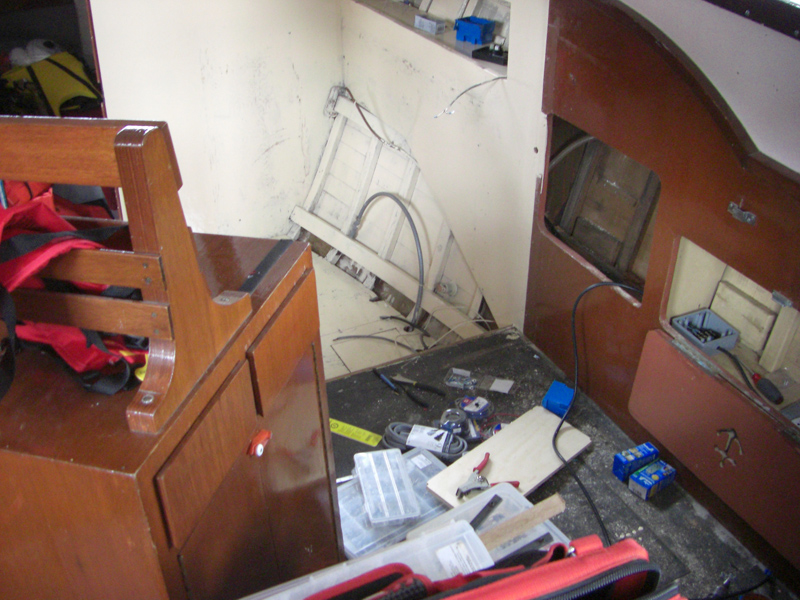
Appliances removed, just the cabinet left and some vacuuming, cleanup, sanding and painting. |
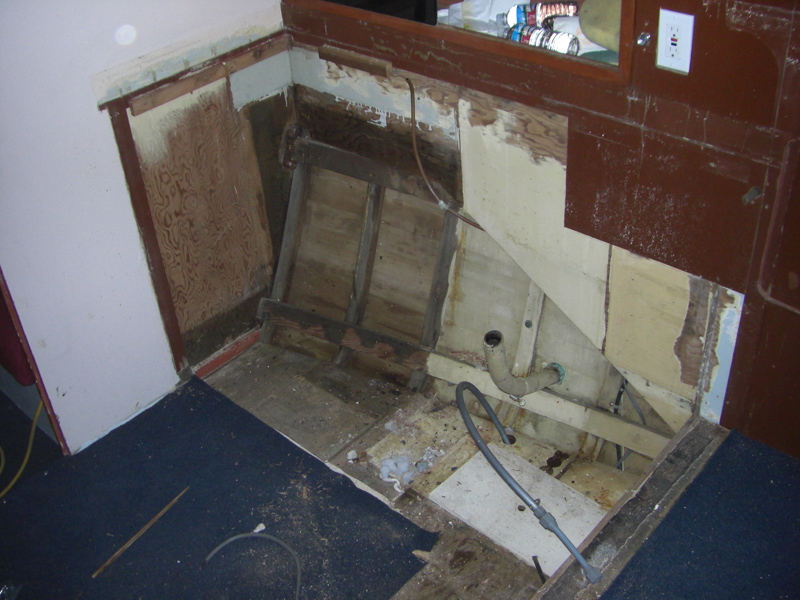 |
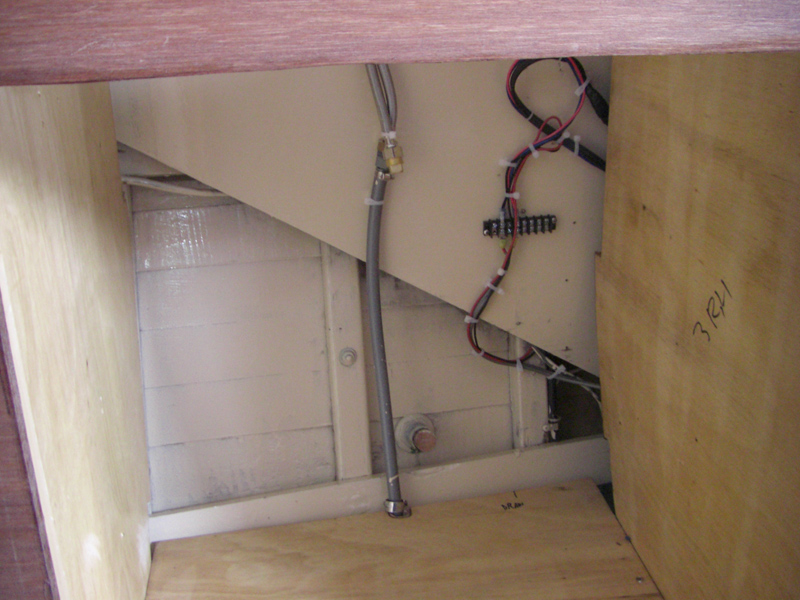
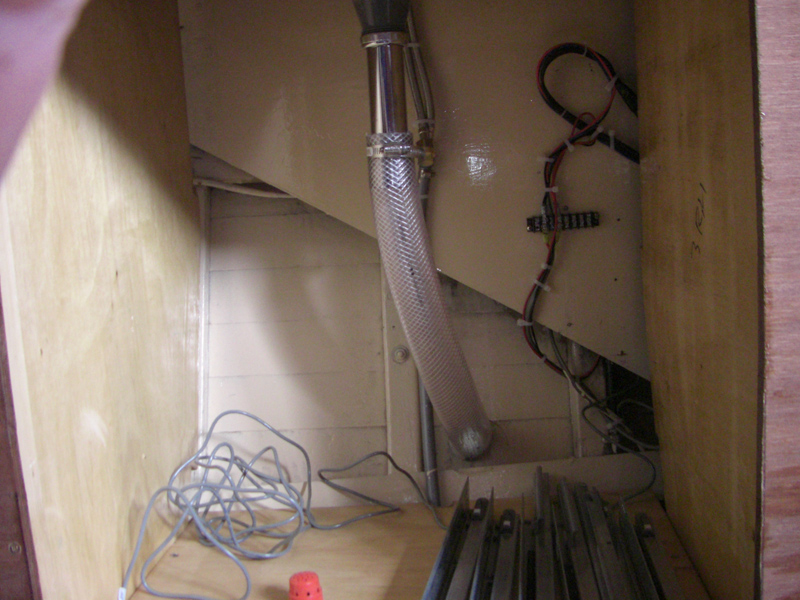
| That's the bare hull curving inwards toward the floor - Port Orford Cedar planking, oak frames. Drain from the rusted sink goes right to the outside of the hull. The grey line coming up through the floorboard is pressure fresh water. |
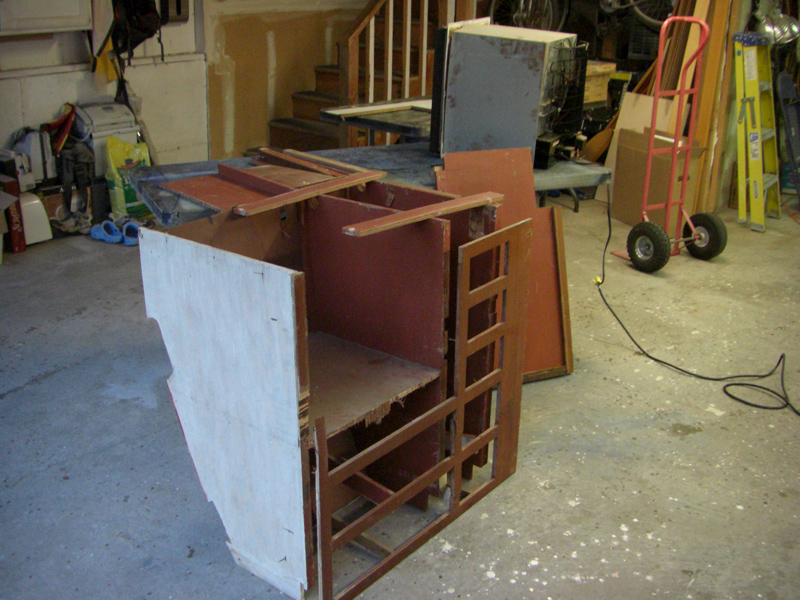 |
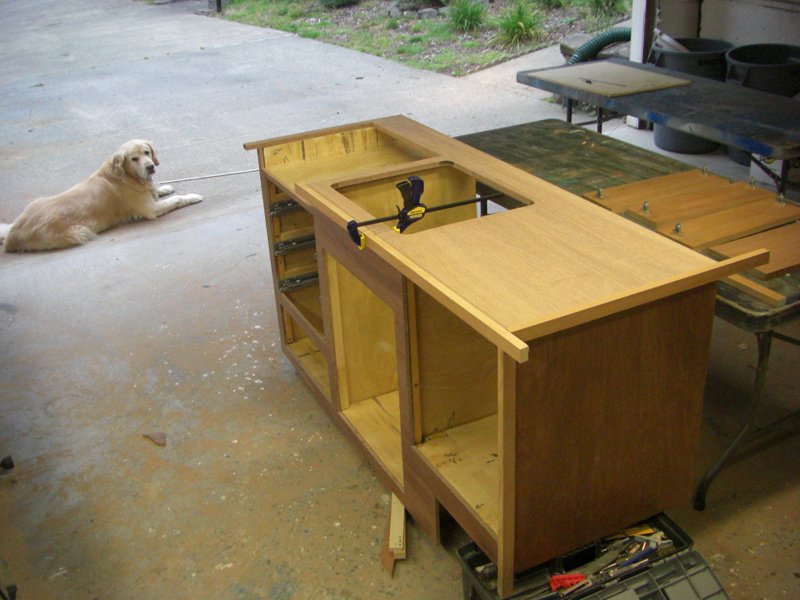
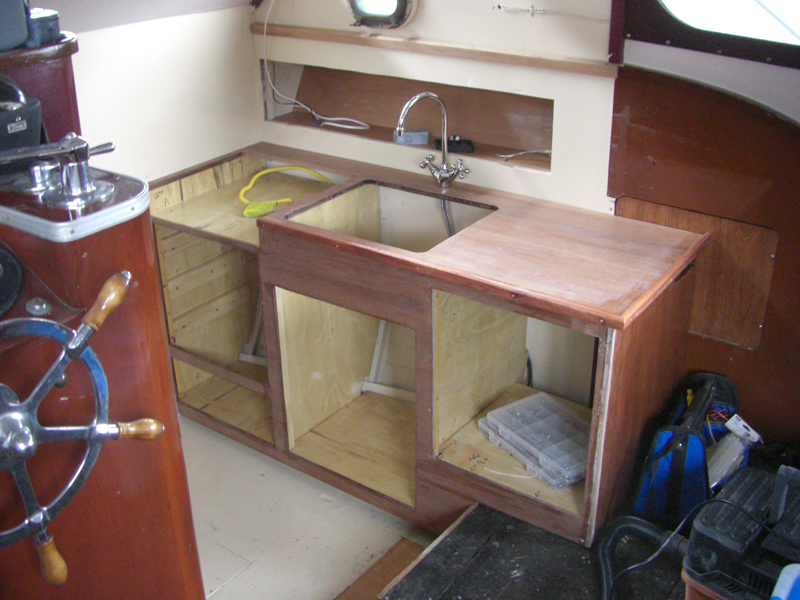
| Above - I reassemble the cabinet in the garage, modify it to accommodate the new sink and cooktop, relocate the fridge, make a new counter-top, install new drawers from Ikea and take it all down to the Monk and re-install it. About two week's work, I think... optimistically. |
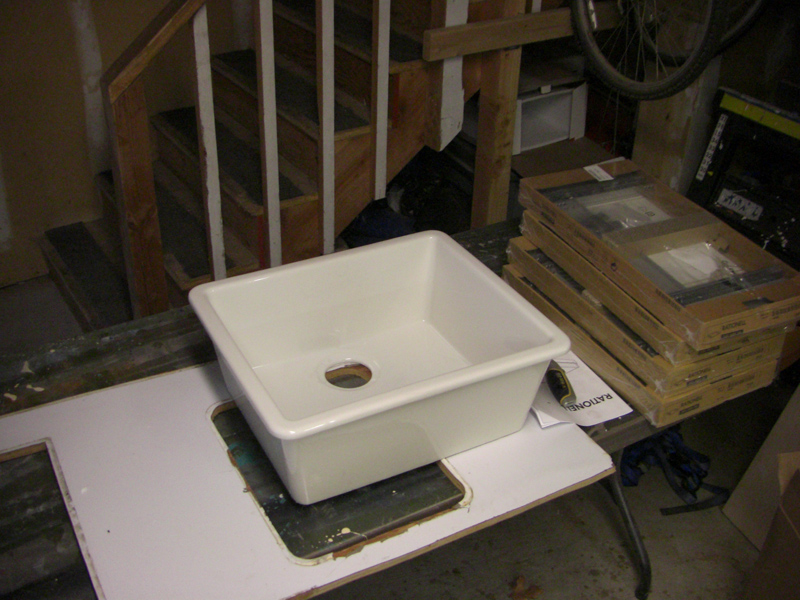 |
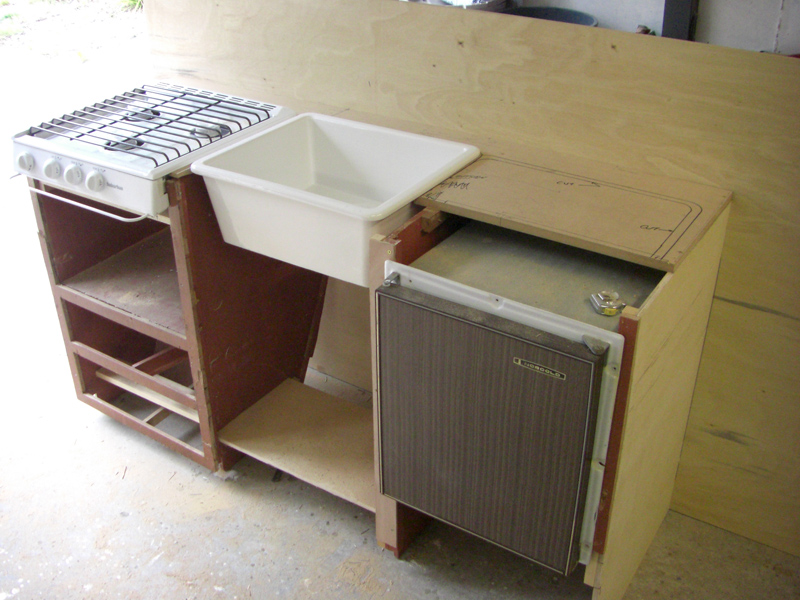
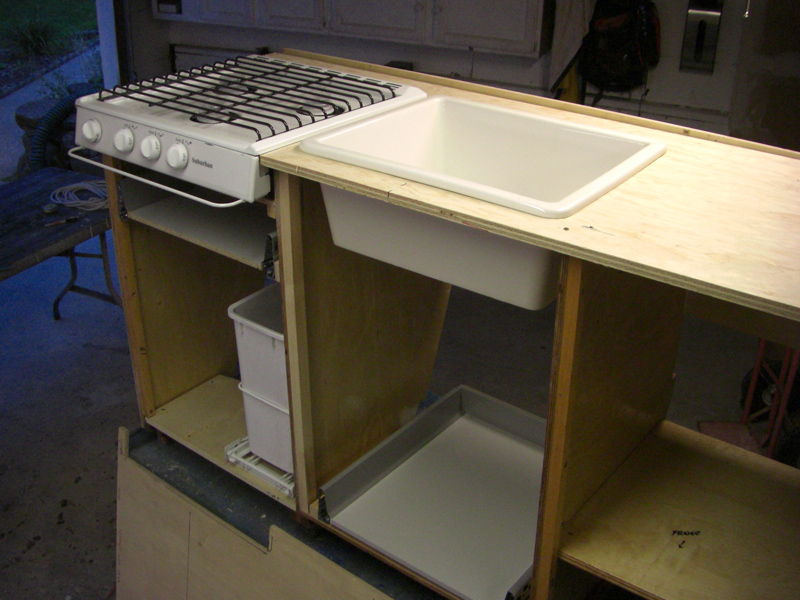
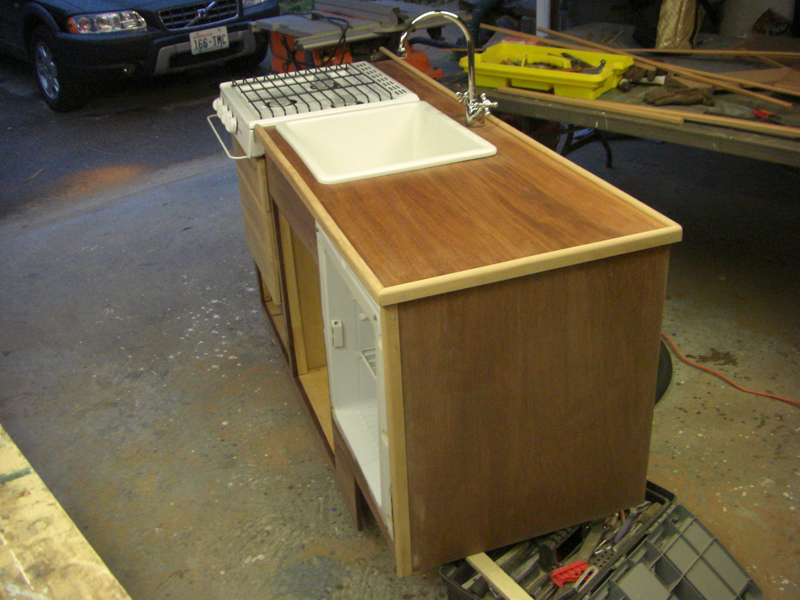
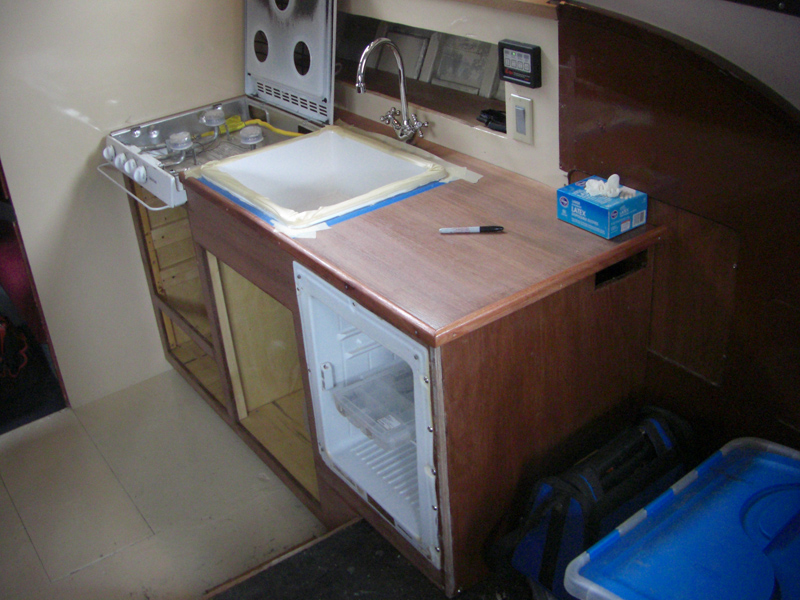
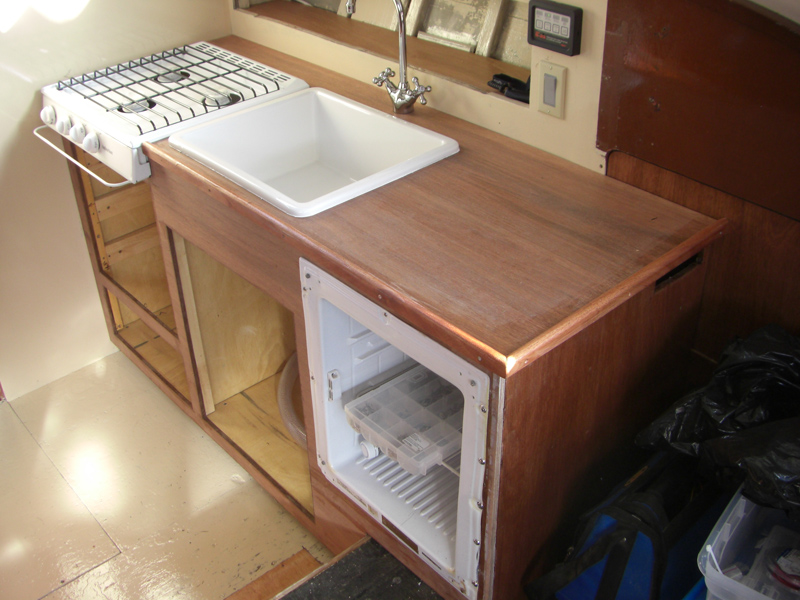
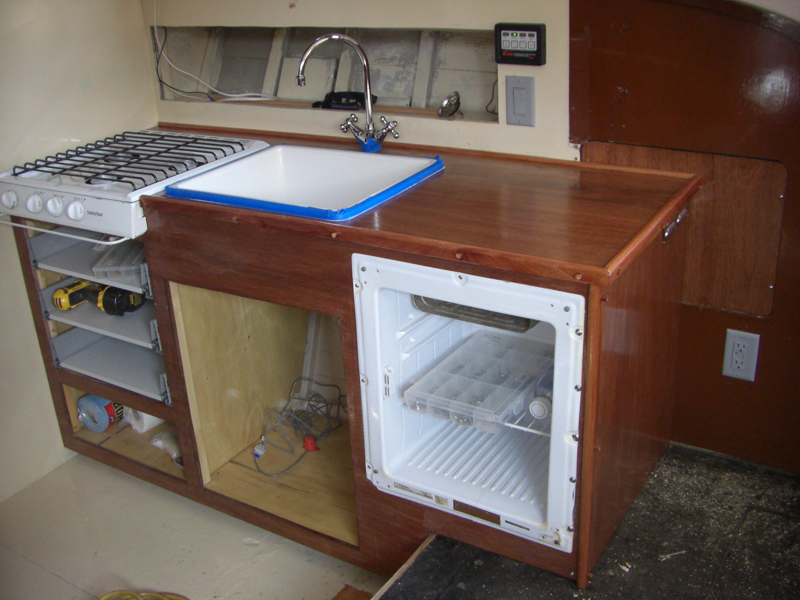
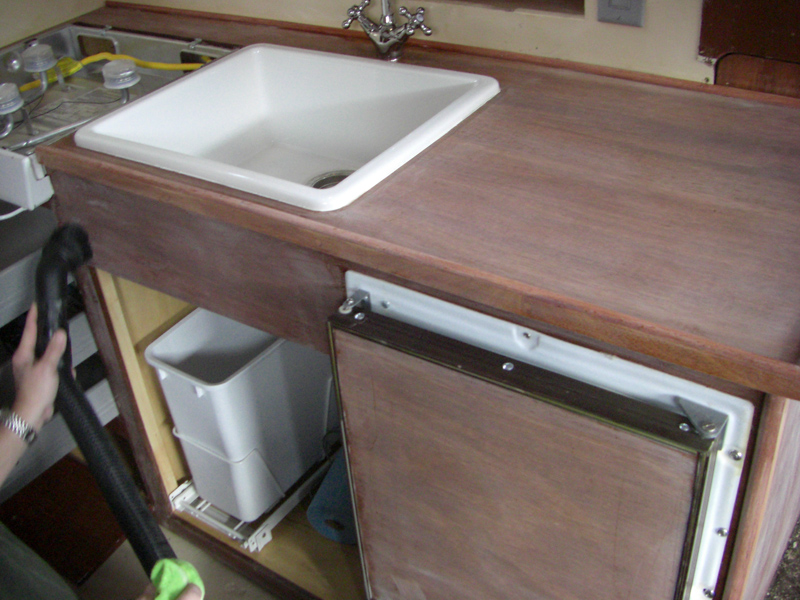
| Above - new porcelain sink from Ikea, much larger than the old stainless bar sink that we removed. Below - new cooktop is on order, fridge on a test run in the background, working fine. |
 |
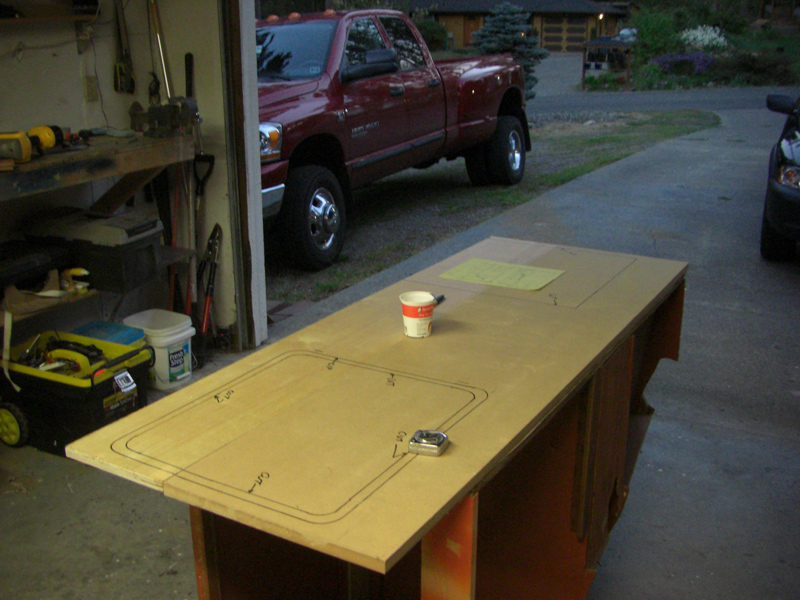
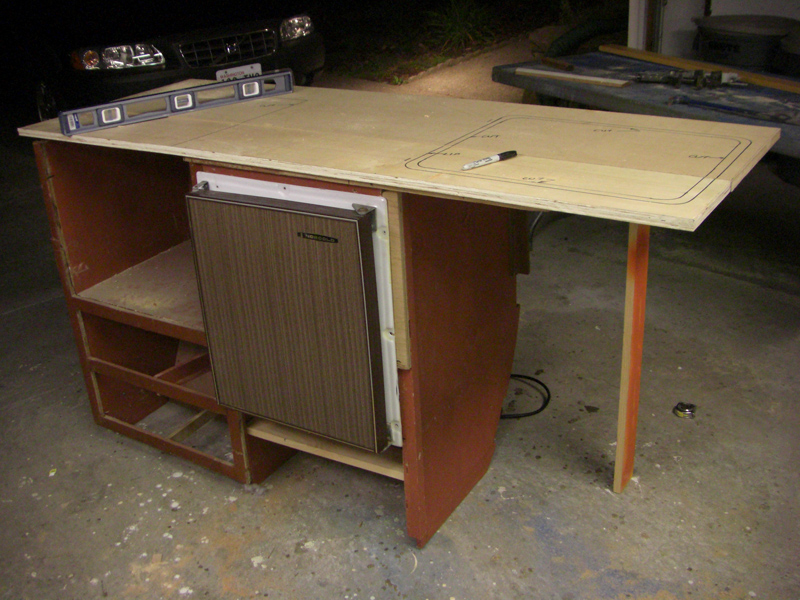
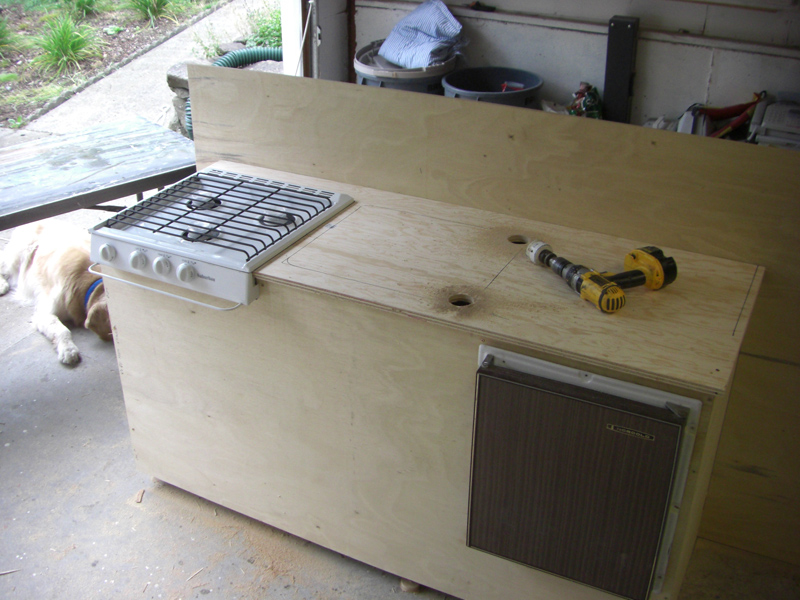
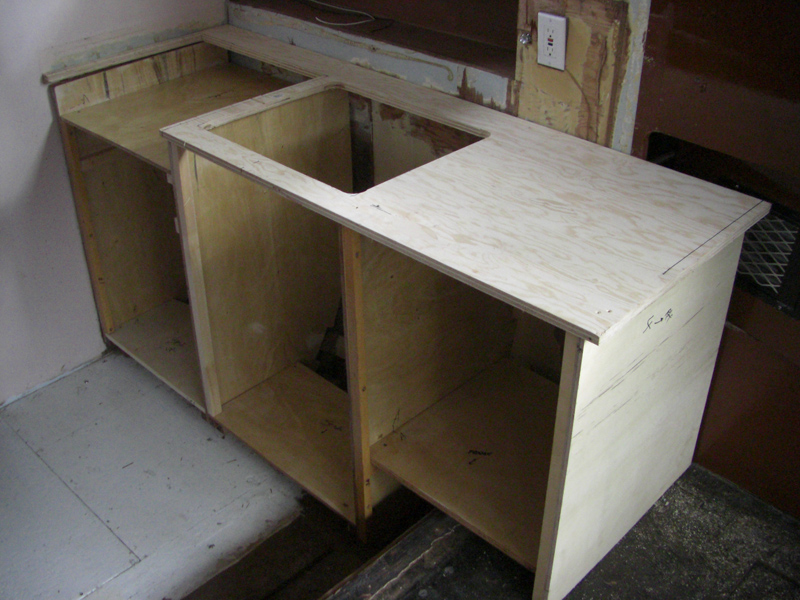
| September 12, 2007 - I used a couple of scrap pieces of plywood to mock up the countertop. I laid out the location of the sink and new cooktop, leaving room in the middle for the refrigerator. |
 |
| |
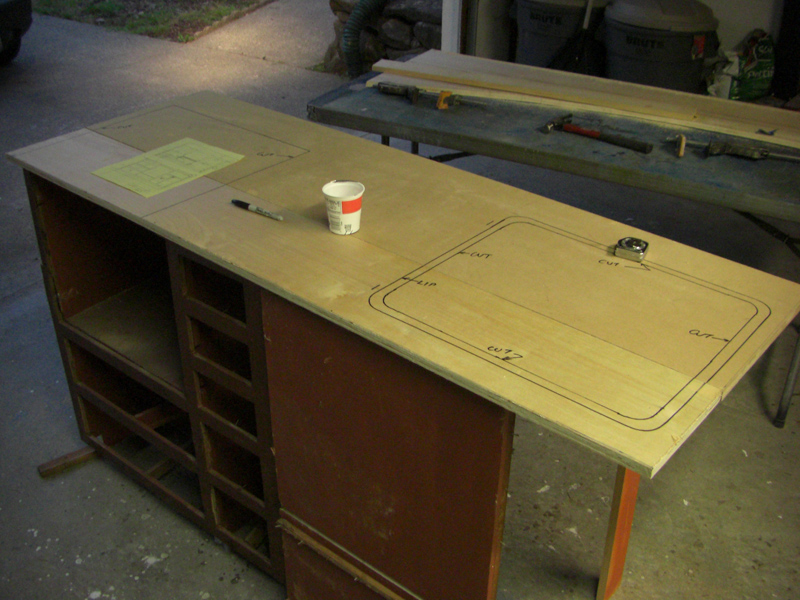 |
| The front face of the cabinet will be replaced with a face panel that accommodates the cooktop, refrigerator and new Ikea-hacked drawers. |
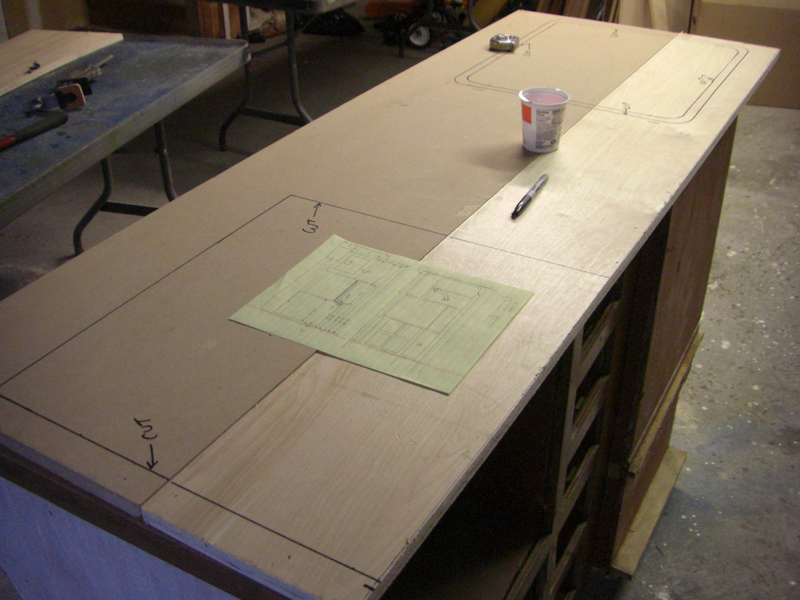 |
| Renee and I spent 9/11 drawing out the new layout and marking up the countertop, then this evening we moved the center bulkhead, cut the old face panel and installed the fridge. |
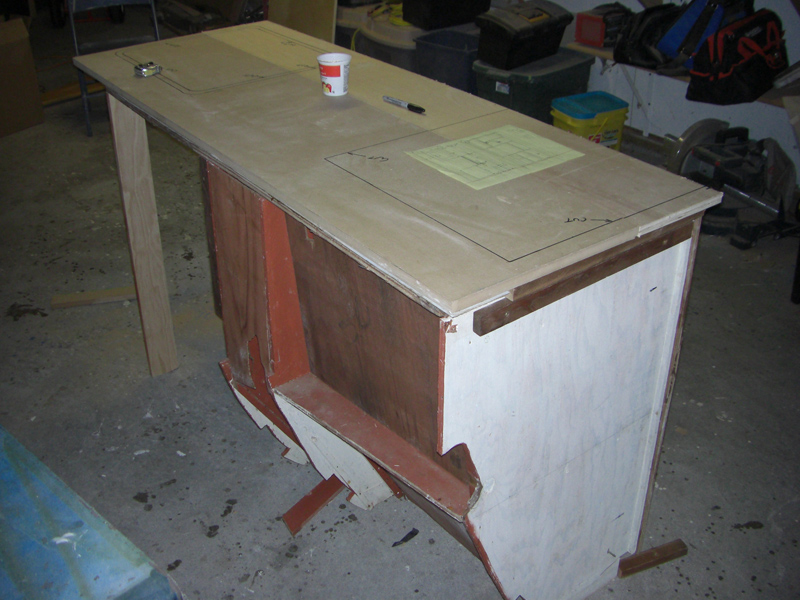 |
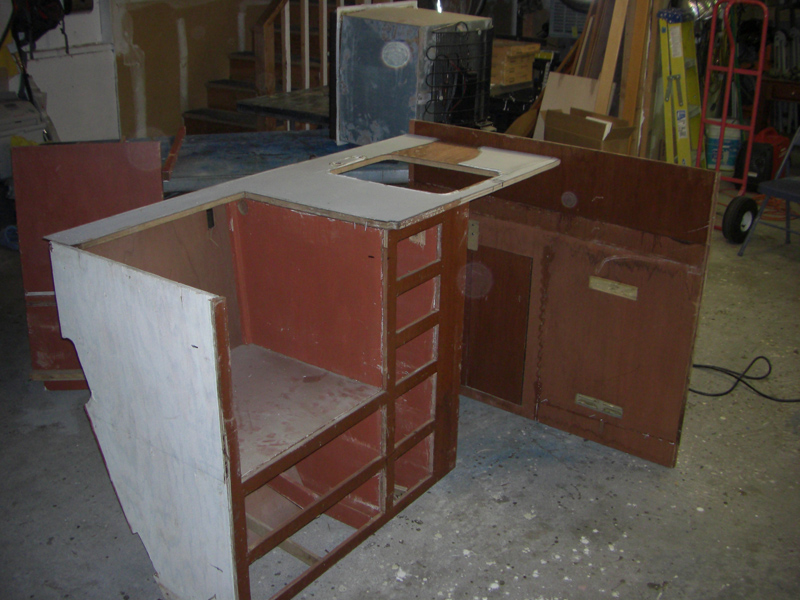
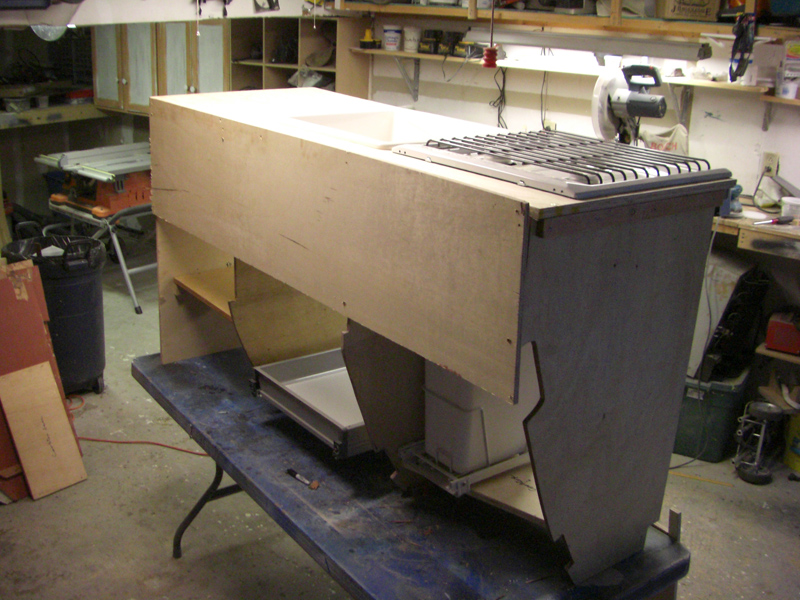
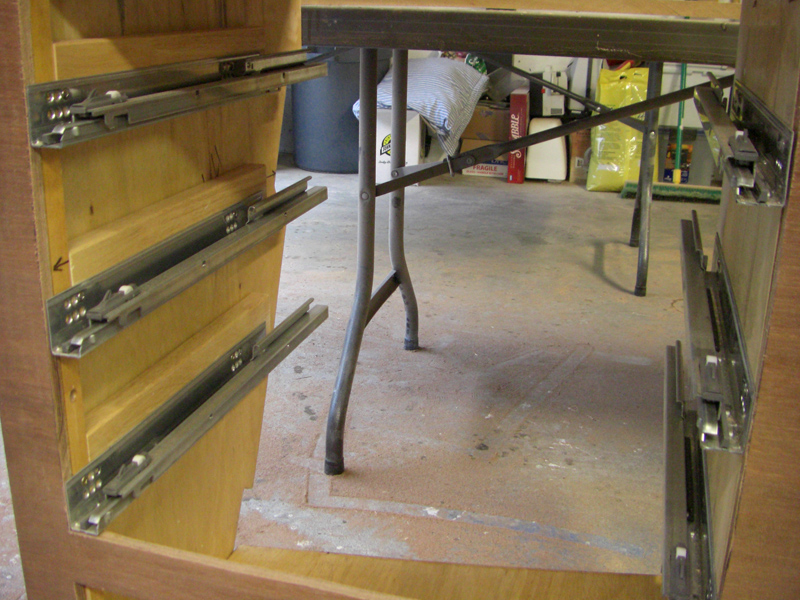
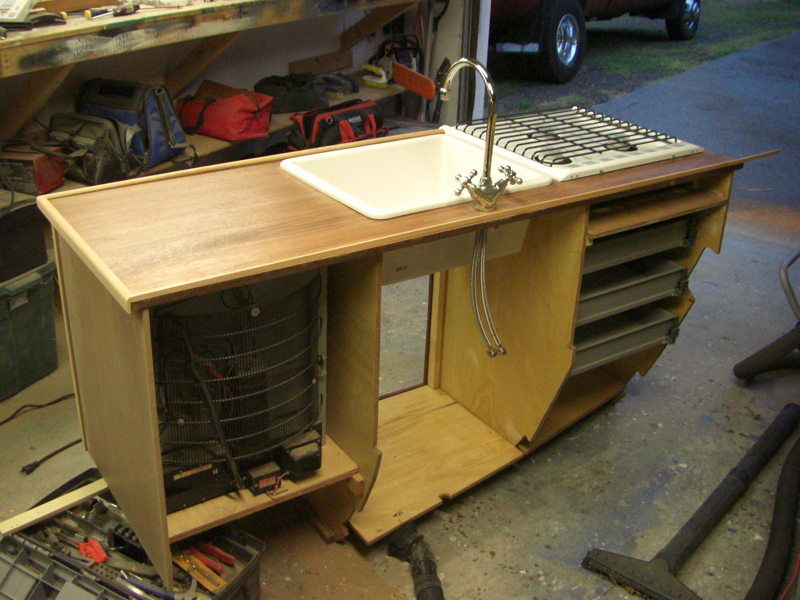
| Above - in this rear view, you can see where the center frame was originally located, we moved it aft 10 inches to provide a space of the fridge - see below. |
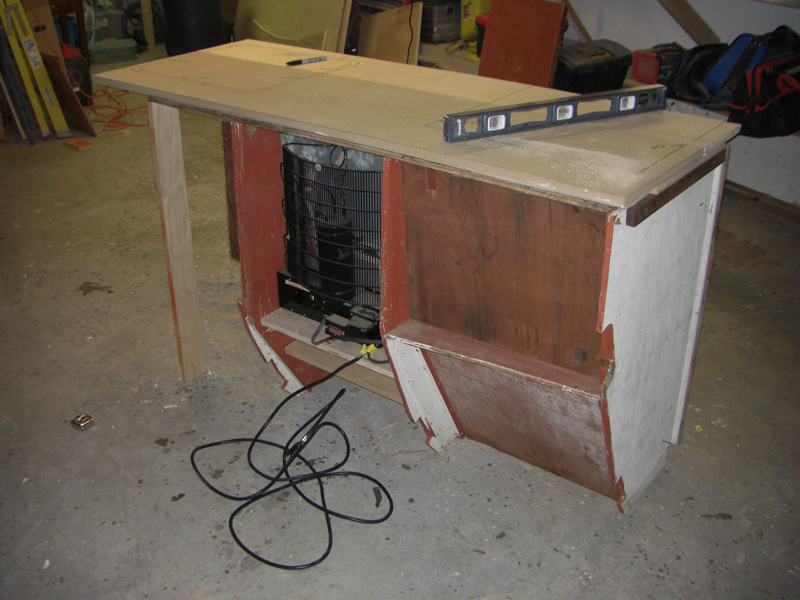 |
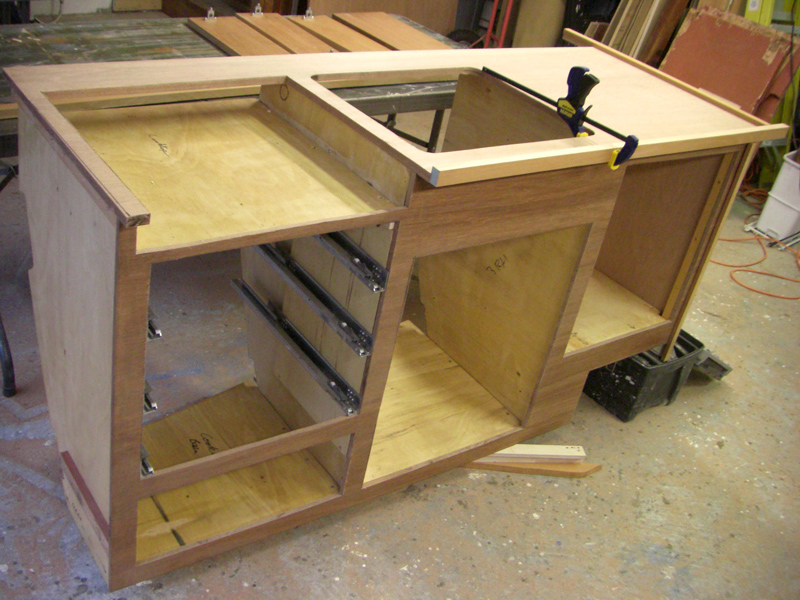
| Above and below - now the fridge is in the correct location, frame relocated. Next I'll make a new aft frame to support the right end of the countertop and fabricate a new face panel with cutouts for the cooktop, fridge, drawers and under-sink doors. |
 |
| After the entire galley cabinet is mocked up, we'll re-assemble the mockup in the boat, bring it back home and cut new frames, panels and countertop from mahogany plywood and solid mahogany, coat everything with epoxy, finish with Epifanes and haul it back down to the boat for final installation. |
 |
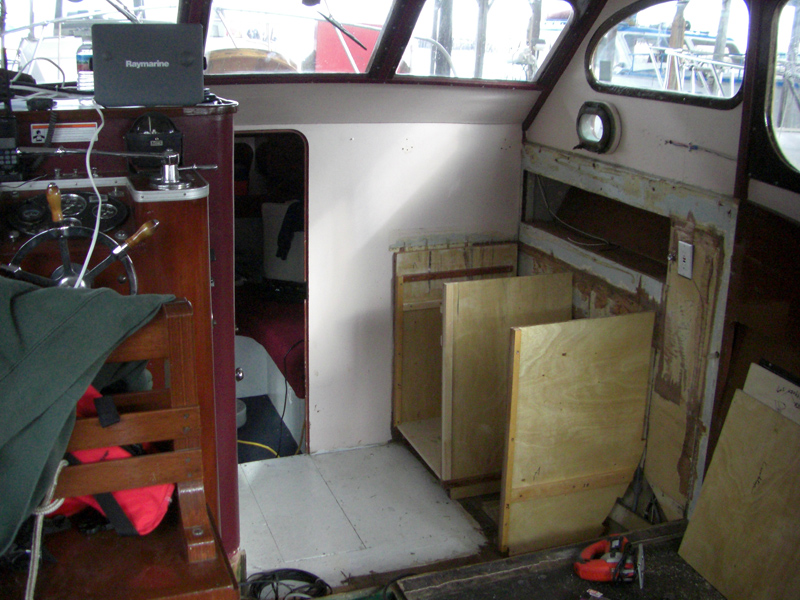
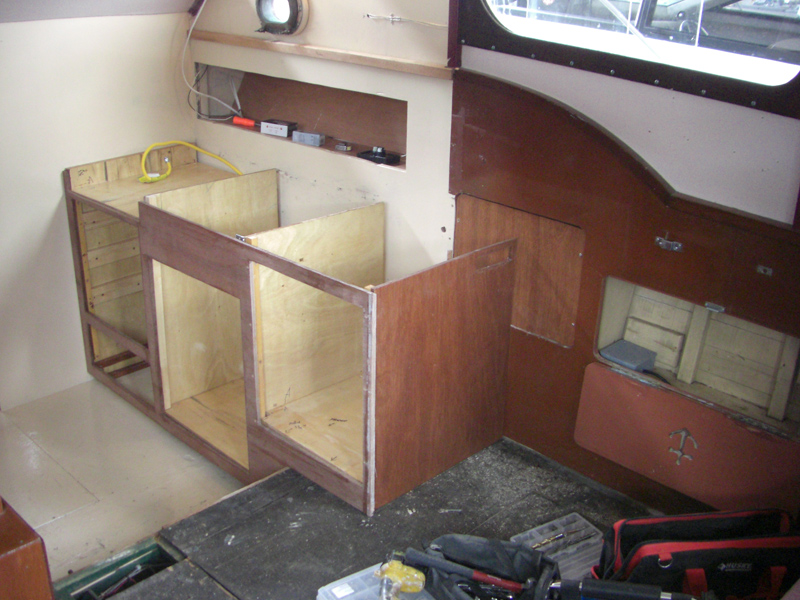
| Sept. 15, 2007 - Above and below, we go back to the Monk and measure, fit and do more work on the interior in preparation for installing the galley cabinets. |
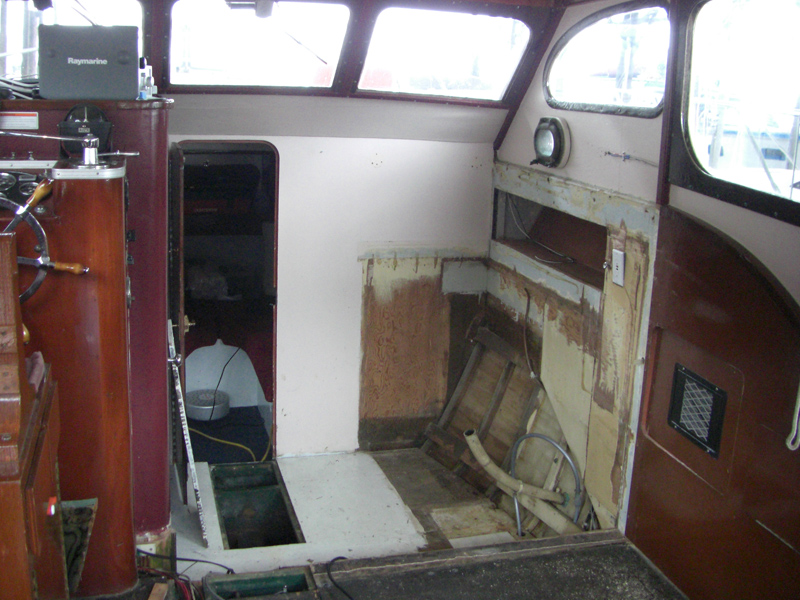 |
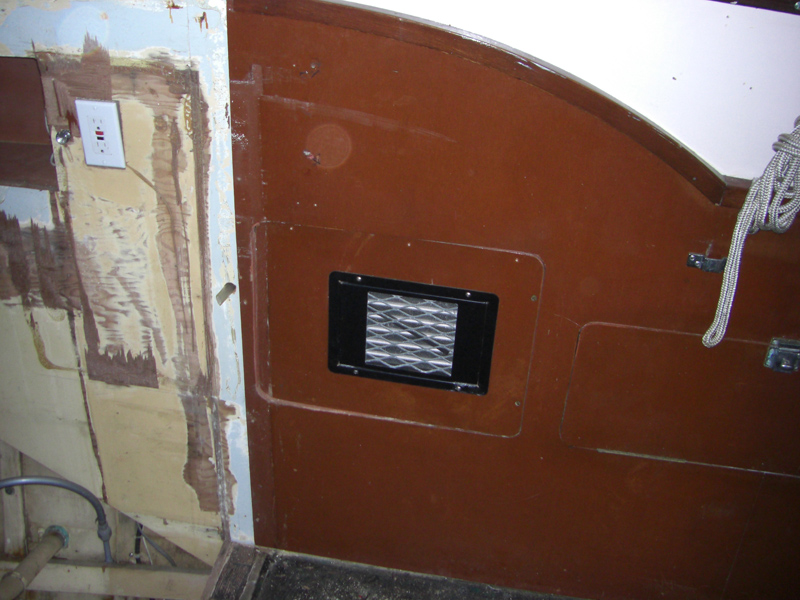
Below - we'll have to move the heater, electrical plug and water pump switch. |
 |
| |
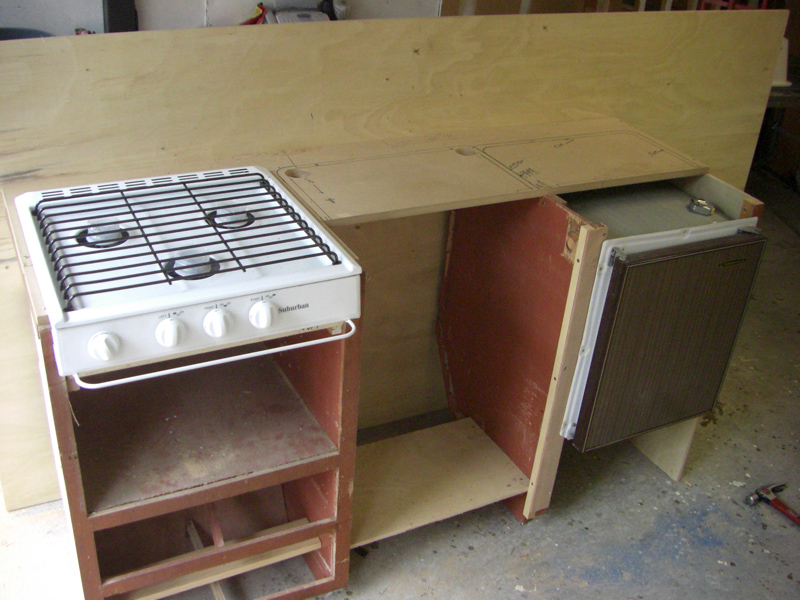 |
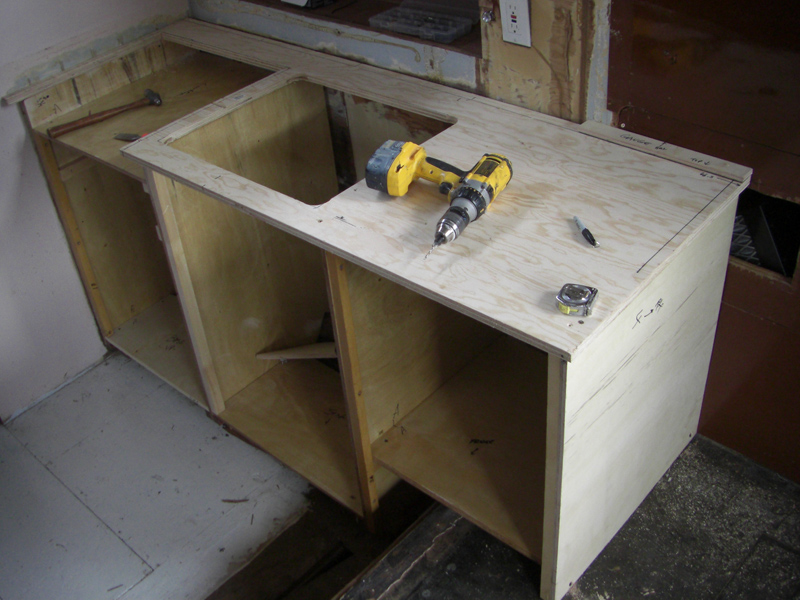
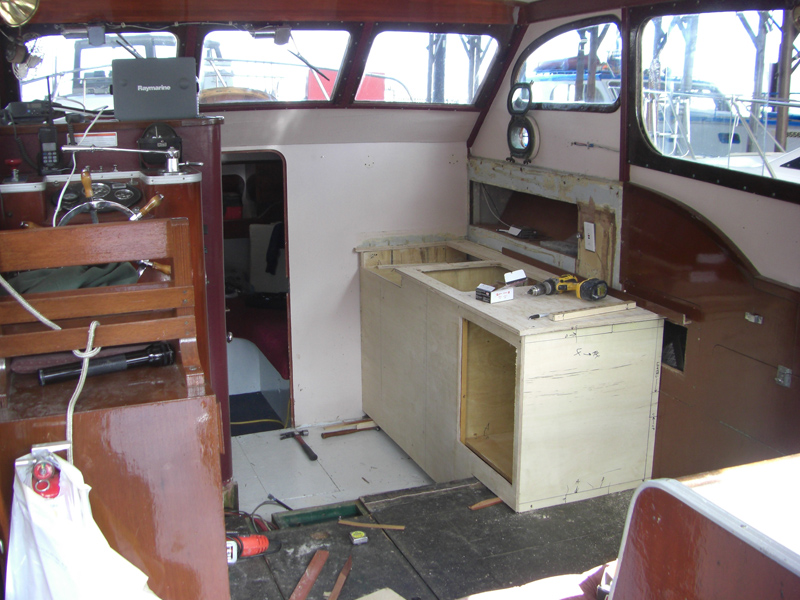
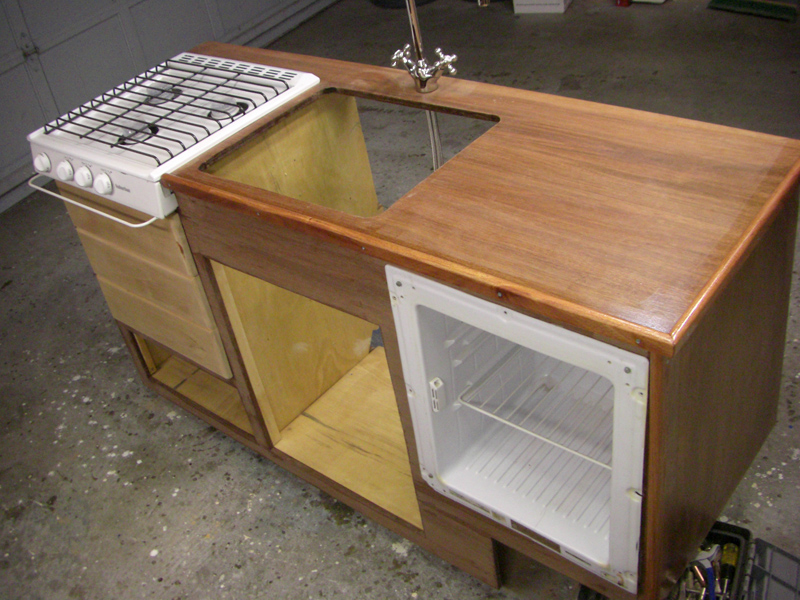
| Above and below - back in the garage, I continue to mock up the cabinet using old cabinet bulkheads and some plywood. I'm doing this to get final locations, dimensions and to make sure everything fits. |
 |
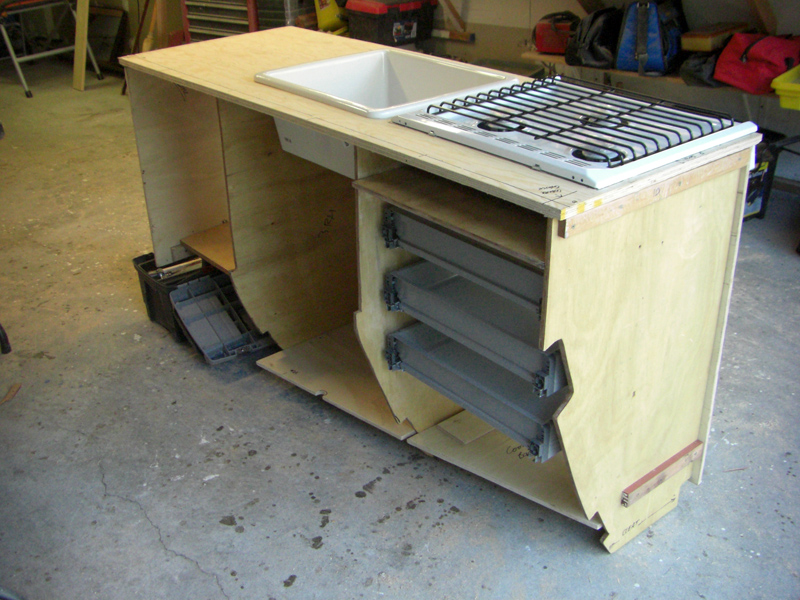
| We had originally we wanted the sink at the aft end, but after going back to the Monk this morning, we realized that it would be much easier to put the fridge on the end, this will allow the existing sink drain to be in the correct place and provide enough depth for the fridge. This was Renee's idea - she thinks of these clever solutions while I scratch my bald head and try to figure out what the hell to do, nice having the Great Mind with me when trying to figger this out. |
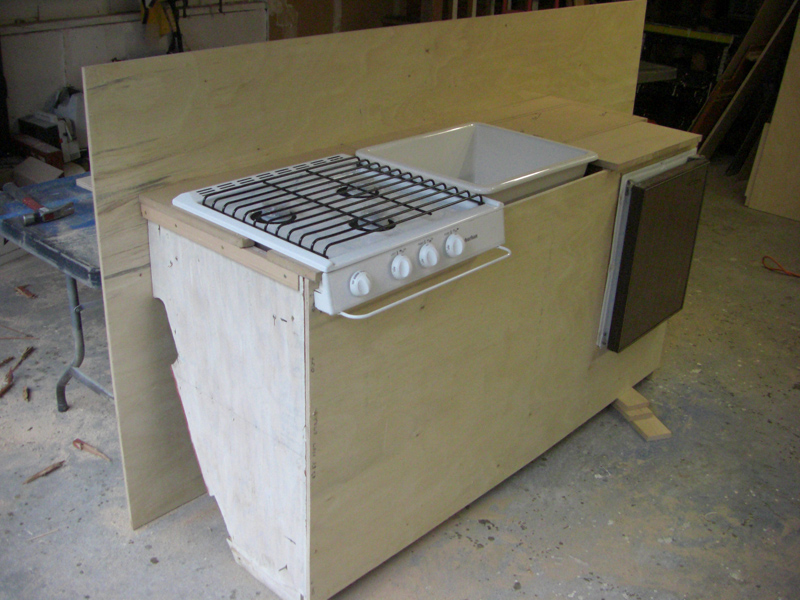 |
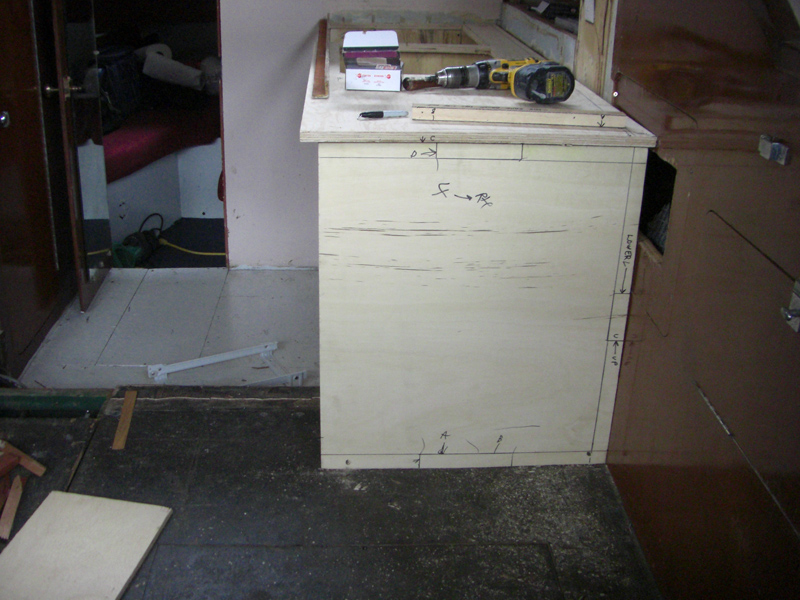
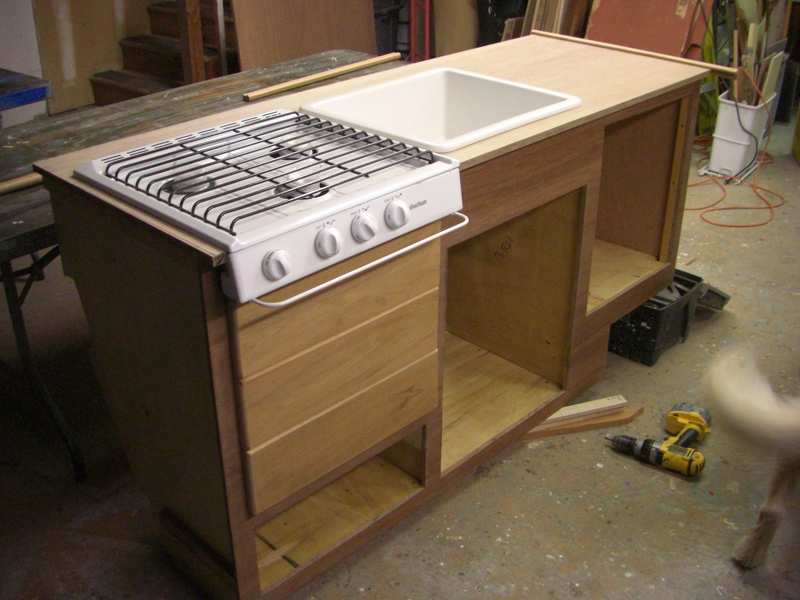
| Temporary face panel on, We'll mark this up, cut out the holes for drawers and doors and use it as a template to mark and cut the final face panel from mahogany. |
 |
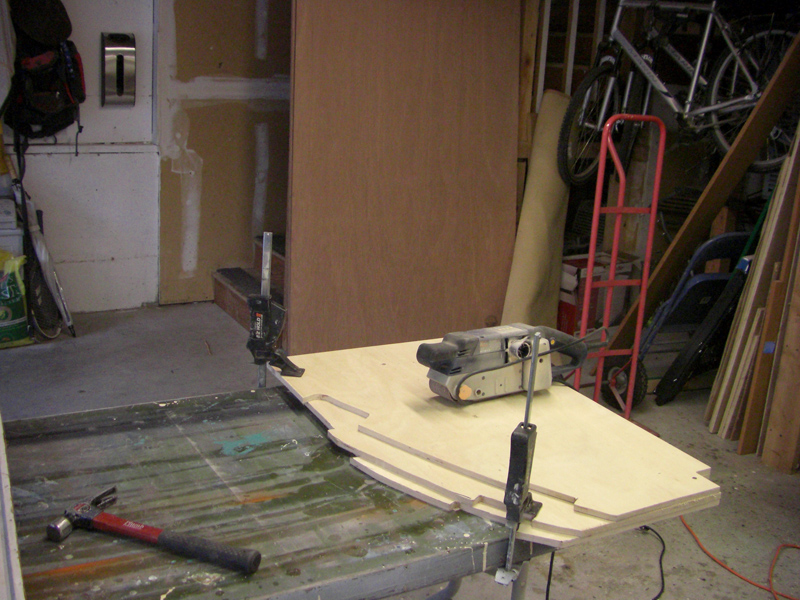
| Above - plywood countertop template being cut and sawn, I'm using this piece as a template prior to cutting up a $100 piece of mahogany, best to screw up some cheap CDX than an expensive chunk of wood. So far, this has taken 2.5 full days of work to get this far. |
 |
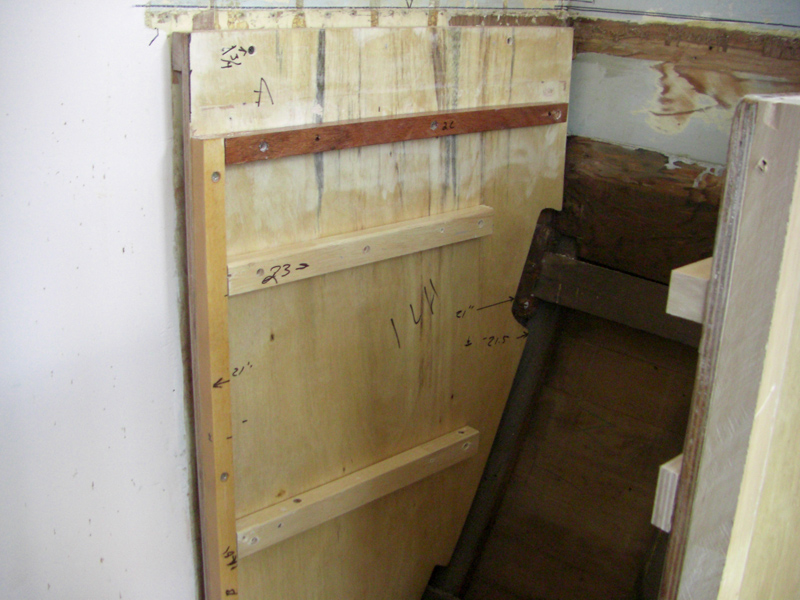
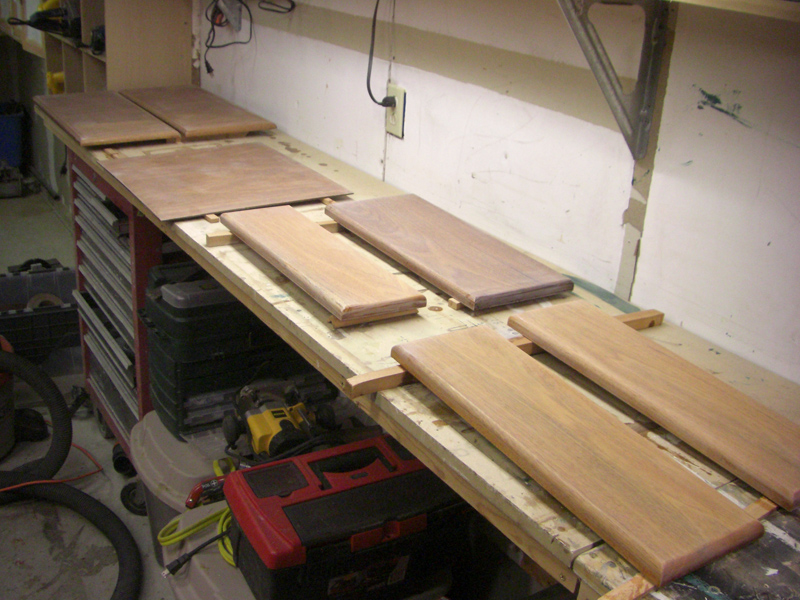
| Above - Sept. 19, 2007 - I sand the bulkheads to shape and square them up. These pieces are 14mm meranti plywood. |
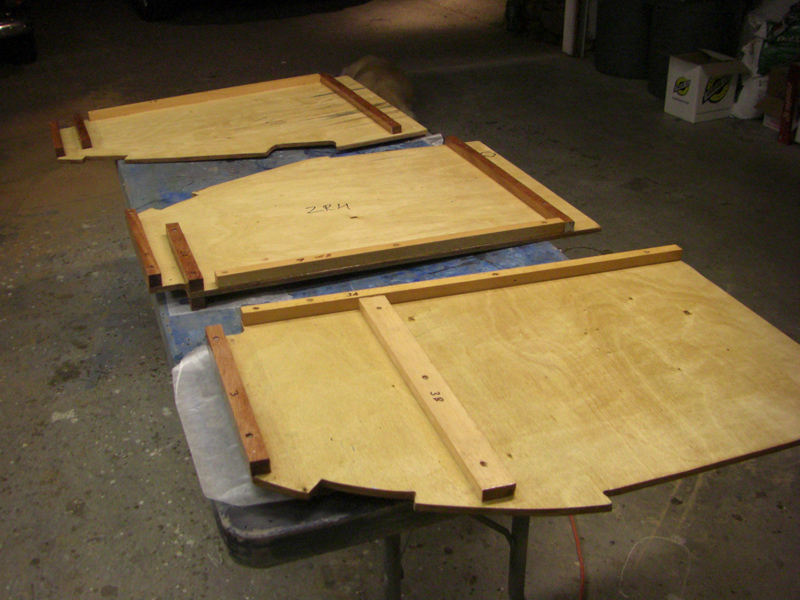 |
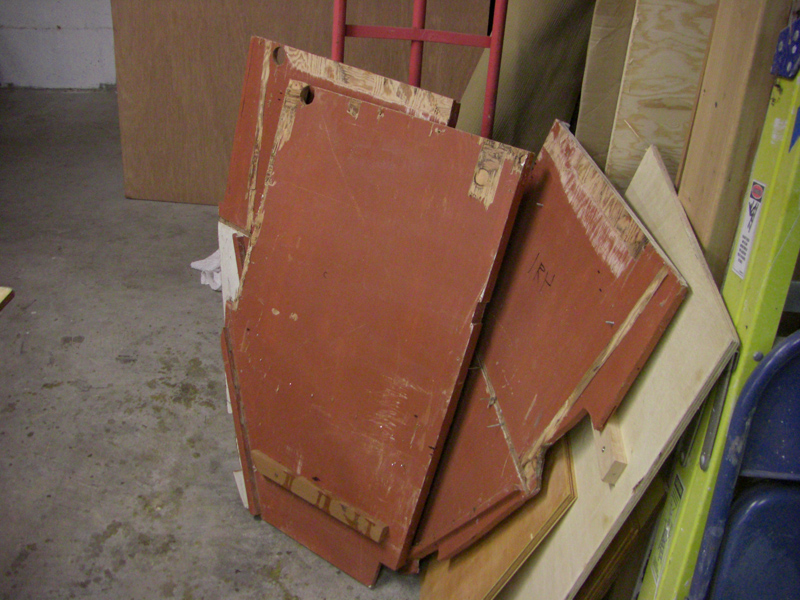
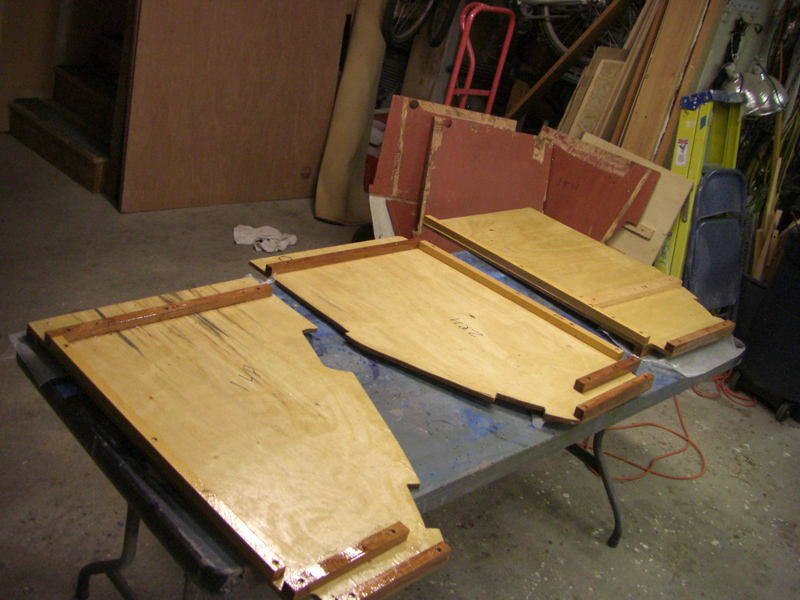
| Above - bulkheads with frame blocks installed to support the various shelves and provide a cleat to attach the bulkheads to the boat's floor. Below - the old frames sitting in front of two pieces of mahogany plywood that I will use for the countertop and the face panel. |
 |
| Below - the bulkheads are completely coated in epoxy. The large plywood sheets of mahogany in the background are 18mm (countertop) and 14mm (face panel) and they cost $237 for both at Edensaw. Epoxy and Polyurethane paint was $180, mockup plywood and meranti frame wood was $200, cooktop was $209, sink and drawers from Ikea were $214, still to purchase: propane tank, regulator and miscellaneous fitting, fasteners and consumables. |
 |
| Next, we go down to the boat and mock up the installation, make final adjustment and cut the finish mahogany pieces. |
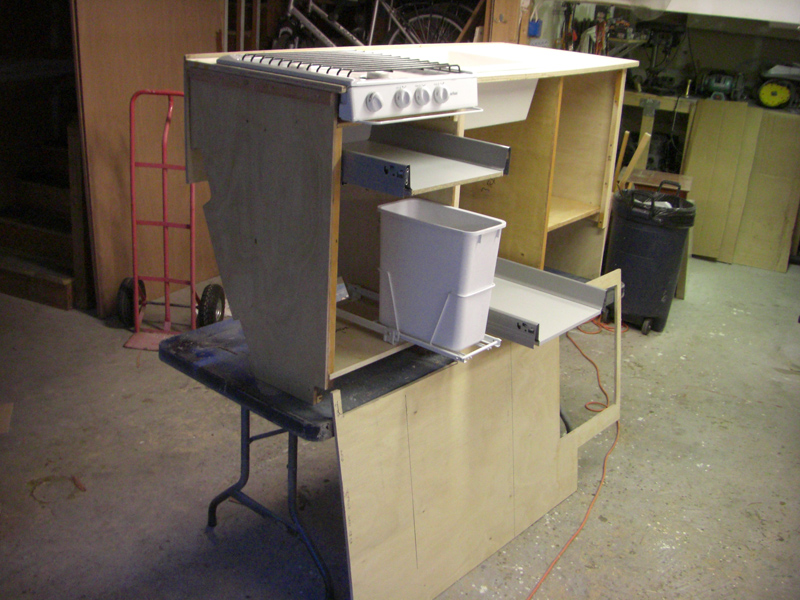 |
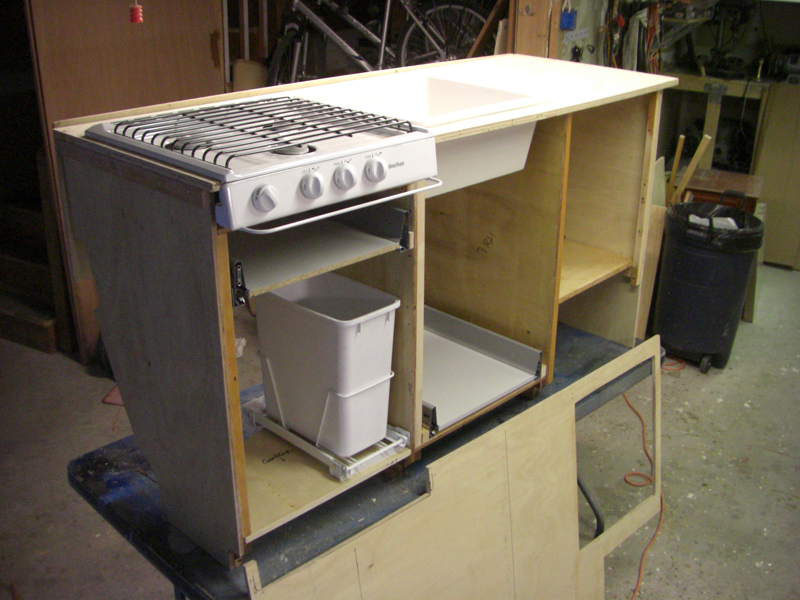
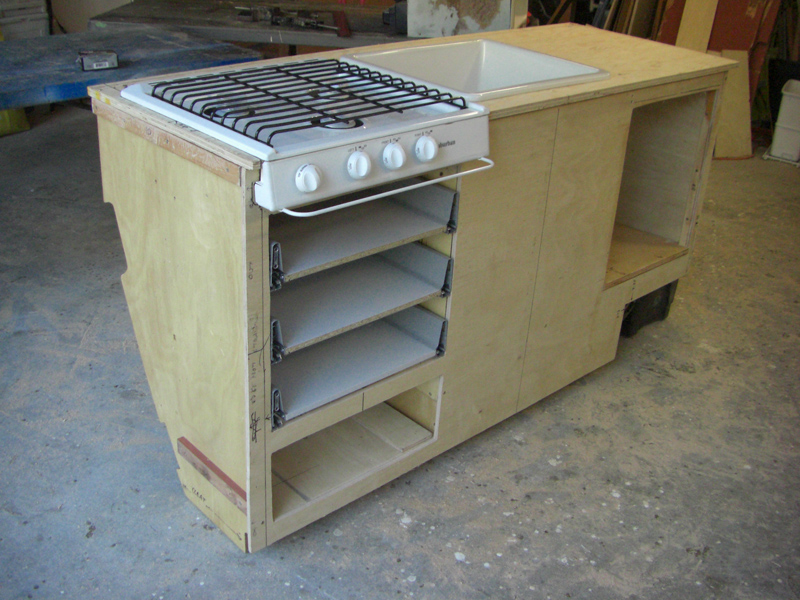
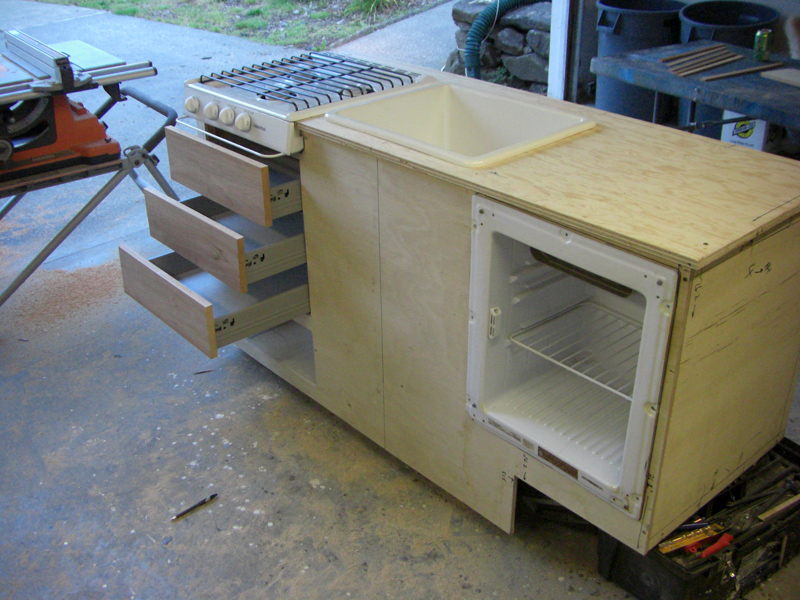
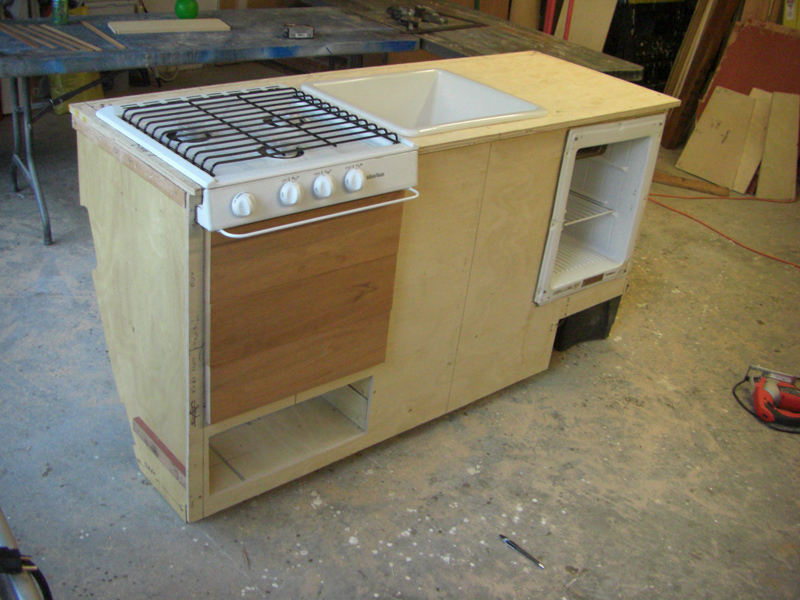
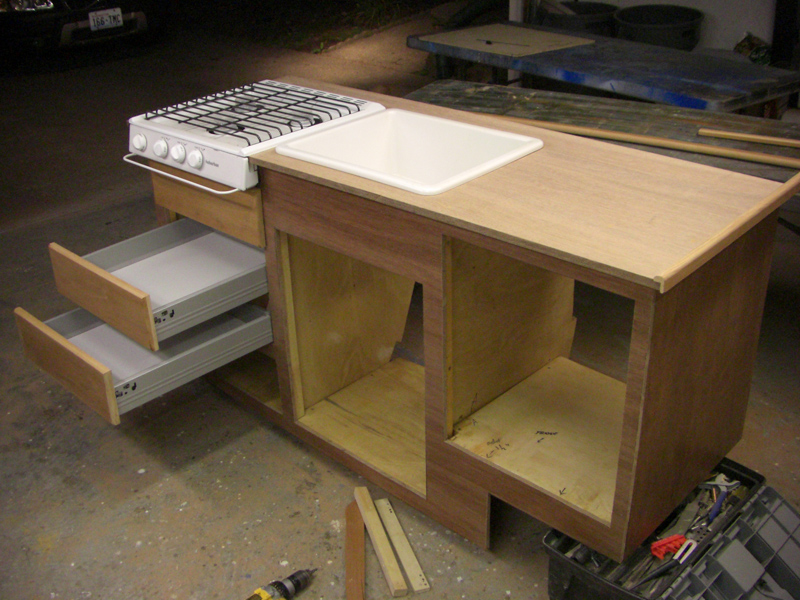
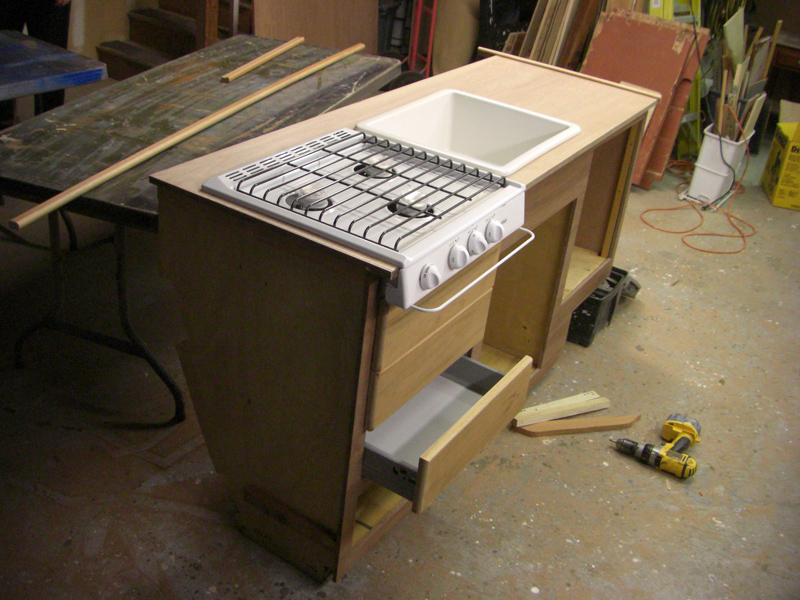
| September 21, 2007 - Above, we re-assemble the epoxy coated pieces, assemble the Ikea drawers, make sure everything fits, install the sliding waste bucket and relocate things that I moved because they don't fit any longer after I moved them. |
 |
| With everything re-assembled again, critical monuments set in place, we're ready to take it all back apart, re-install the cabinet in the boat with the mockup countertop and face panel, adjust for a perfect fit, then bring everything back to the garage for final cut and fit of the finish panels. |
 |
| Once everything is sized for final assembly, we'll cut the finish countertop and face panel, coat with epoxy and 10 coats of varnish, cut new drawer fronts and doors for the drawers and cabinets, then take it all back down to the boat for final installation. But first, down to the boat tomorrow to prepare the space for the cabinets - sanding and painting of the walls, floors, frames and whatever else. Two weeks, huh? Sure... whatever. |
 |
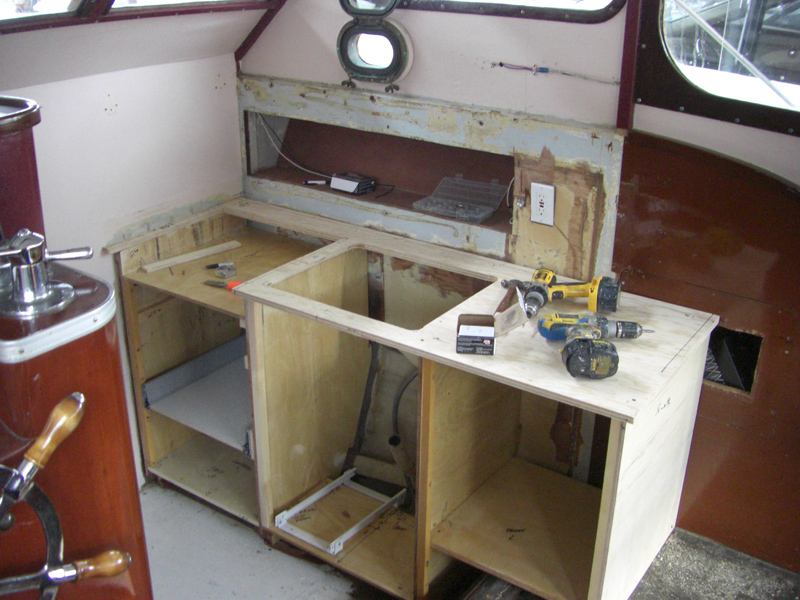
| September 22, 2007 - Down to the Monk and the galley goes in with the frames and mockup countertop and mockup face panel. |
 |
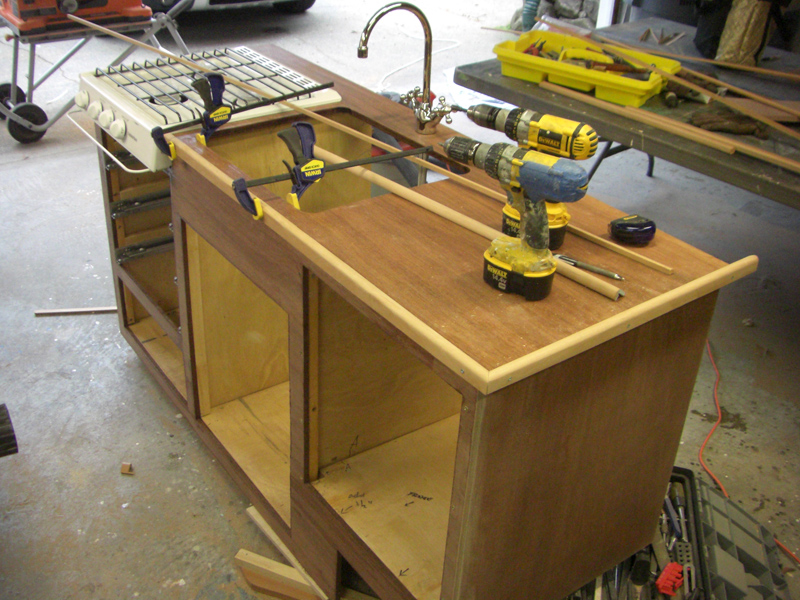
| First, the frames go in to see how they fit and to make notes on adjusting the locations and panels. |
 |
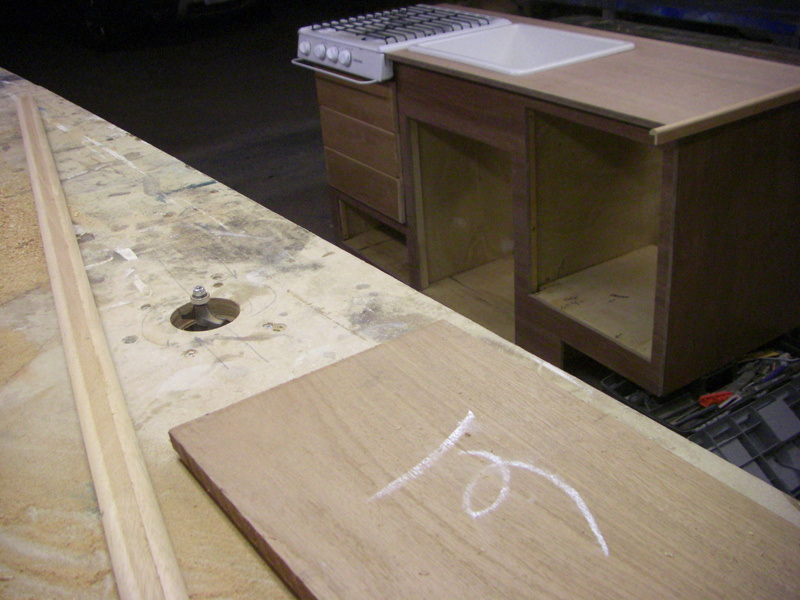
| Then the countertop goes on and gets a scribe line all around using a gauge so I can get out the final layout on the piece of mahogany that I bought for the finish countertop. |
 |
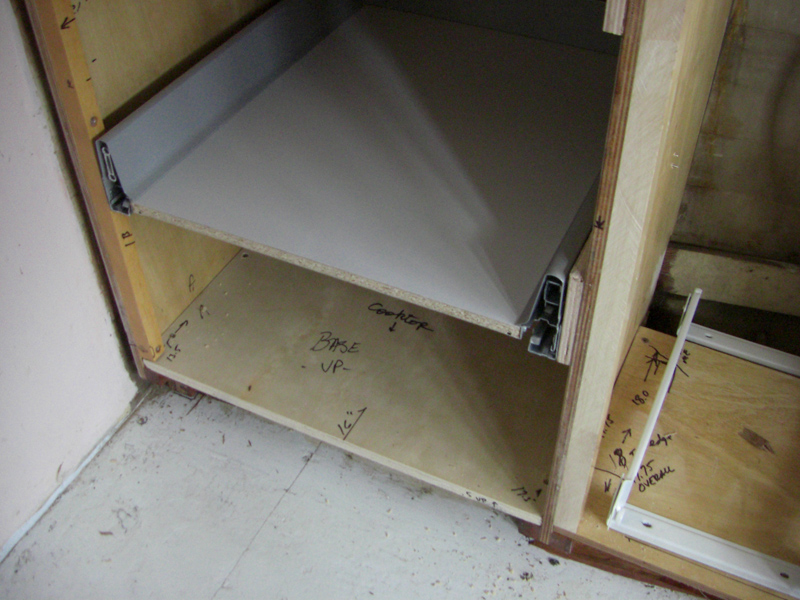
| Below - I fit one of the Ikea drawers into the lowest position (of three drawers that will go under the cooktop) to insure there is enough room for the 20" deep units. |
 |
Sliding trash can base gets located under the sink. |
 |
| Below - the sink drain is perfect, grey pressure water line is also in a perfect location for the sink in this spot. |
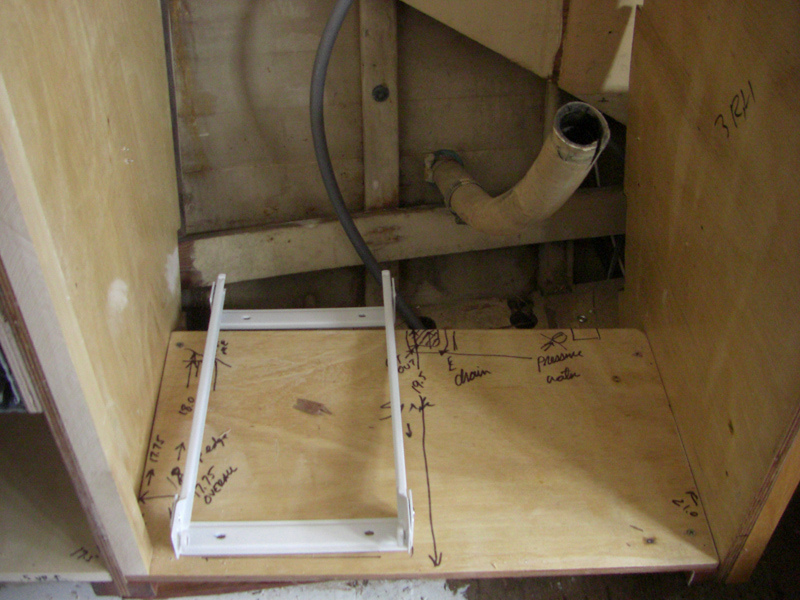 |
| I use the gauge to mark the end panel for final fit prior to cutting it out of finish mahogany. The rectangular hole behind the countertop holds the cabin heater; I'll have to relocate the heater aft of the cabinets and mount it in a vertical orientation. |
 |
Below - face panel installed. |
 |
| Once I have everything fit and marked, I remove all of the pieces again and take them back to the garage for final cutout of the mahogany pieces and assembly. |
 |
Below - time to clean up the galley area, fill in some dings and scrapes and paint it. |
 |
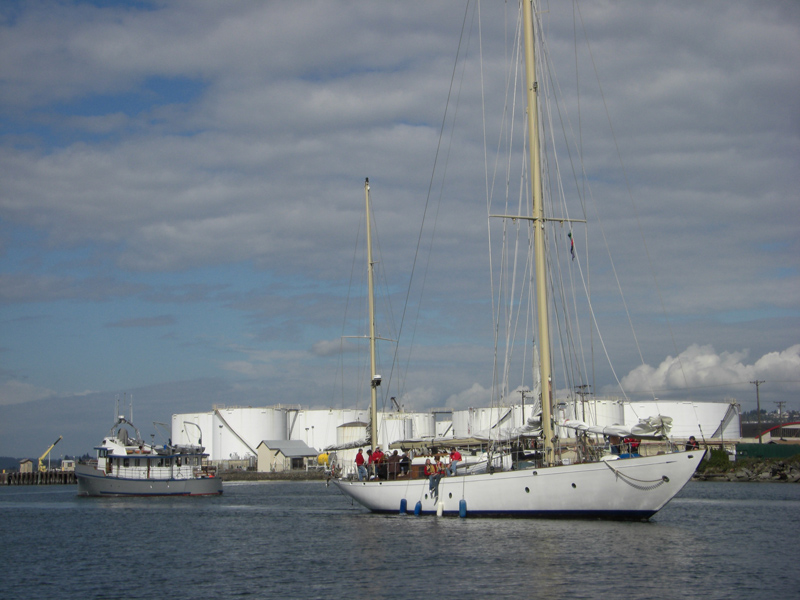
| But first, the Sea Scouts are heading back in so I take a break to watch them sail by in their ketch while another group of Sea Scouts head out into the bay in the grey-hulled motor vessel Francis H. Curtis. |
 |
| |
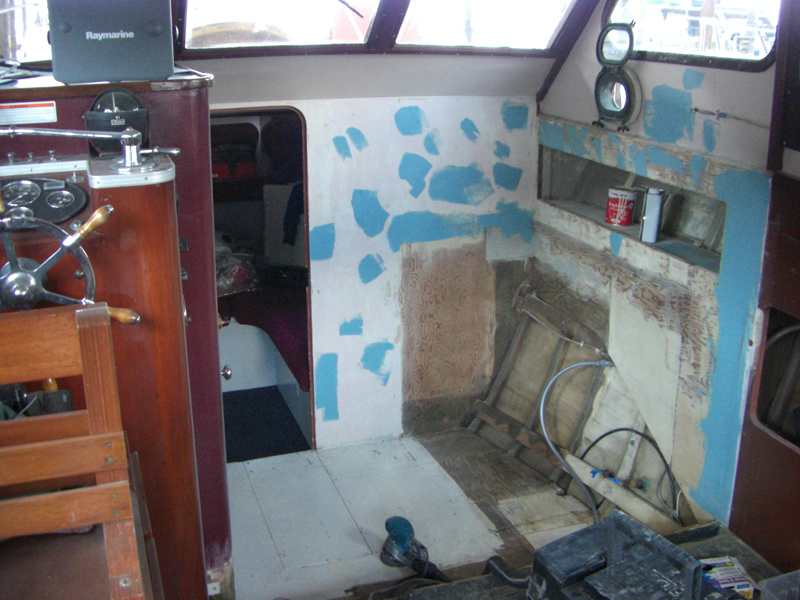 |
Above - filler applied and ready to be sanded down, below - two coats of Interlux polyurethane finishes the job. |
 |
| |
 |
| September 25, 2007 - Back in the shop, the galley is re-assembled for final fit and markup of the finish panels, drawer installation and sink door cutouts. |
 |
| |
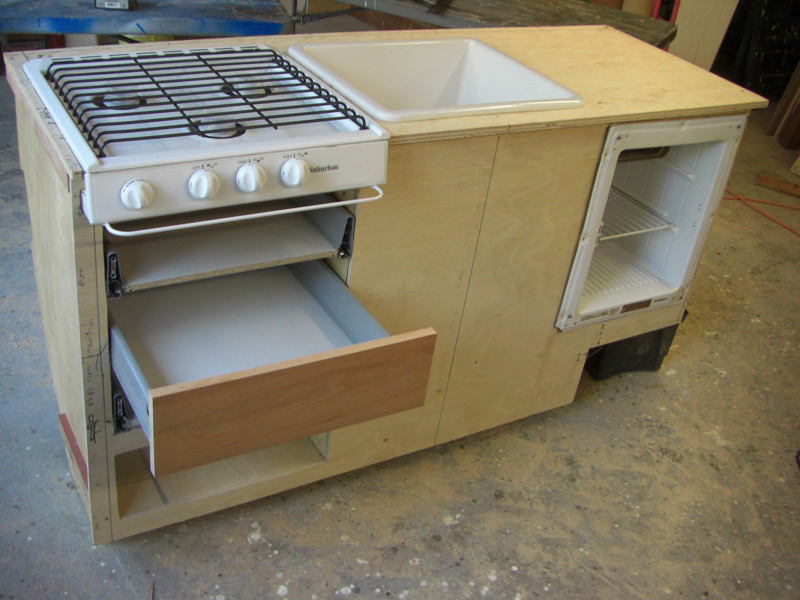 |
| The Ikea drawers go in and I cut some mahogany drawer fronts from some stock I bought at Edensaw last Saturday. |
 |
| |
 |
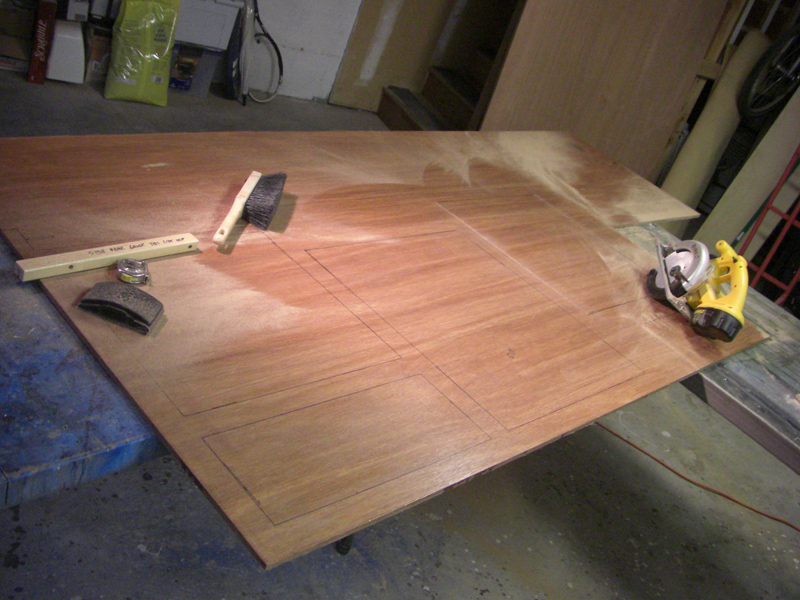
| Below - September 26, 2007 - I lay out the finished template onto the new 14mm mahogany plywood. |
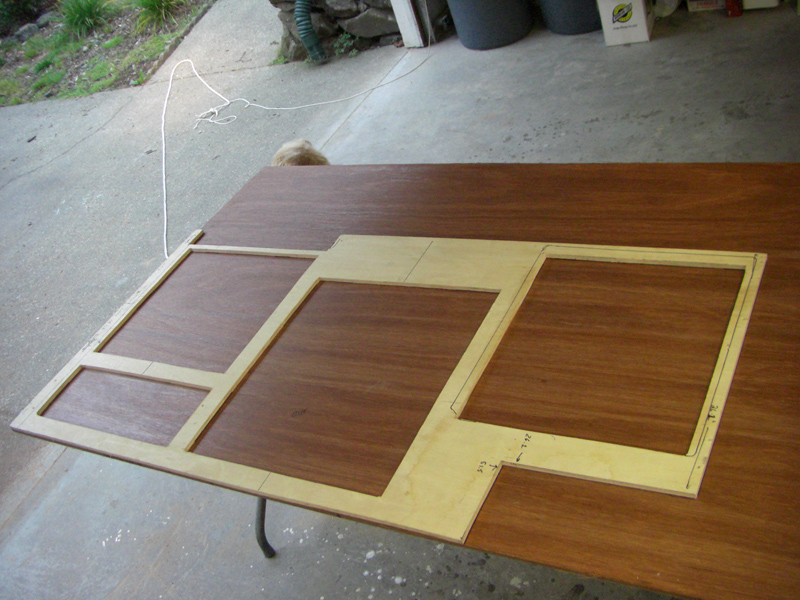 |
Below - I cut the plywood with the circular saw and a jigsaw. |
 |
| |
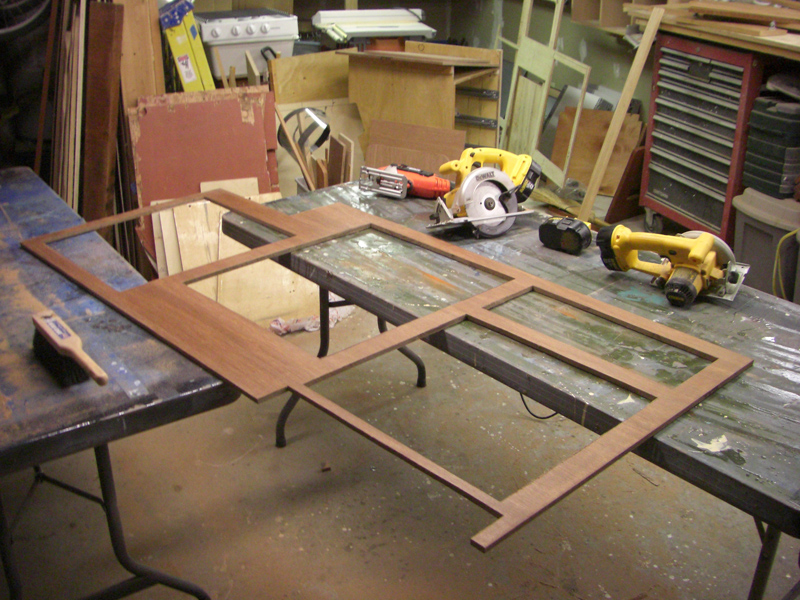 |
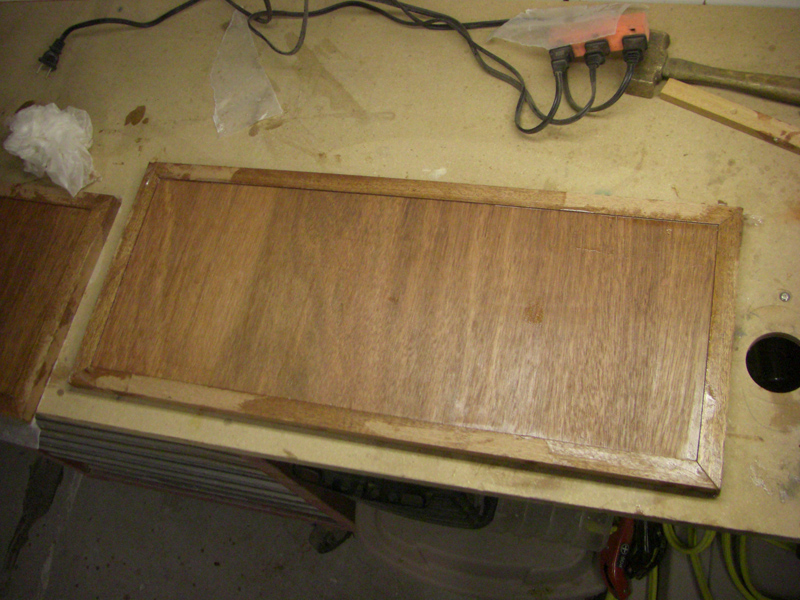
Above - the finished face panel and below, the countertop is cut from 18mm mahogany plywood. |
 |
Above - I fit some trim pieces prior to routing them round. |
 |
| Above - the sturdy Ikea drawer tracks, heavy steel on ball bearings, very nice units, only $20 each for the tracks and drawer assemblies, less the drawer fronts. |
 |
Below - my router table and the shaped drawer fronts installed. |
 |
| |
 |
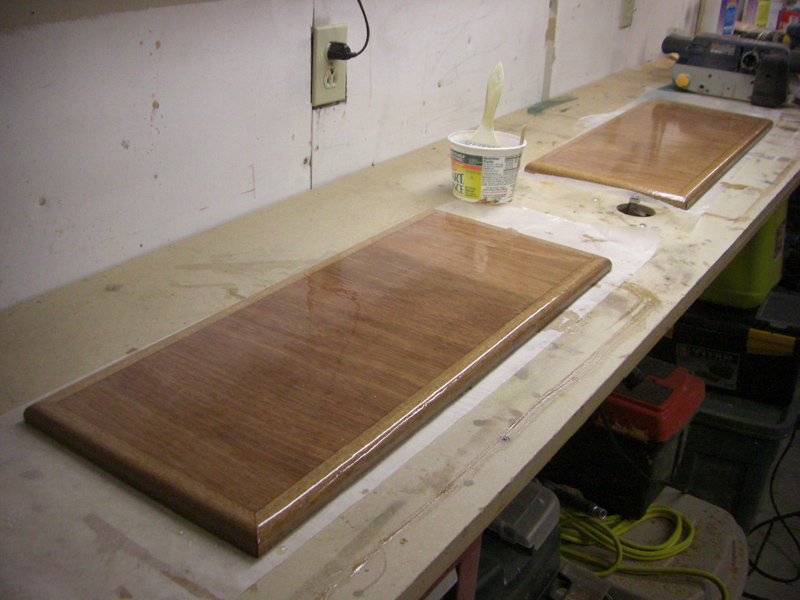
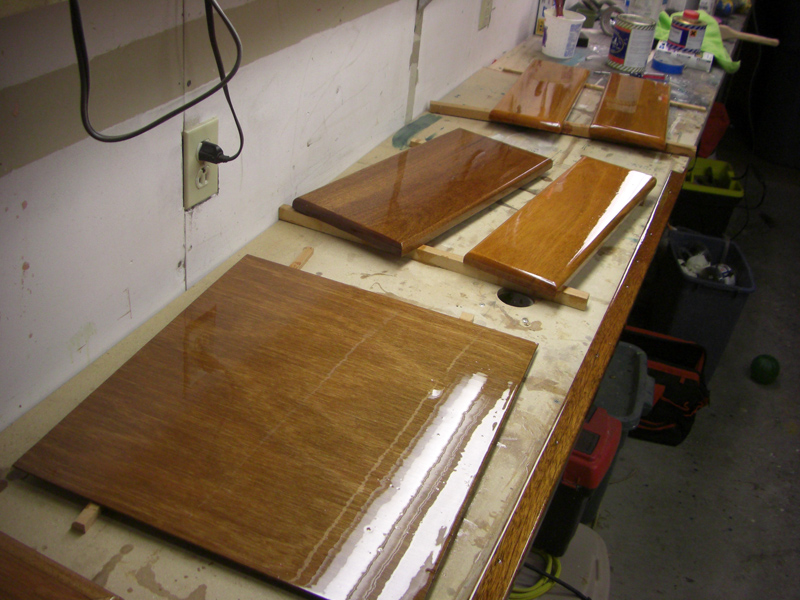
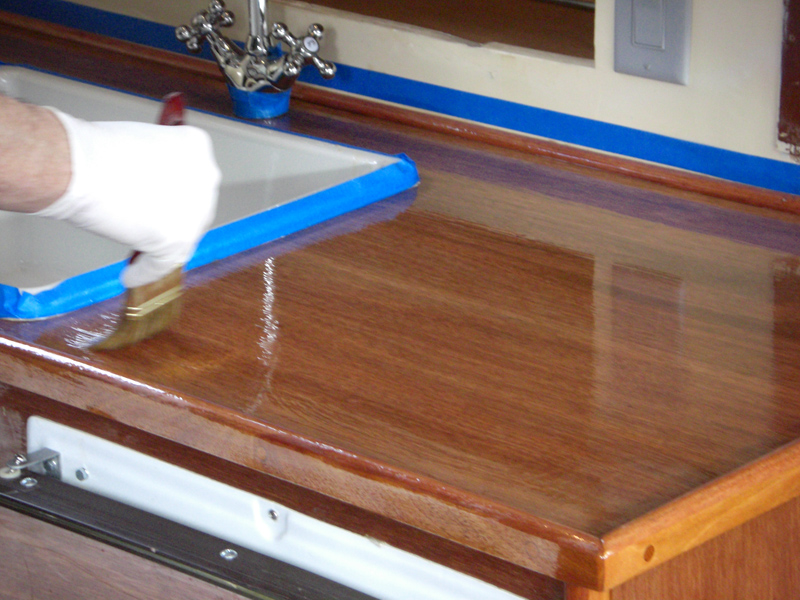
| The face and side panel is coated with MAS epoxy, the countertop will get the same treatment and will be the same shade as the face panel. The, numerous coats of my favorite goop - Epifanes high gloss. |
 |
| Getting close now - I plan to make the doors under the sink from mahogany plywood, trimmed with solid mahogany. The fridge front will be 3mm mahogany plywood. |
 |
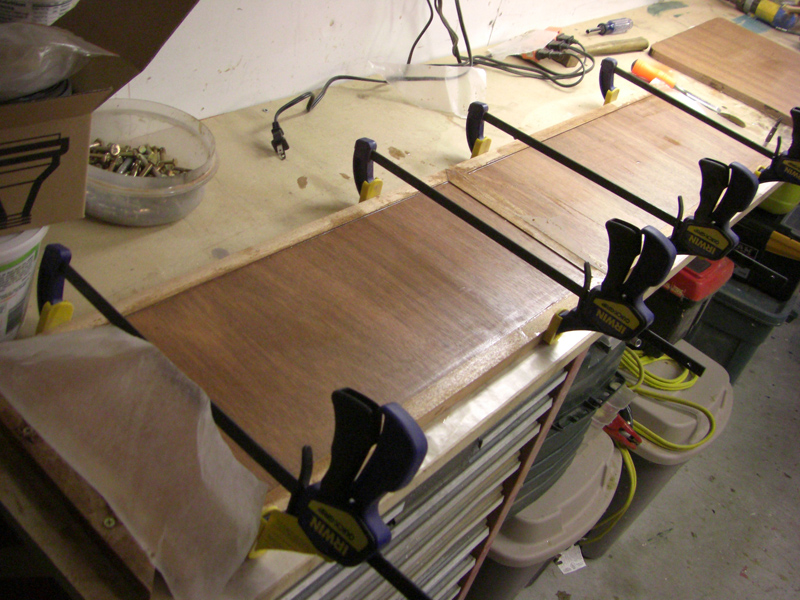
| Below - 9/30/07 - I start to fit the counter rails. These rails are ripped from mahogany boards I bought from Edensaw. |
 |
| |
 |
All fitted and temporarily fastened with steel screws. |
 |
Below - Now the rails are epoxied in place, steel screws to be replaced with bronze and plugged. |
 |
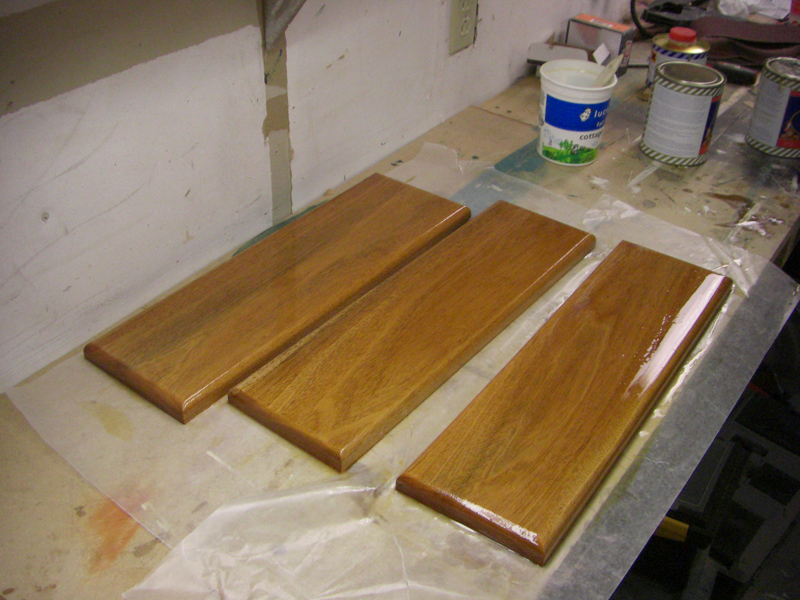
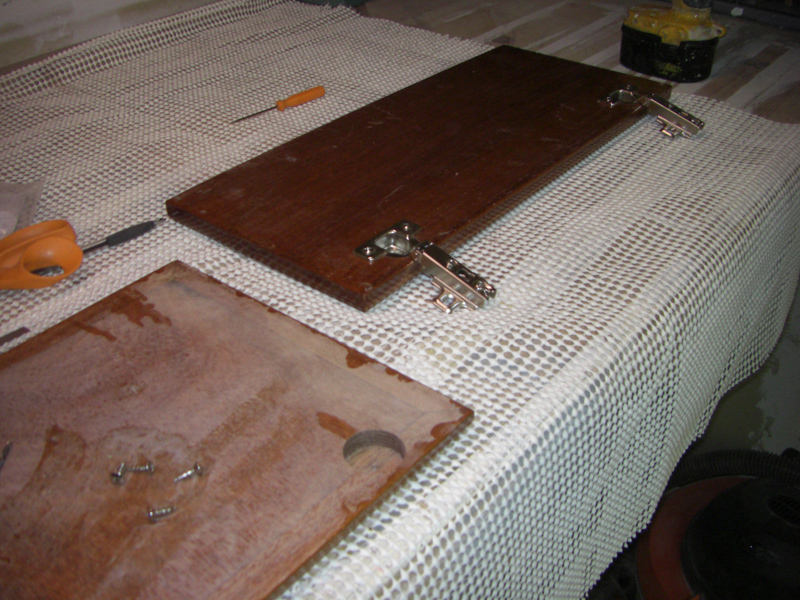
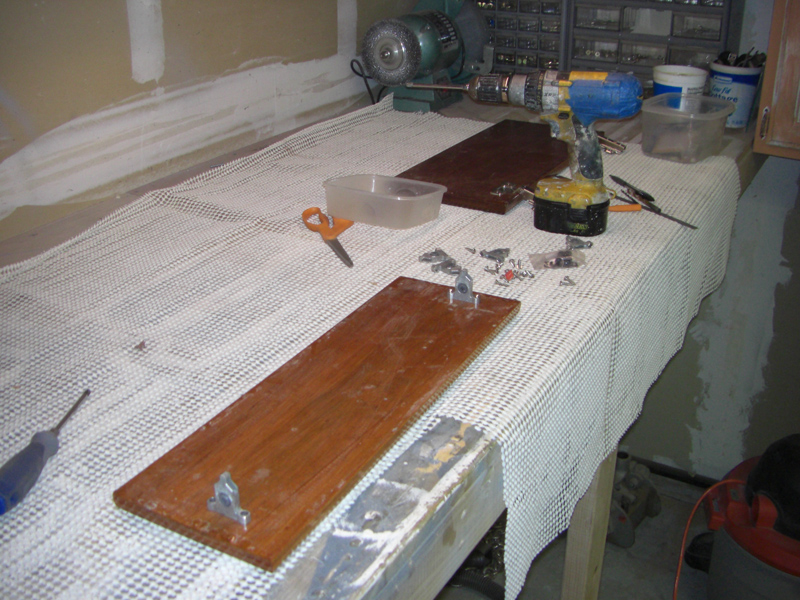
| Below - I make up some door panels for the space below the sink - those are 18mm mahogany plywood with solid mahogany edges. After the epoxy sets up, I'll route the edges same as the drawers. |
 |
Below - one of the door panels, ready for sanding and routing. |
 |
| Next week is a four-day weekend, I expect to be installing the galley back in the Monk over that four days, plenty of varnishing and other finish work left to do. |
 |
| |
 |
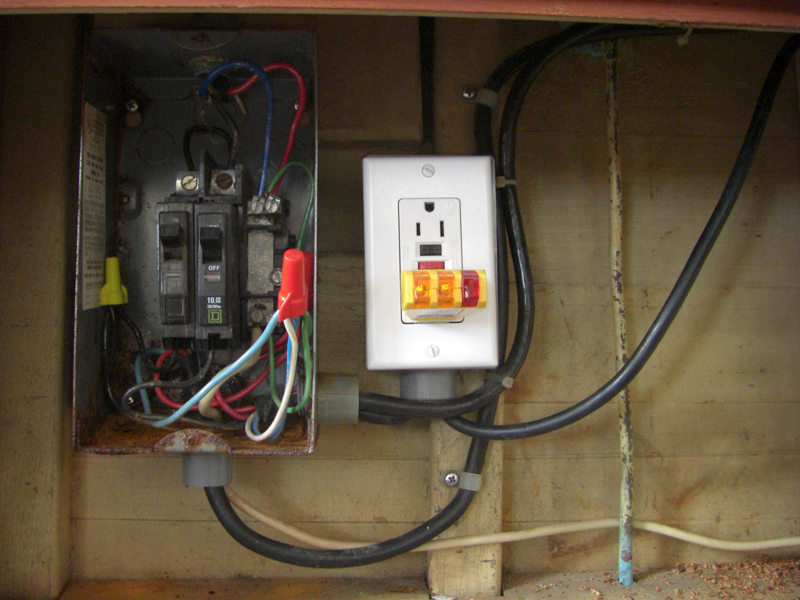
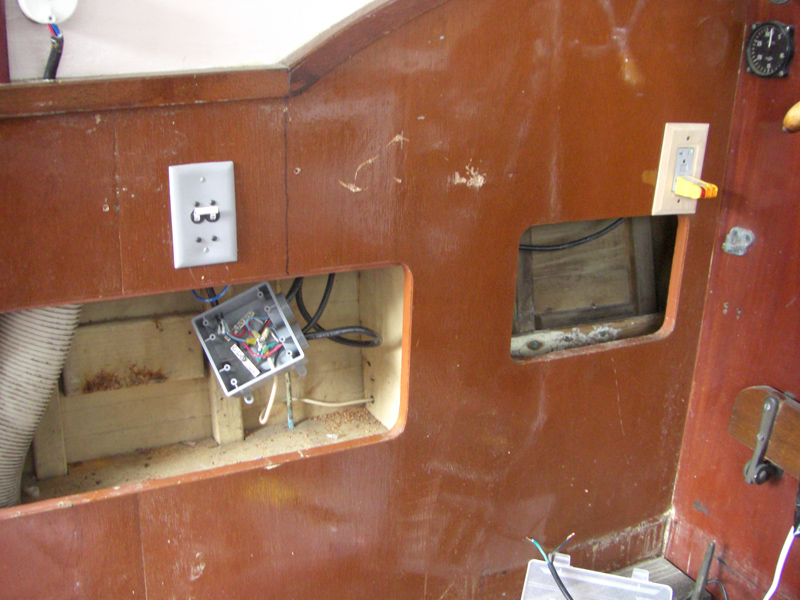
| Below - October 5, 2007 - Prior to installing the new galley, I have some electrical work to do. The previous owner just plugged the battery bank charger into a GFCI outlet, one of three on the boat. I wanted to hard-wire the charger, move the GFCI outlet next to the galley and install a proper marine 110 volt circuit breaker. After moving the helm seat, I found this Square D, home style, circuit breaker box rusting to pieces with household circuit breakers ganged together on only the hot line - not good. |
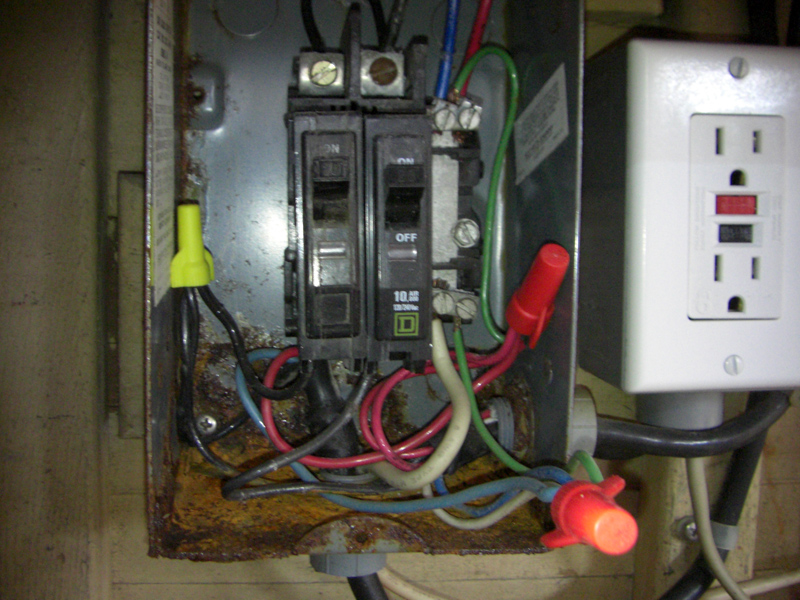 |
| Further investigation revealed all three GFCI outlets had only two wires, hot and neutral; no ground wires to any of the outlets - duh! Needless to say an entire 8 hours were spent re-wiring the 110 VAC system to ABYC standard. |
 |
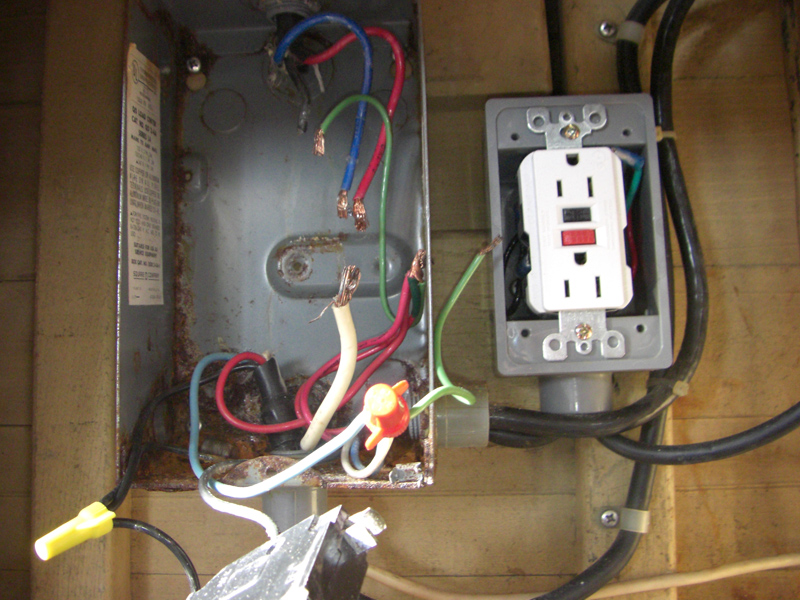
| Above - the 110 VAC junction box on the right side of the boat, from here I'll take off the wiring for the battery bank charger, refrigerator and right side GFCI outlet. |
 |
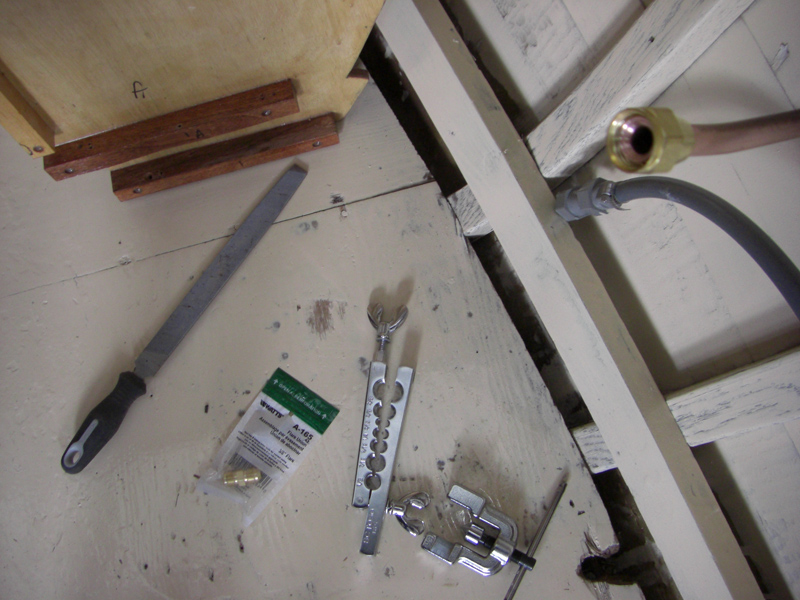
| Below - October 6 - after a couple of hours wiring this morning, I flare and install a new nut on the propane line. |
 |
Below - the epoxy-coated galley frame goes in. |
 |
Below - the finish panel and aft frame - coated in epoxy and sanded so they look a bit dull right now. You can see the 110 VAC J-box in the space to the right. |
 |
| |
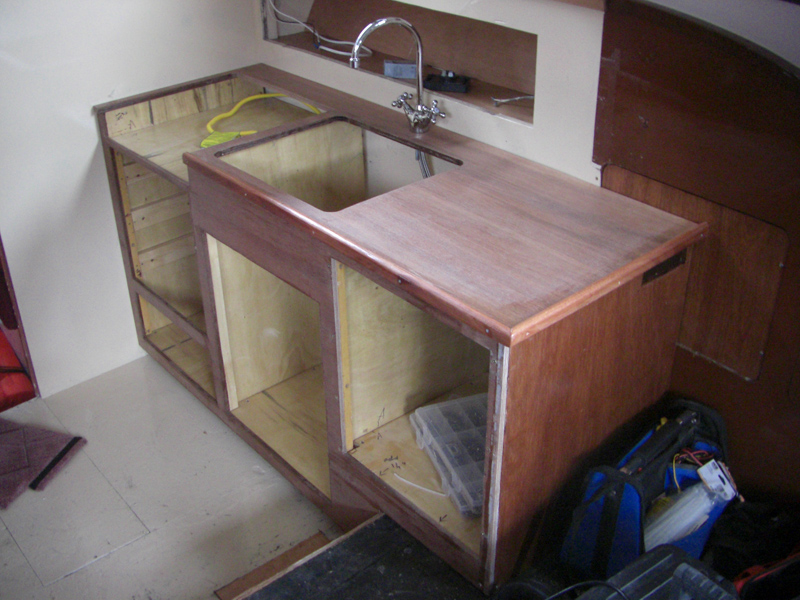 |
Above and below - sink faucet plumbed and counter-top on, also coated in epoxy and sanded. |
 |
| |
 |
| |
 |
| |
 |
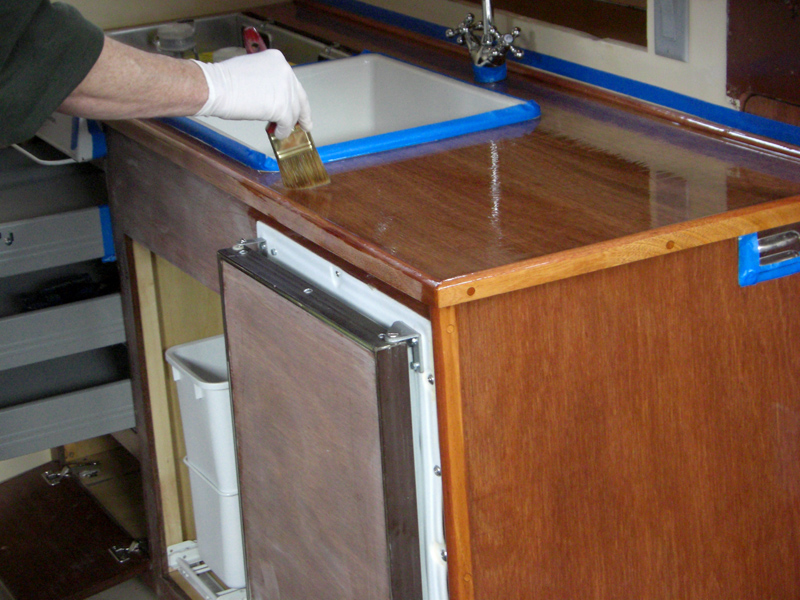
| Above - after a full day of work, the galley structure is in, tomorrow we'll put the fridge, sink and cooktop in. The yellow line is the LP gas line coming up from the copper tube I flared earlier. The copper gas line runs to the transom where the propane bottle will be located in a gas-tight locker. |
 |
Sunday October 7, 2007 - I finish wiring the AC and DC for the fridge, propane leak detector and water pump. |
 |
| Below - the fridge is installed, I just finished connecting the faucet plumbing for good. You can see the water pump switch below the LP gas leak detector and valve control panel above all of the electrical tools. |
 |
| Below - the sink goes in, sealed to the counter-top with 3M 5200; once that stuff sets up, it will be tough to remove. |
 |
| |
 |
| Below - Columbus Day 2007 - Another federal holiday and I'm back down on the boat while Renee goes to work. She drives the truck today because I have the kayak on the roof of the Volvo, going to trade it for a 10' Avon inflatable later today. Gotta love Craigslist! |
 |
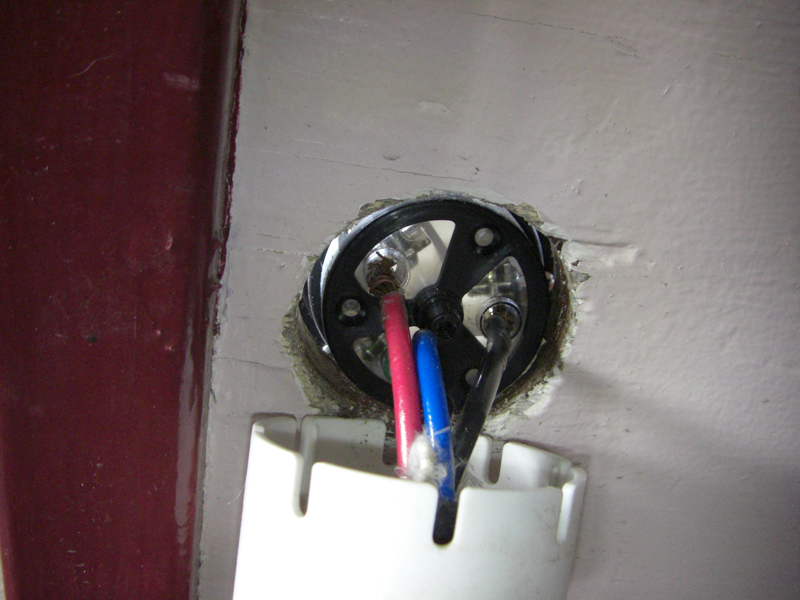
| Today I rip out the old AC wiring. Big problem here with the red neutral and blue ground from shore power having been tied together at the grounding bus on the boat. Big no-no because if the neutral goes to ground inside an accessory, then this arrangement, being tied into the DC ground (large white wire running out the bottom of the box) will turn all of the DC grounded items (like for instance the engine!) into hot neutral AC. That is bad. The rocket scientist who wired this AC system connected one hot wire to two breakers - for what? Anyhow, time to get it fixed. |
| |
| Above - the new marine thirty amp dual breaker on the settee with an old work box it will live in and I just need to modify that blanking plate to accommodate the breaker toggles. |
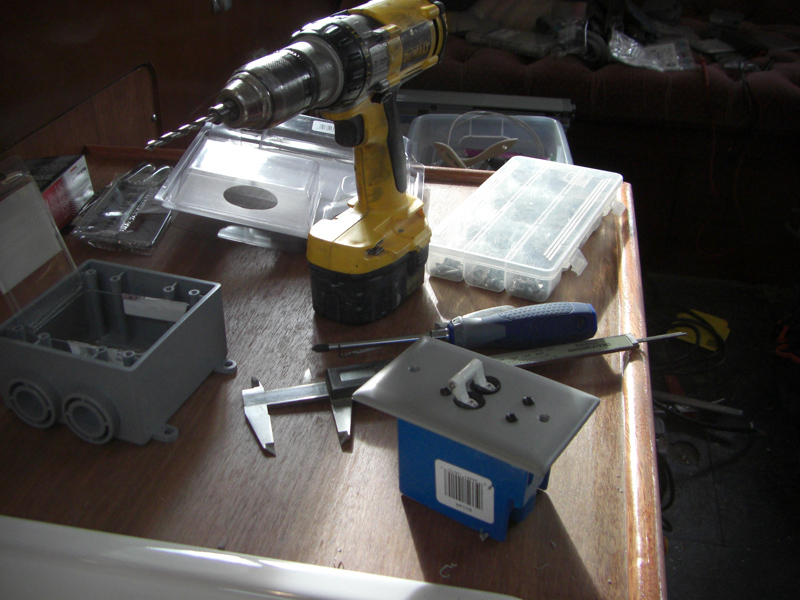 |
| Above - I drill holes in the blanking plate with my Unibit and mounting holes for the screws; fit check in the blue old work box and it's time to cut a hole for it. |
 |
| After cutting a hole for the new breaker with my jigsaw, I disassemble the Square D rusty junction box and rip out the old stuff, almost time for the new wiring and bits to go in, but first, I want to check the shore power receptacle wiring for correct polarity, with what I've found so far - I won't be surprised at anything. |
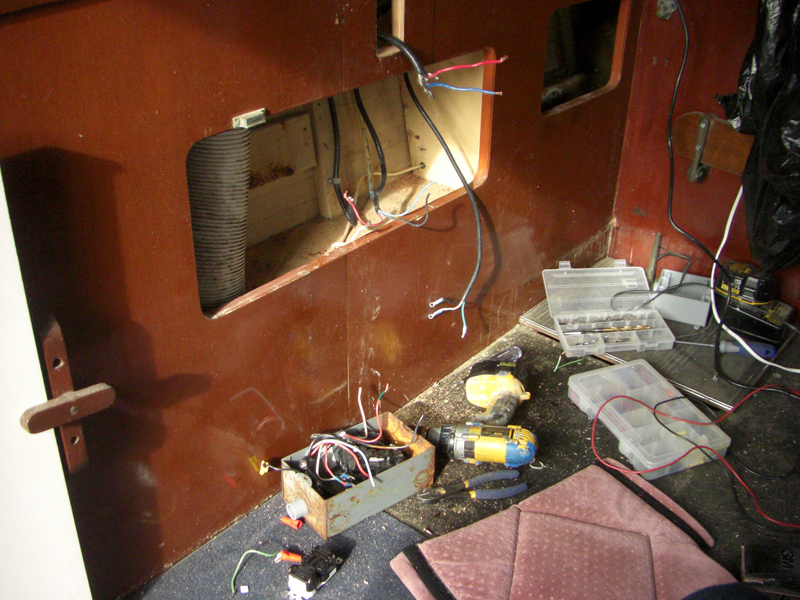 |
| Three circuits will lead out of the new junction box, two for 110VAC GFCI outlets and the battery charger and one for the fridge. Those are the three black 14 ga. wires above. |
 |
| I remove the back of the shore power receptacle and find the wires falling out of the receptacle, twisted, corroded and improperly fastened. So, I rebuild that for an hour, pleased that I didn't drop any small bits into the water. |
 |
| Above - After re-wiring and reassembling the shore power receptacle, I install the new breaker and wire up the new junction box. All wiring accomplished in accordance with Nigel Calder's excellent book and tested for correct polarity and grounding resistance, etc. |
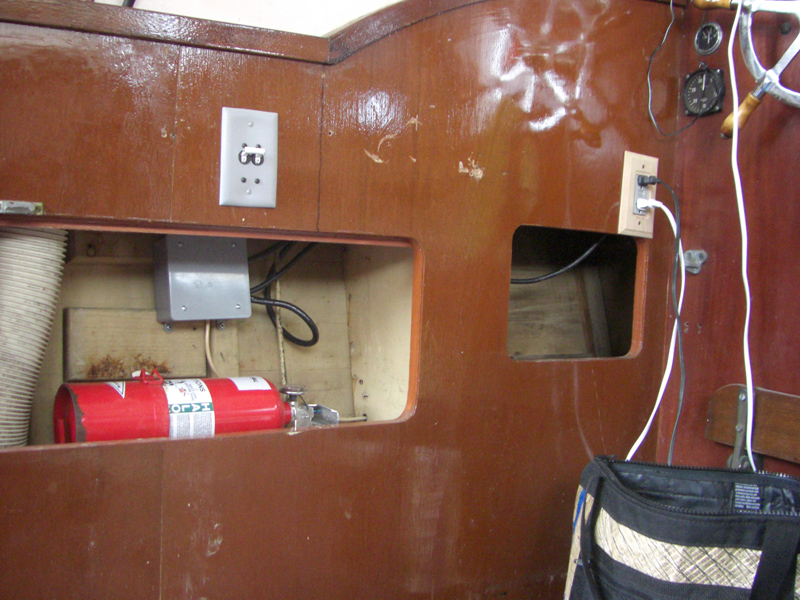 |
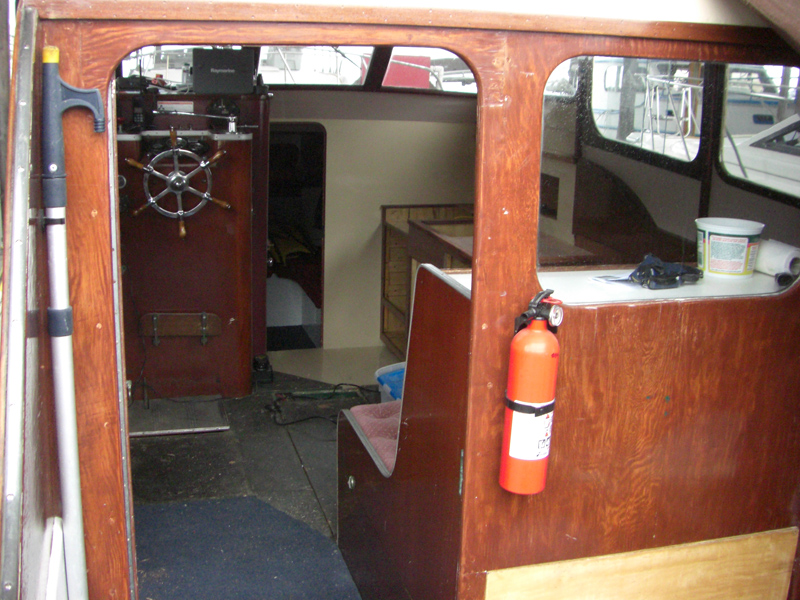
| Above - fire extinguisher installed, new GFCI on the right; just need to tidy up some wires and straighten the junction box and it's done. |
 |
| Above - I install the new sink drain hose. That's the LP gas detector sensor on the lower shelf, it will be installed in the bilge when I get to it. The rails on the right are the Ikea drawer rails waiting to go in. |
| |
| |
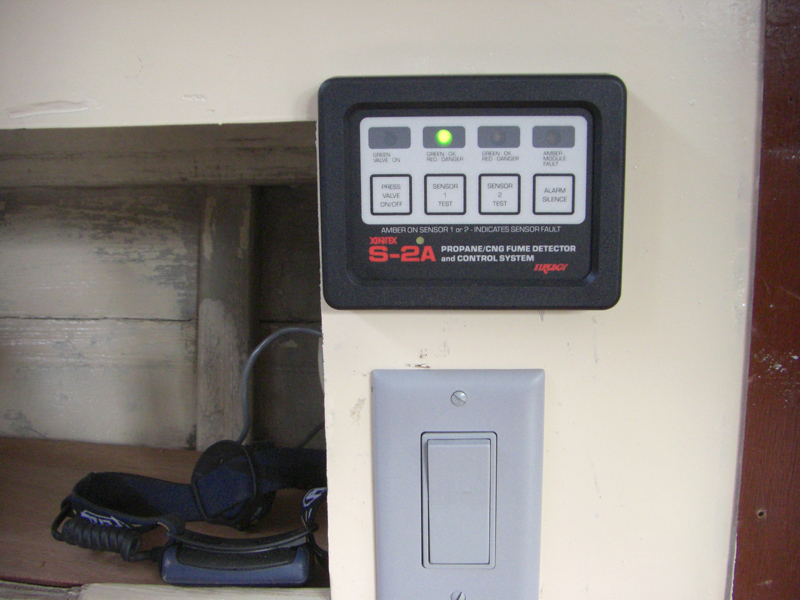 |
| Above - the gas detector. A nice side benefit of this unit is that it detects any hydrocarbons, including gasoline. So, if there is a gas leak from the engine, the alarm will sound. Nice. |
 |
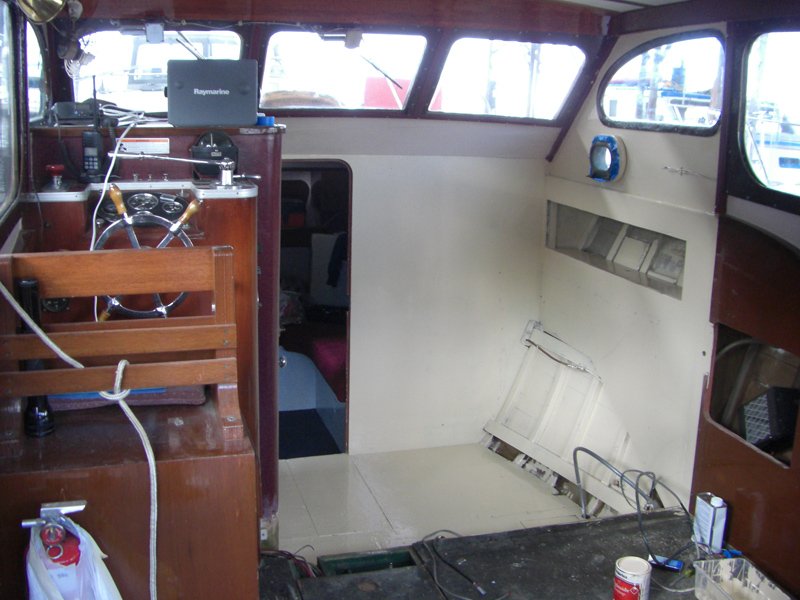
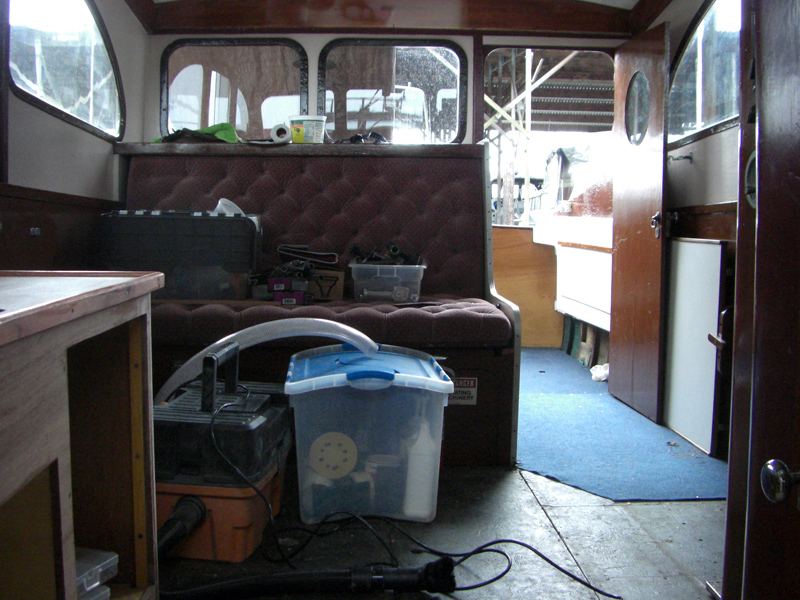
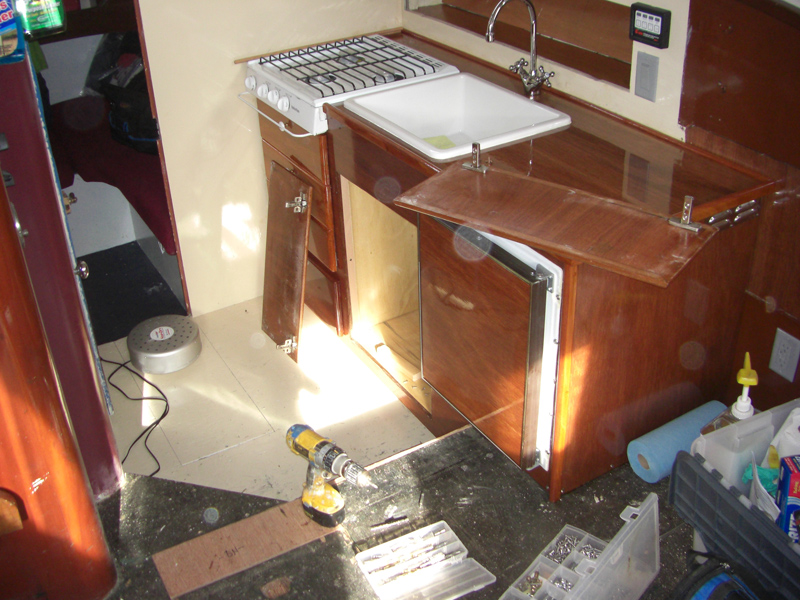
| Much roomier - hard to appreciate how much bigger space we have now. Next, install drawers, doors, fridge door and varnish for a few weeks. All the structural, plumbing and electrical work is done, save for the propane tank locker forward of the transom. |
 |
| |
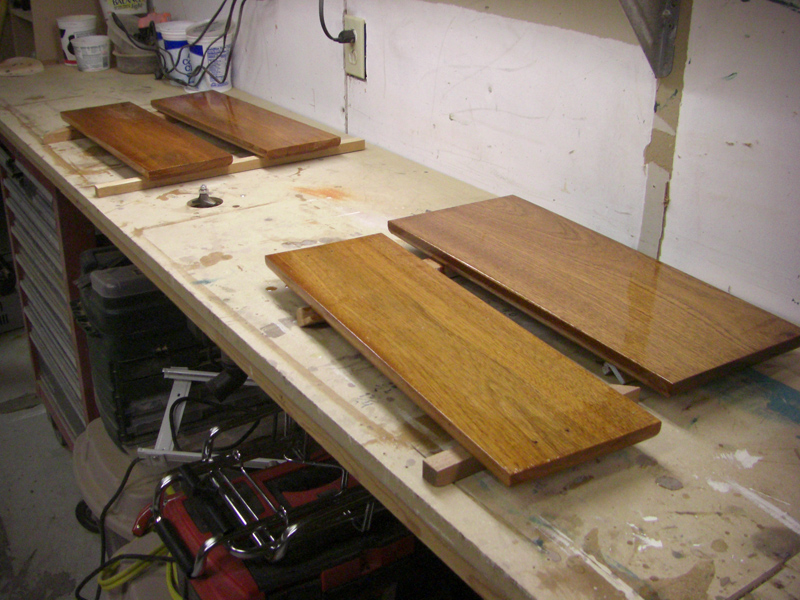 |
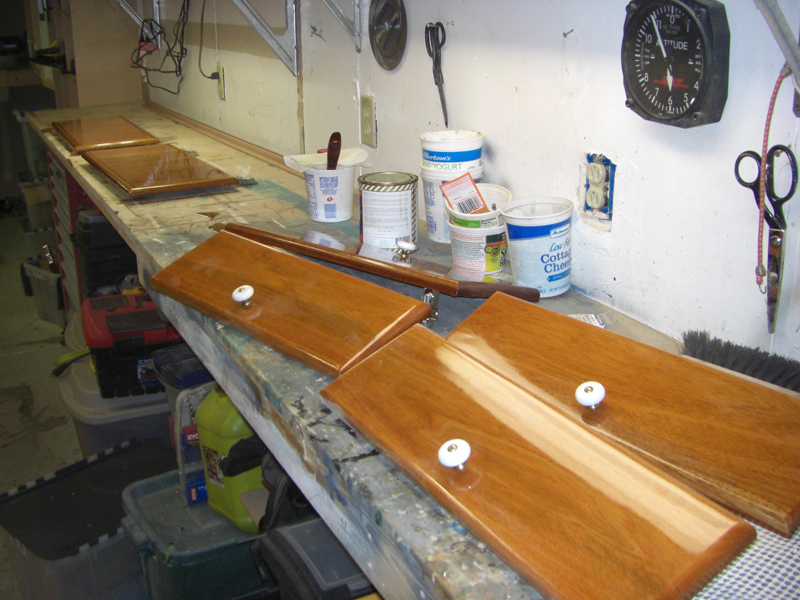
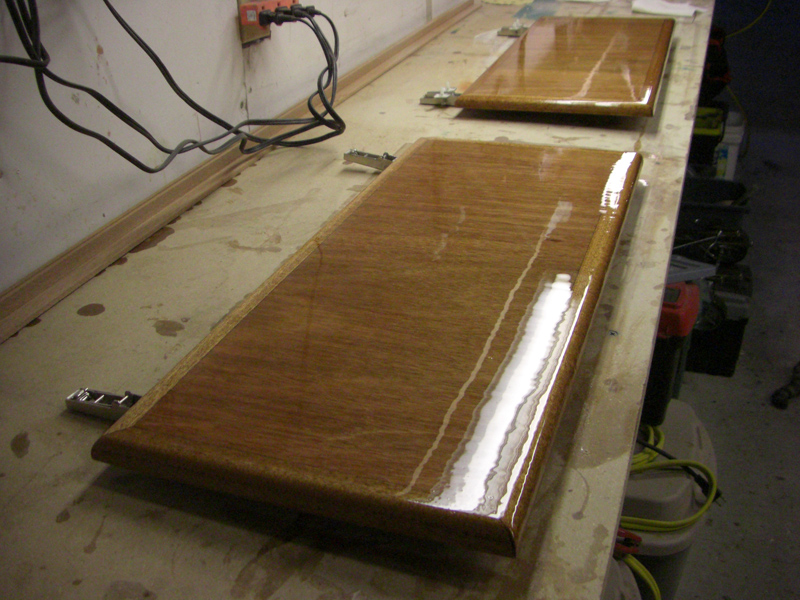
| October 14, 2007 - Above, the drawer fronts get another coat of varnish. Below - The galley gets plugs in the screw holes where the rubrails attach, drawers installed and a final coat of epoxy. |
 |
Below - I traded the kayak for this 10 foot Avon inflatable in very good condition. |
 |
| Below - I'm going to make new floorboards to replace the old water-soaked floorboards. I'll coat the new ones in epoxy prior to installation. |
 |
| Below - the Monk gets a new old stock spotlight that I bought on ebay for $60. |
 |
| Below - after the galley is done, we'll be hauling Stormbird for a bottom cleaning, zincs and new topside paint. Gonna have to put on a new deck soon. |
 |
| |
 |
| |
 |
| |
 |
| |
| |
| |
 |
| |
 |
| |
 |
| |
 |
| |
 |
| |
 |
| |
 |
| |
 |
| |
 |
| |
 |
| |
| |
| |
|
|
|
|
|
|
|
|
|
|
|
|
|
|
|
|
|
|
|
|
|
|
|
|
|
|
|
|
|
|
|
|
|
|
|
|